Reader's Choice


Popular articles
Wireless printing on the printer will help get rid of unnecessary wires and install the printer in a convenient place. This article will discuss current ways to connect the printer via wi-fi. with step-by-step instruction.The simplest connection of the printer to the Wi-Fi network is to use a router. It must have a set of specific functions that allow you to create a connection.
First you need to connect the router to the network and configure it so that a wireless network appears in the room. Now you can proceed to setting up the printer directly.
Method 1. Connect the printer to wireless network Wi-Fi with built-in wizard.
An installation wizard will help you connect your printer to a prepared wireless network.
! What you need to know before you start setting up:
WPA password or WEP encryption key, which will be the password itself wi-Fi networks;
Network Name (SSID).
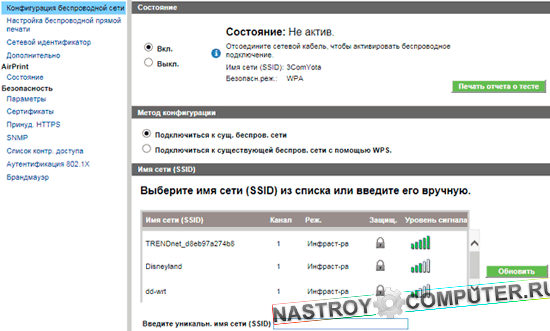
Before creating a wireless configured network using a router, you need to go to work on the printer settings. To do this, go to the menu " Customization"And select the option" Network". Next, the setup wizard will display information about available networks for connection. Next you need to choose the name of your created network. If the printer can not find the desired network, then its name must be entered manually, taking into account the case of letters. After selecting the desired network, the printer will request a WEP encryption key or WPA password. They are also case sensitive. The print device connects to the wireless network and you can now send various tasks to print.
Thus, connecting the printer to Wi-Fi does not take much time. The connection process takes only a few minutes. The main thing to prepare for work is to find out whether the equipment supports the required technologies and, of course, have a working and configured Wi-Fi network with a known password and name.
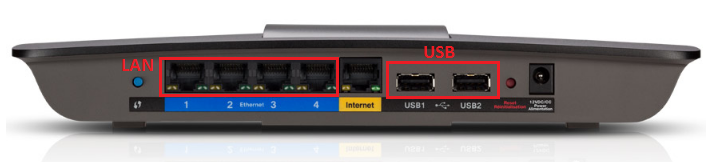
It is possible to connect the printer to your Wi-Fi router with a USB port using the built-in Print Server - it connects the printer to the router and allows access to it from any client computer on your network.
In order to install a printer through a router, you must connect the printer to the USB port of your router. In this article I will explain how to connect an Asus RT-N56U Wi-Fi router and a printer in Windows 7. You can also connect a printer to this router using a special utility:
The utility allows you to automate the connection and configuration of a network printer and works only in Windows. Next, I will tell you how to connect the printer through the router manually.
Attention! Make sure your printer model is supported by the router! Check if the printer is compatible with the Asus router.
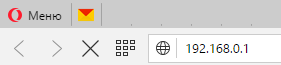
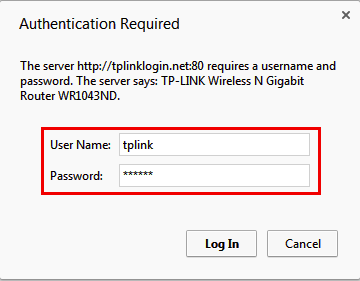
Check the connection of your printer using the web interface by opening any browser and enter the address bar http://192.168.1.1. In the window that appears, enter the login and password (admin and admin, respectively).
In the next window, you must select the printer port (see. Fig. 4). Go to point "Create a new port" and select the item in the drop-down list Standart TCP / IP Port.
After pressing a button "Further" The printer setup wizard will ask for the printer’s IP address on the network, the printer’s IP address corresponds to the router’s IP address 192.168.1.1. Enter it in the field Name or IP Address and uncheck the item "Interrogate the printer and select the driver automatically". Click "Next".
A window will open "TCP / IP Port Search."Wait until a window appears asking you to enter additional port information.
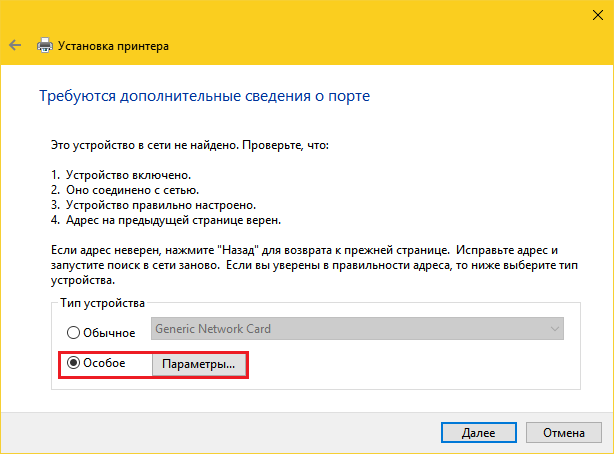
Select device type Normal (Generic Network Card)and click Next:
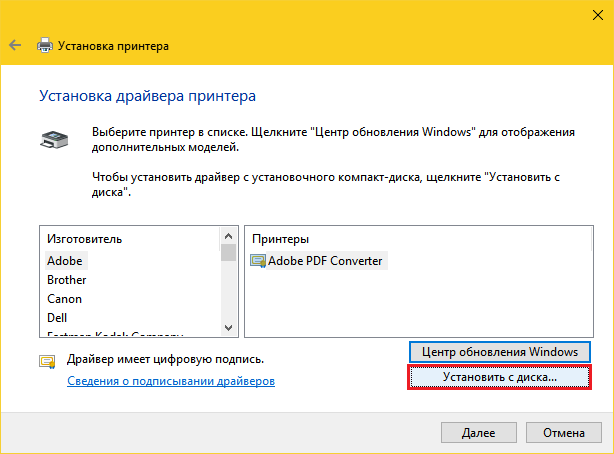
Now you need to install a driver for the printer. Choose your model from the list or click the button. "Install from disk ..." and in Explorer, specify the path to the file with the driver. Then click Next. Enter any printer name and click Next again. A window will appear with the printer installation process after which the installation wizard prompts you to configure printer sharing via the local network.
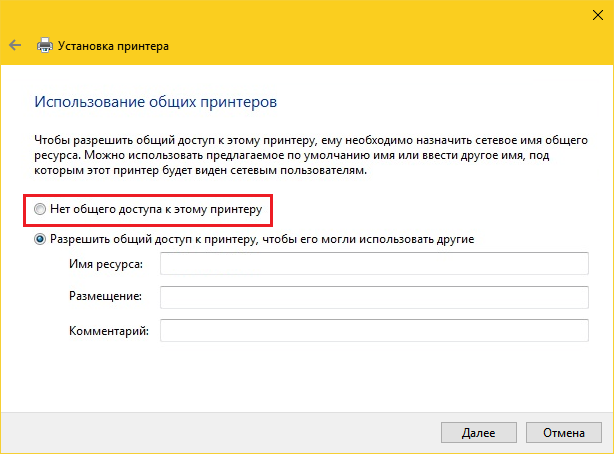
Choose an option "There is no shared access to this printer" and click Next. The wizard will inform you that the driver has been successfully installed and will suggest using the default printer. Now it remains to press the button "Done"and configure the port properties.
Open the menu Start - Devices and Printers.Find your printer, right-click and select "Printer Properties".Go to tab "Ports",check the port that you created earlier and click on the button "Configure the port ..."
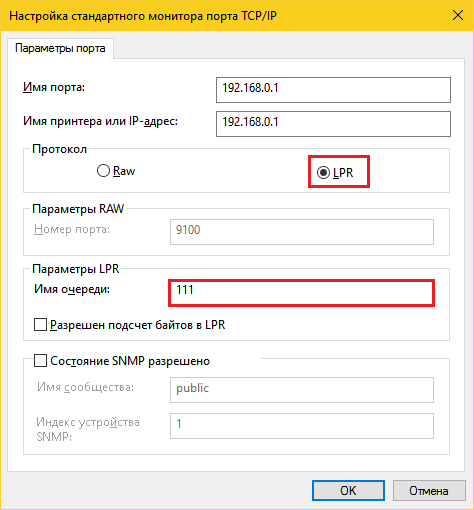
In the TCP port settings, select the LPR protocol and set the Name. Now click "OK" to save the settings.
If you have your own printer with the ability to communicate over WiFi, and you are going to connect it via a Wifi access point, you will have to work hard. So, speaking about how to connect the printer via WiFi, we note that it is impossible to do this directly, but if there is a USB cable, then everything is easy and simple. Difficulties may occur when setting up a WiFi access point. Often, users do it incorrectly, so below we will provide you with detailed instructions on how to connect the printer via WiFi.
Consider the detailed step by step instructions:
Now you will have no difficulty in how to connect the printer via WiFi. After all, the instruction is quite simple and accessible to everyone. And all its implementation will take no more than half an hour. But you should not treat this instruction formally, remember that the exact execution of it will help you to do this work successfully and without negative consequences for your technique. It’s hard to imagine a person who can do everything right without instructions, agree. Although, perhaps, such craftsmen are.
Do you feel like a mosquito caught in patina when you enter the room, from top to bottom, entangled by wires? Togo and look stumble and something overturn yourself. Or break the "sacred" connection of some devices, and they will stop working. Disorder.
Of course, you can’t do without wires, but some of them can be safely removed. Why, for example, pull the cable from the printer to the PC, if you can send documents to print by air? Today we will talk how to connect the printer via WiFi router (router) to any device that supports wireless communication.
If the devices do not have the same connection interfaces or the router does not recognize your model, they can also be connected, but only through an intermediary. That can be an intermediary, I will discuss further.
The main mass is for communication with the outside world only a USB port. The same jack should have a router.
Connection order:
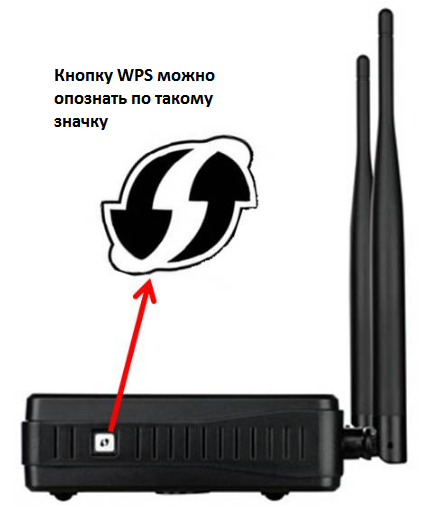
If WPS is not supported, we do it as usual: we find our access point in the list of networks accessible to the printer and enter the password.
A Bluetooth connection is also not a big deal: we enable the option on that and the other device and, after establishing the connection, enter a one-time access code.
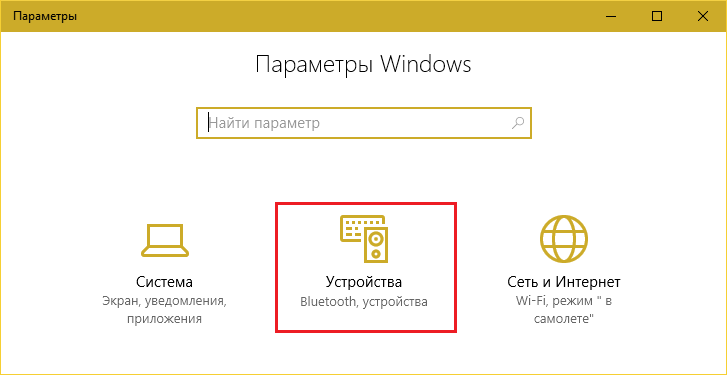
Now we come to the main thing - setting up the function of wireless printing on a PC. Let us analyze it on the example of Windows 10.


This completes the setup. After the message about the successful completion of the operation, print a test page.
The same steps will have to be repeated on each computer and laptop on the home network from which you are going to print files.
Programs are not free, but inexpensive. In addition, you can use mobile utilities for a specific brand of printer, created by the manufacturers themselves: Canon, Epson, HP, Brother, Dell, Samsung, Xerox, Ricoh, Lexmark, etc. By the way, such utilities are also available for Android.
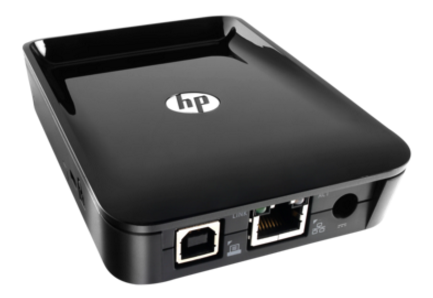
The task of such a box is not only the physical association of incompatible devices, but the expansion of functionality (alas, but many routers limit printing support to the print itself). When you connect a print server, you will be able to access scanning features (if your device includes a scanner), ink level monitoring, head cleaning, two-sided image printing, and more. He will help out in a situation where mobile gadgets do not see the printer.
Options, as you can see, are many. Choose any and free your living space from unnecessary wires.
Nowadays, Android devices are becoming more common due to their advantages. With a smartphone, you can not only enter the Internet, make calls, play games, and so on. You can also print from Android via WiFi. It is very convenient, especially for students and people who work with documents.
There are several ways to print with an Android device:
About that documents using non-Wi-Fi and Bluetooth printers
It is worth noting that the first three options include the installation of the corresponding application on your smartphone. There are a lot of similar applications. Moreover, programs can be free and paid. The difference between them is only in the set additional features. So, the most common application for printing documents from Android via WiFi, USBOTG or Google account is PrinterShare.
This program is very easy to use and has an intuitive interface. In the free version of PrinterShare there are some limitations on the number of pages to print. In addition, in order to be able to directly connect your smartphone to the printer via WiFi or USB, you will have to buy the PrinterShare Premium Key program. Of course, you can find the hacked version of this application with a full set of features. So let's look at how the program works.
First of all, let's look at how to print from Android to a WiFi printer. Of course, this is only possible if you have a printer equipped with a WiFi adapter and supporting a wireless connection. You will also need to connect the printer and phone (tablet) to the same network. To do this, you must have a router. If these conditions have been met, then you can go to the interface PrinterShare.
First, run it on your smartphone. On the first page you will be offered the printing options:
In the lower right corner you will see a "Select" button.
By clicking on it, you can choose the type of connection:
WiFi, Bluetooth and USB is a direct connection through the appropriate link. Google Cloud is a virtual printer that is connected to your Google account. That is, in this case, you can manage the printer and print files, while being hundreds of kilometers away. Everything happens over the Internet - through the cloud (server) Google.
To print a document from Android via WiFi, select the first item.
The application will automatically scan your network for availability. wireless printersconnected to the router. Next, just follow the instructions on the screen. After the connection is established, select a print option, for example, “Document”.
After that, locate the file you want to print (on the memory card or in the internal storage of the phone) and click the "Print" button.
| Related articles: | |
|
How to cook milk millet porridge - step by step recipes with photos
How to cook millet porridge in milk, what should be the right ... Types and possibilities of fluorescent inks
Fluorescent wall paint is a very specific look ... Earnings on the Internet - real working ways
Welcome dear visitors of our site, today we will offer ... | |


