Reader's Choice


Popular articles
Hello everyone, my dear! Just yesterday, I realized such a thing, that many of my readers are very poorly versed in computers. So I’m talking about how to make money with the help of the Internet, about some cool services to save on travel, but it's all about the wall of peas, because computers are a dark forest for some of my guests.
The word sometimes recognizes your intent, and the divisor will intelligently replace the dash. Can you add a sketch to the document, the letter of the Greek alphabet, the £ sign and many other characters that you cannot even find on the keyboard? In the Script drop-down list, set the element so that the characters form a set of fonts that you used in the place you used in the document.
A common habit, not just for beginners, is text indents with a few spaces. Usually the computer uses so-called proportional fonts for texts. Individual letters of such fonts do not have the same width, and the gap does not always have the same width. This leads to the uneven length of the string when aligning the block. If you subtract text with five spaces at the beginning of a paragraph, the overall width will be completely different from the beginning of another paragraph.
So today I decided to correct this omission and begin with a very detailed story about how to type text on a computer. So...
In this article:
To create a text electronic document exist special programs. They allow you to print text, that is, to create a document layout in electronic form, which you can then print on a computer or drop it onto a USB flash drive.
You can edit the electronic text at any time, and you will probably do it several times before you complete the document. The gap with spaces will change in size, and you will have to make very difficult repairs. For this reason, it is better to use the tab for compliance.
If you want to change the offset of several tabs that are equally shifted, do not change each paragraph separately. Select all these paragraphs and edit the tab once for them. The most elegant options for correcting text are gray stops on the ruler above the document. The left stop has three controls: the upper triangle controls the indent of the first line of the paragraph, the lower triangle changes the left indent of the other paragraphs of the paragraph. Taking the cork by the rectangle below, both feet are locked against each other and move them simultaneously.
There are a huge number of such programs, but there are only a few of the most popular ones.
1
- Microsoft Office Word
2
- WordPad
3
- Writer (rarely used, must be installed separately).
I know from my relatives that the most difficult thing for a beginner at the first stage is to find and open these programs.
The ruler quickly stops and reliably corrects the text shift. Again, we can write the text without continuous formatting of individual paragraphs and further adjust the stops for all the necessary paragraphs at a time. If you are trying to move the letters to a new line, putting a few spaces in front of them, you will be there! If you achieve the result, but as soon as you want to edit the text and paste it, for example, instead of several words, the text is “full” to give you an incomplete line.
Text editors have an “indelible break” for this case. It is inserted between the preposition and the next word, and as if the preposition sticks to this word, therefore, if the text moves for some reason, the preposition moves with the word. The word usually inserts these spaces automatically, but to properly set the space, text changes may not occur.
To cope with this task, you have to imagine what the program icons look like. Most often this is a document icon with a letter. Wor, as in the latter case, with the letter BUT (this is how WordPad is designated):
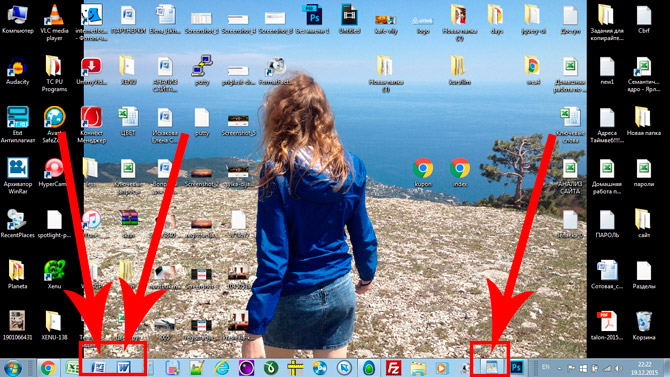
Look closely at the desktop and the toolbar at the bottom, the programs can be displayed in a prominent place, like on my desktop (by the way, here it is, don't be alarmed):
Each text conveys information to someone. This can help graphic design. If you break the text accordingly and correctly highlight the important parts, the eye will catch it, and the reader will understand and remember the message. Therefore, headings are mainly used in bold. Beware of different decorative fonts. This is more appropriate for shorter texts of larger size, longer text and smaller sizes.
Longer texts on long lines make your eyes more attractive, so you need to write them in a clearly legible font. If you combine different fonts in the same document, you should not use similar but contrasting types. Titles in serigraphy are not aesthetically appealing. And most importantly: in one document you should not combine more than two, no more than three fonts. Styles are a convenient feature of modern text editing programs, but they are little used. Their use simplifies text formatting to the maximum.
If you have not found anything, then try the second method:
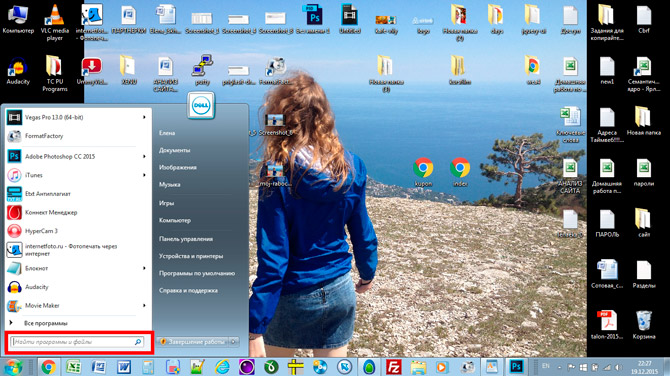
1 - run the panel Start or simply click on the round icon in the lower left corner, a menu will open.
In it you need to find the file search field, I have it called Find programs and files:
And which styles are so practical? A style is a specific set of text parameters that can be applied to a paragraph or selected characters. Paragraph style can include information about the font and its size, its style, spacing, indents, indents of the first line, spaces before and after the paragraph, etc. select the highlighted paragraph or part of the text from the drop-down list of the toolbar.
Roller input panel and style. Synthesis will greatly accelerate the formatting of the document. Imagine that you are writing 10 pages of text, and before you complete it, you decide to change the font at the second level of headings and reduce the size of the text by two points. Usually you will need to choose one heading after another on all pages, set a different font and reduce its size. If you permanently assigned styles in all headers during recording, you only need to edit the font and size in the style definition once, and the headings marked with this style are automatically reformatted throughout the document.
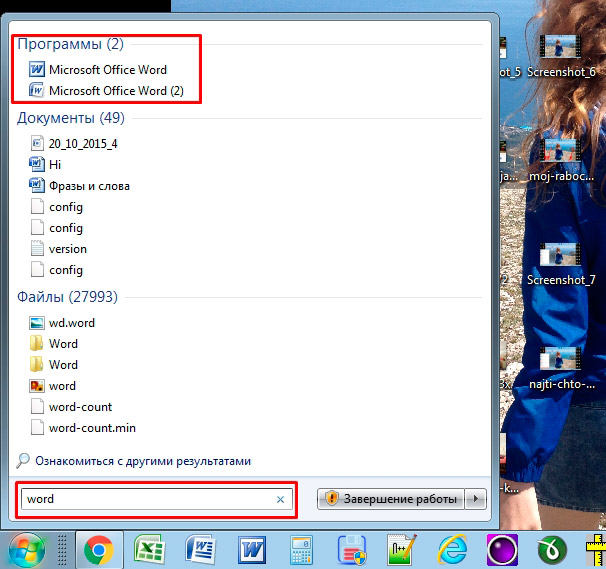
It is in this field enter the name of the program you are looking for. For example, I type the word Word and get the Microsoft Office Word programs:
If I enter the word WordPad, he will find this program for me:

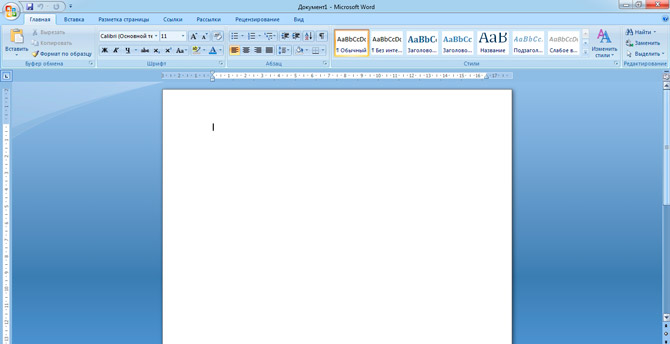
After that, you simply click on the found program, and a working window opens in which you can create a document: print text, edit it and save.
So, before you is a work area, the so-called clean sheet. This is where you can print the text, edit it as you please.
Usually, newcomers at the sight of this sheet and a huge number of buttons are lost and do not know what to undertake. Most of all, the keyboard causes an explosion of the brain: it is not clear where and what to press.
So, you don't need to be scared, you will definitely be able to figure it out. To do this, just watch this informative video, everything is very simple and explains in detail the main features of the program.
Be sure to watch this informative video from the beginning to the end, while not forgetting to repeat all the actions for the lead. So you take a giant step in learning text editors.
Then you will only have to train, and then you will be able to navigate literally in any text programs, since they are all arranged approximately the same.
Once you have created your document, you can save it. To do this, find in the upper left corner the button that brings up the menu, and in this menu, select Save as and any suitable format, for example Word document:
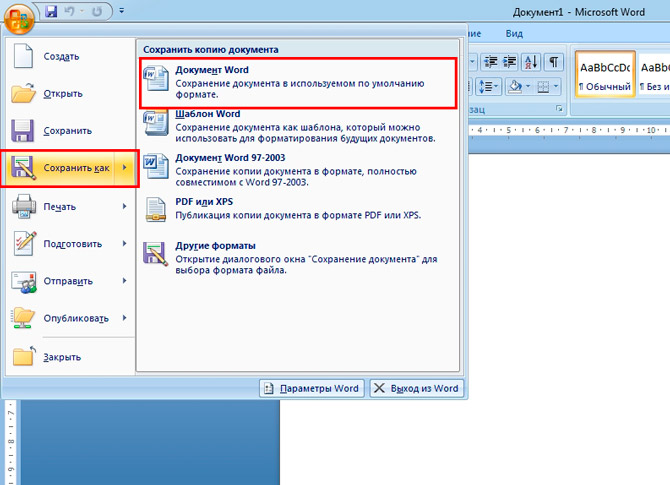
A window will appear in which you can choose:
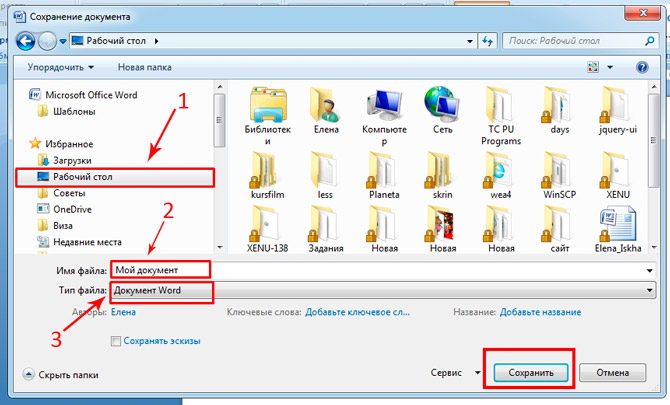
Done! Now this file will appear on your desktop.
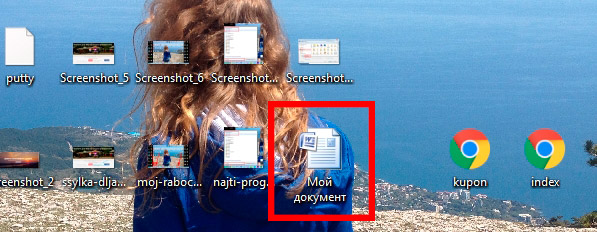
You can do anything with this document. For example, throw on a USB flash drive, send an e-mail, open for further editing or delete.
By the way, if you are working on a large document, I recommend that you make intermediate saves. And the more often, the better.
Everything is very simple.
1. Insert the USB flash drive into the computer.
2. On the desktop, find and open My computer (or simply Computer).
3. In the opened window should appear Removable drive, click on it 2 times:
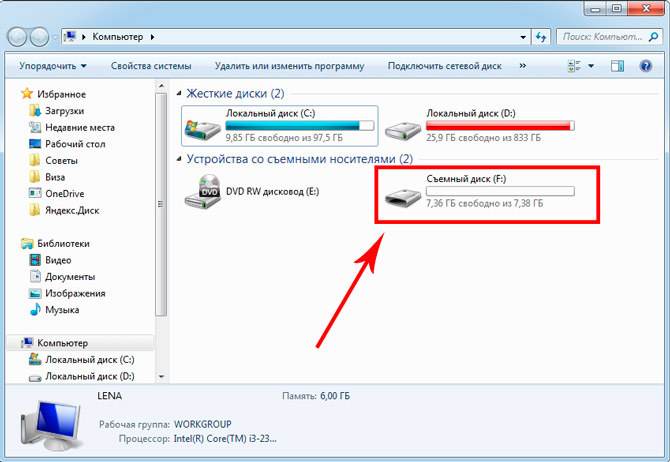
An empty window will open to us, which we will leave for now:

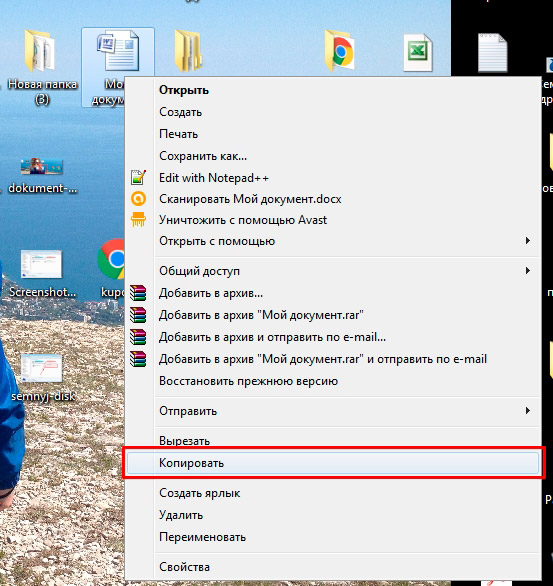
4. Now find our text file, we saved it with you in the previous paragraph on the desktop. Click on it with the RIGHT mouse button, and in the menu that appears, select Copy:
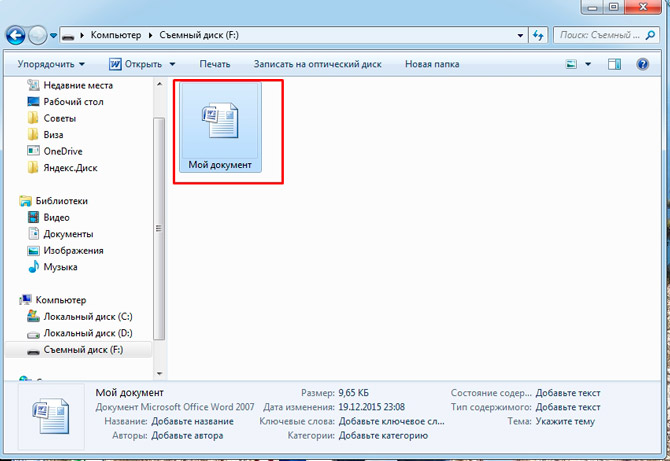
5. Now go back to the removable disk that we just opened in step 3, click on the free field with the RIGHT mouse button and select Paste:

The document is copied and appears in this field:
Everything, now the USB stick can be taken from the computer.
Suppose you have a printer, it is already connected to your computer and configured properly. I am not going to talk about printer connection and settings now, since this is a topic for a separate article.
But if you are already set up, you can print the document in just 2 clicks. But first make sure that the printer is turned on and has the necessary amount of paper.
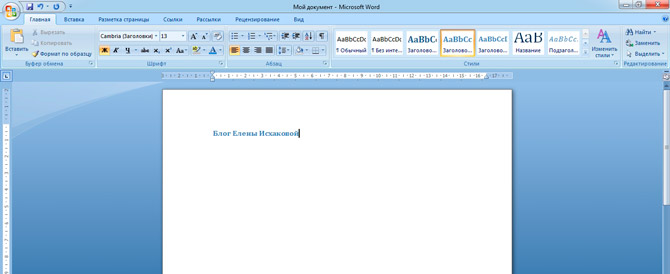
1. Open the document you want to print:
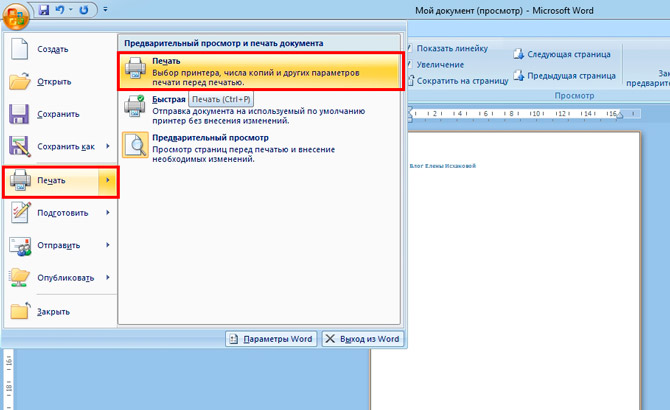
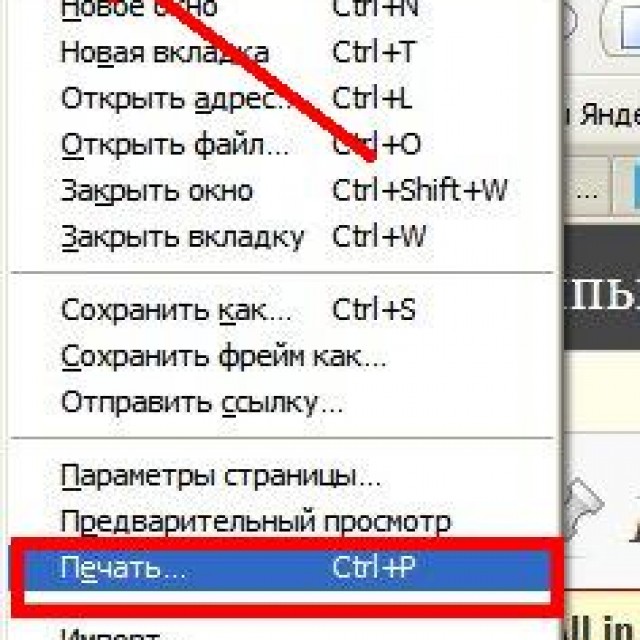
2 . Find and open in the upper left corner of the menu and select in it Print,and then again Print:
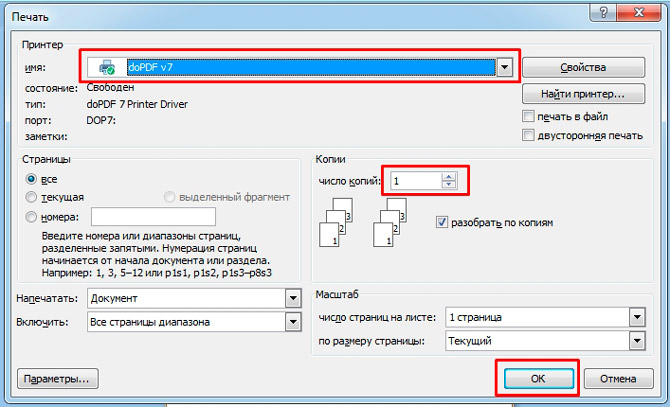
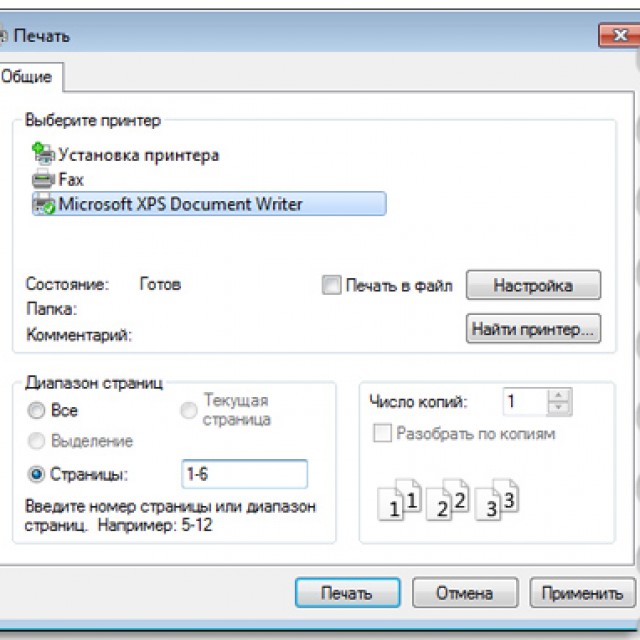
You will see a window with a bunch of settings, but do not be afraid of them, they are all quite simple.
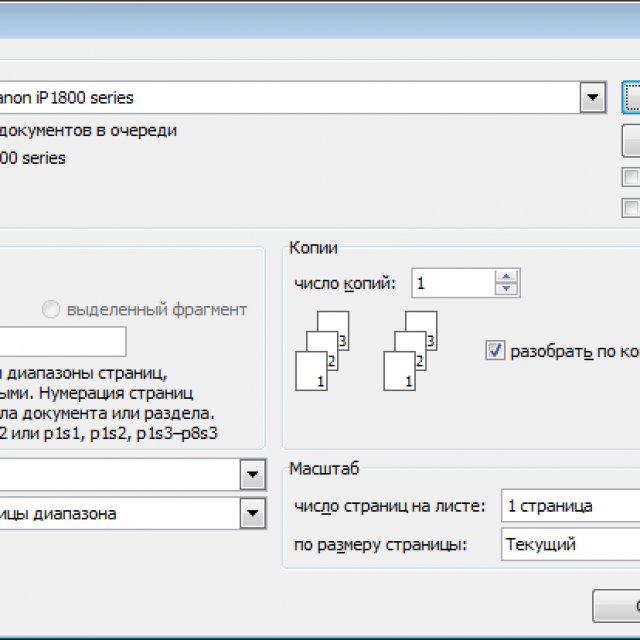
Here you can choose a printer if you have several of them, the number of copies of the document, paper size, print color, and so on.
But if you do not need any specific settings, you can leave everything by default and just click Ok.
The printer will start printing and you will receive a document. By the way, this way you can print not only a text document, but other files, the scheme will be the same.
Not having a common language with a computer today is a big problem. If 5 years ago it was excusable not to be able to work with technology, today it translates into a huge obstacle for every newbie. That's because almost every profession today is in some way in contact with the computer.
When I worked at a large military enterprise, we installed a new version of the design program. For me, this did not cause any problems, just a new shell.
This can be compared with the updated packaging of your favorite candies: I didn’t stop buying them less, but I was able to quickly adapt to the new wrapper.
But for many employees it was literally a disaster, they depended so heavily on the interface of the program, and so desperately resisted their brains to everything new. As a result, they were even trained to work in the new interface.
Today is not the most better times for Russian companies, and I don’t even need to guess who will be the first to be cut short ...
And quite the opposite example from real life too.
The engineer has experience of over 40 years, constantly developing and mastering not only the computer, but also all modern engineering programs. Such a specialist does not want to let go, he is needed, in demand and speaks with young subordinates in the same language.
This is just one example. And now think how many opportunities are revealed by the ability to use a computer to earn money remotely via the Internet. Even having learned to use a text editor, you can write texts and make good money on it.
Being with a computer "on you" today is a necessity. No matter where you study, there are a lot of people on the Internet today. useful materials, courses, schools.
On this I will finish. I hope that the article was useful to you, helped you to deal with the main points. Move forward, improve, be better. And I have everything for today, thank you for your attention and bye!
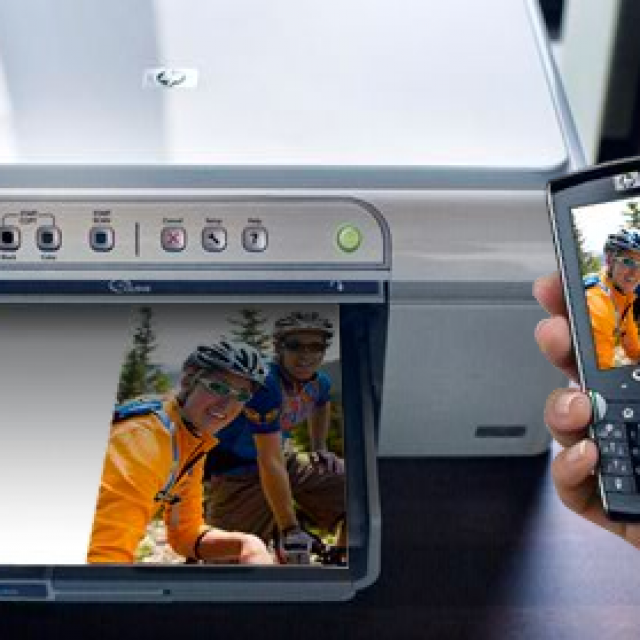
Do you want to print photos or a text document? Of course, it is good to purchase a printer and make a connection to a computer. But this is not the finish line.
It is necessary to make all the settings, do not forget to install the driver of this printing device, as well as additional programs for the correct operation of the device.
The combination of these actions will lead to the desired result - the ability to print. It is from these steps that we will begin to move towards the goal.
Older models of printers required a lot of attention to themselves, to connect them to a computer.
It was required to connect to a special port and wait for the operating system to do everything. Now much simpler.
There are two ways:
We will look at two basic types of connections:
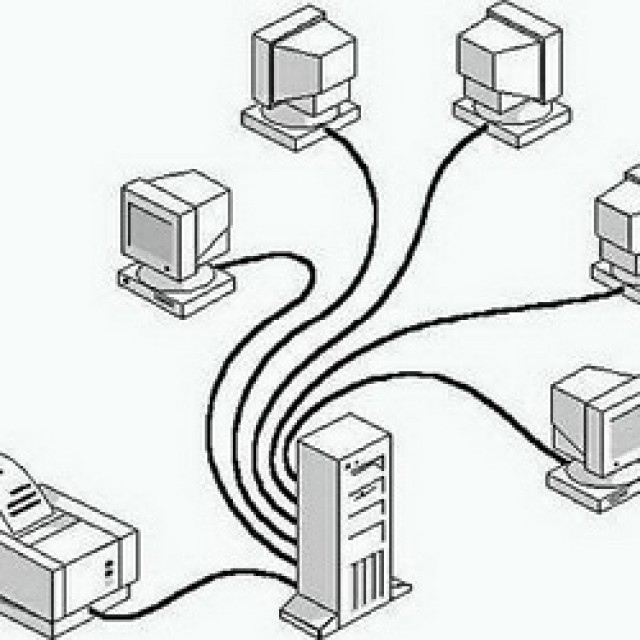
Photo: local printer connection
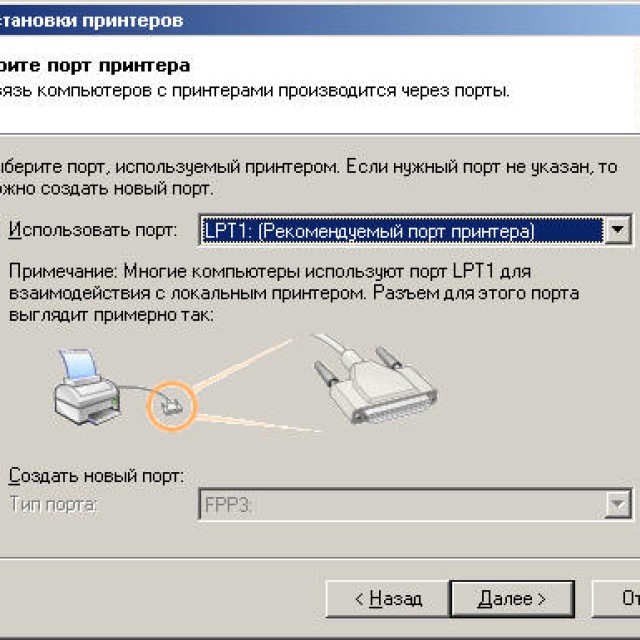
Initially you need to install the driver.
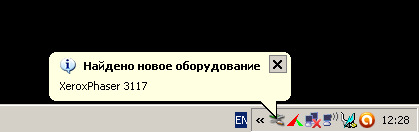
When installing locally, make sure that the device is turned off, then connect it to the computer, and then turn on the power. Standard Plug and play facilitates the task - the operating system installs the necessary driver itself.
In the case when this technology is not supported, you will have to install the driver manually.
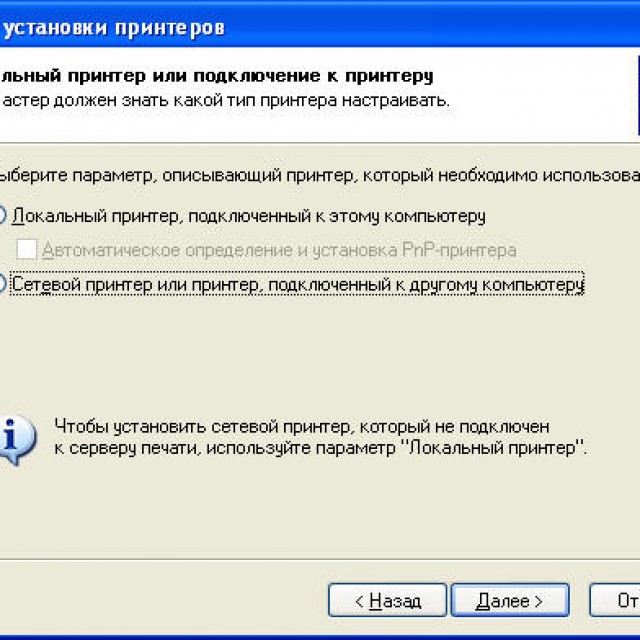
In the first version, your actions:
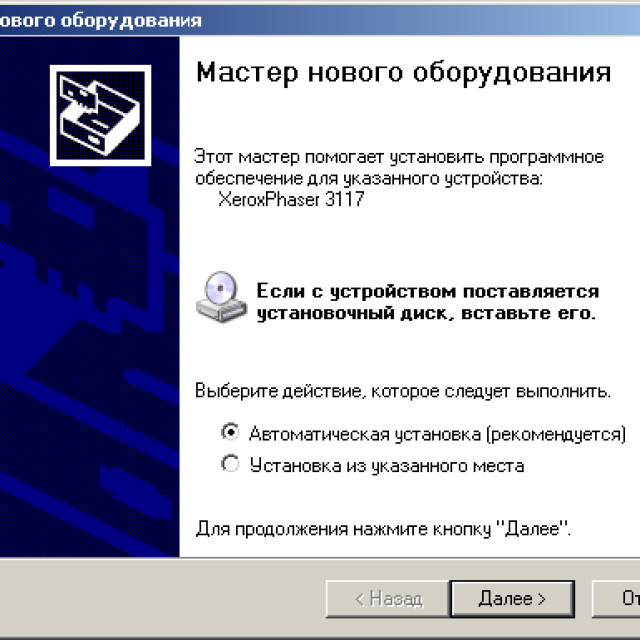
If Plug and Play is not supported, then your actions are:
When the installation is complete, in the folder Printers and faxes the corresponding icon appears.
To use the network type:
Note: The printer can be assigned by default. Then all documents will be automatically sent to this device.
To install the driver, make sure the hardware is connected.
Then follow the steps:
This is the end of the work with the driver.
To configure or change the default settings:
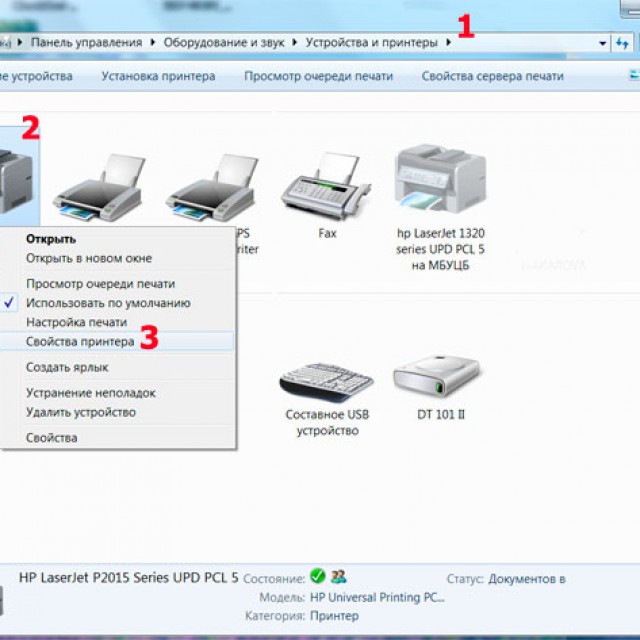
Using a laptop, mobile device or tablet, you can make settings for each network. operating system remember all these settings.
You can also choose the default different models in different networks:
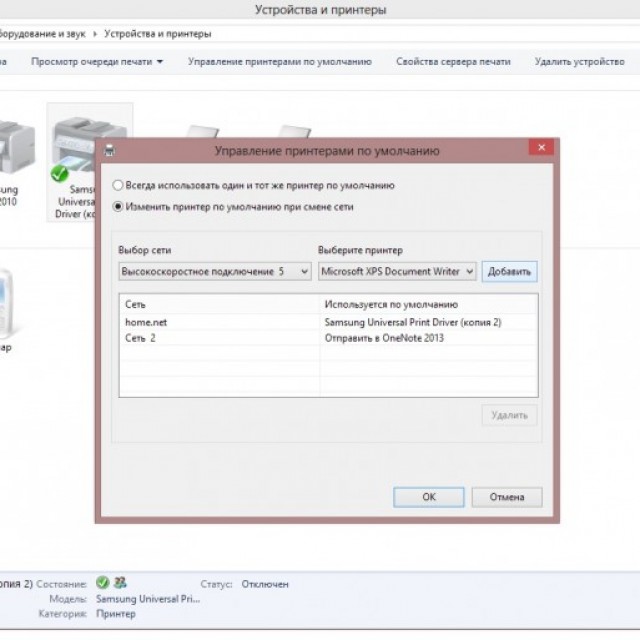
Comment! If you want the settings to not change when moving from one place to another, follow steps 1-3, and select Always use the same default printer. Then click OK.
Before you buy a printer, you should be familiar with the parameters that affect its performance: 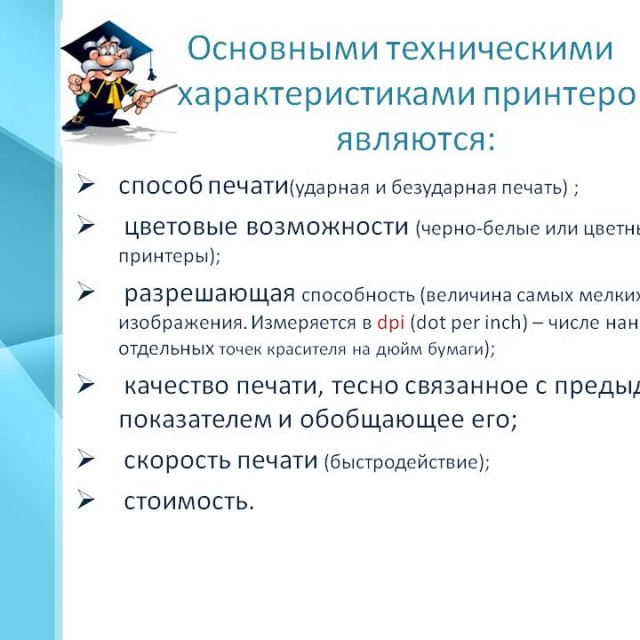
All are good in their own way. But inks with dye, for example, there is a drawback - there is a possibility of spreading and short-term brightness of color. Pigment inks are more durable, however, they also have a minus - they clog the cartridges, which makes them useless more quickly.
The most important thing is to fill each cartridge with the appropriate type of ink; otherwise, problems with them cannot be avoided.
Consider how to print text from computer to printerusing print options.
The first thing you need is to select a text or a part of it and copy it from any document or web page.
In case of printing part of the text - check the box Selected Fragment.
If you are typing word document (eg Word 2007) first check for readability, grammar and punctuation errors.
On the menu File click on Preview (preferably), then Print.
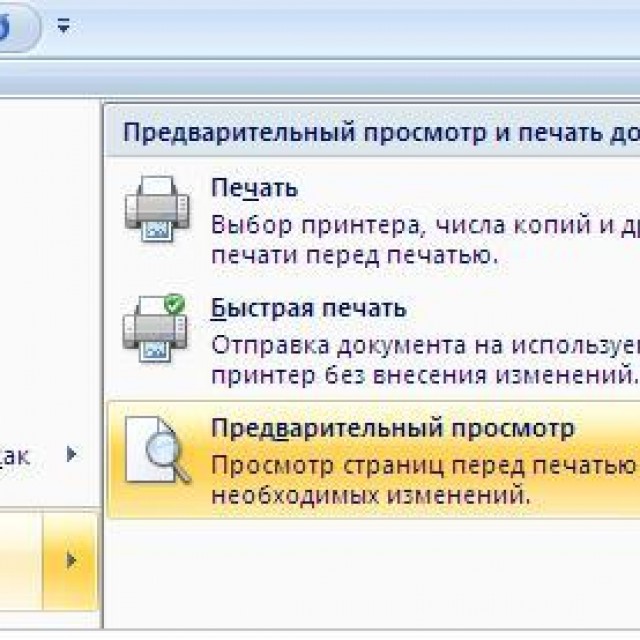
Photo: Preview in Word 2007
In the window that opens, you can select the necessary parameters:
In general, there is nothing difficult.
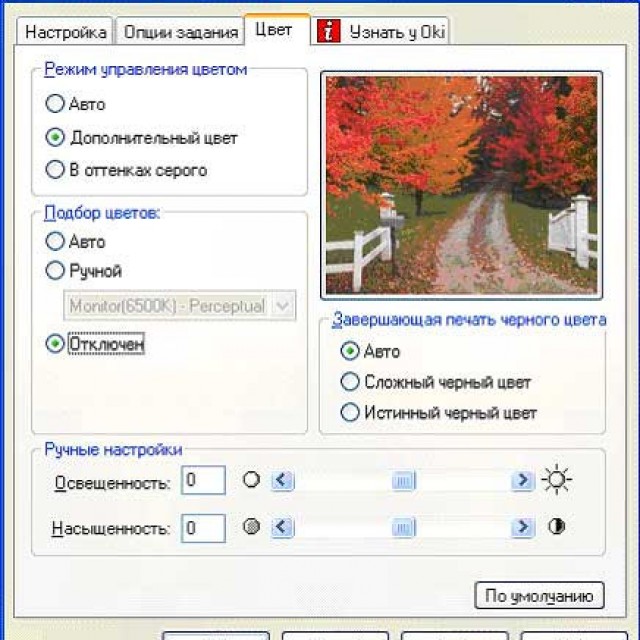
You probably know about two modes: color and black and white.
To install the second one:
So, the current document will print in black and white.
Going to the window Color managementYou will see that you can view, change the default color used values.
| Related articles: | |
|
Cauliflower puree soup with vegetables and cream
Today on our site is a recipe for cream of cauliflower soup with cream and ... The main symptoms of kidney failure, causes, features of treatment and consequences
When you hear that someone has kidney failure, it becomes not ... The use of protein cream
Regular readers know my love to cook and eat well with ... | |


