Reader's Choice


Popular articles
We will knit a classic hat “on the head” with knitting needles, starting from the bottom, with a seam at the back. This method of knitting hats, perhaps, one of the most common. detailed instructions designed primarily for beginners knitters. The cap is knitted of two contrasting yarns in the “Honeycomb” pattern and decorated with a rudder from the front surface. For knitting this model caps fit both thin and thick yarn.
Let's start with the basics. Having dealt with the principles of calculation and reduction of loops, you will be able to knit a children's, men's or women's hat with any pattern you like to any size.
So, for a start, a little theory.
Let's see what measurements are taken to build the basis of the pattern caps.
Head circumference is measured in its widest place. We have 56 cm.
The distance from the point of the base of the skull to the crown (AM) is 17 cm;
The distance from the crown to the hairline in front (MW) = 16 cm;
The distance from the crown to the ear lobe (MU) = 21 cm
The distance from the base of the skull to the ear lobe (AU) = 11 cm.
Now we will build a pattern-basis. We build a right angle with the vertex at the point O. Horizontally, we postpone the head circumference measure - point G. Down vertically, we postpone the measure AM = 17 and get the back seam line. Divide the distance of OG in half and get the point In - the middle line of the front. Along this line we put off the measurement MB = 16. From the point O to the right horizontally we put off the measurement AU = 11 and get the point Wo, down from which we draw a vertical (ear line). The distance Vou = MU = 21 cm. Through the points AUV draw a smooth line.
If you knit on this pattern, you will get a hat with a seam in the back, with small ears and an assembly at the crown. The size of the cap will exactly match the head measurements if you knit with a tight, little stretchable knit.
But we will knit the simplest cap - the cap. Such a cap consists of a crown and a bottom and is a cylinder.
We will determine the size of the bottom and the crown. Suppose that the cap should cover the ears, i.e. reach the earlobe. This means that its height as a whole should correspond to the measurement of МУ = 21 cm. The width of the cap at the level of the crown should correspond to the girth of the head - 56 cm. Now we calculate the radius of the circle - the bottom (R). The circumference of the bottom is 56 cm or 2PR, where P is pi, equal to 3.14. Then R = 56 / 2x3.14 = 8.9 cm. Let’s round this value to 9 cm. Now you can determine the height of the crown: 21 - 9 = 12 cm.
So, for knitting a simple hat, you only need to take two measurements - the girth of the head and the desired height of the cap.
The general formula for calculating the bottom radius of the cap is R = Og / 6.28.
If for any reason you cannot take measurements, we propose an indicative table of sizes of the knitted hat depending on age.
Sizes of knitted hat
We will knit a cap from the bottom, from the crown and diminish the loops to form the bottom.
Pattern of the "Honeycomb" pattern
|
|
The pattern is repeated with 2 rows.
A detailed description of the binding of this pattern and video lesson here: pattern "Honeycomb".
The dimensions of our sample turned out to be:
before washing
42 loops - 18 cm
70 rows - 14.5 cm
after washing, in a slightly stretched form
42 loops - 21 cm. Pg = 42/21 = 2
70 rows - 15 cm Pv 70/15 = 4,6
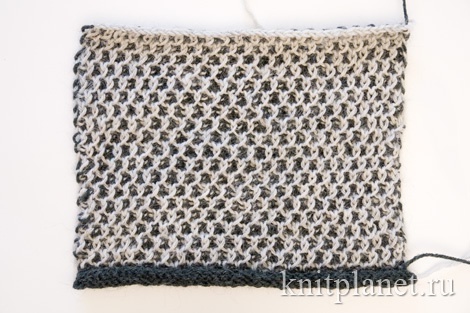
Samples mating "Honeycomb"
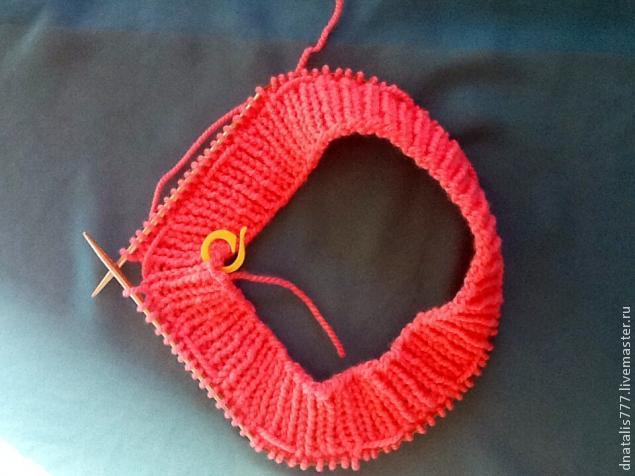
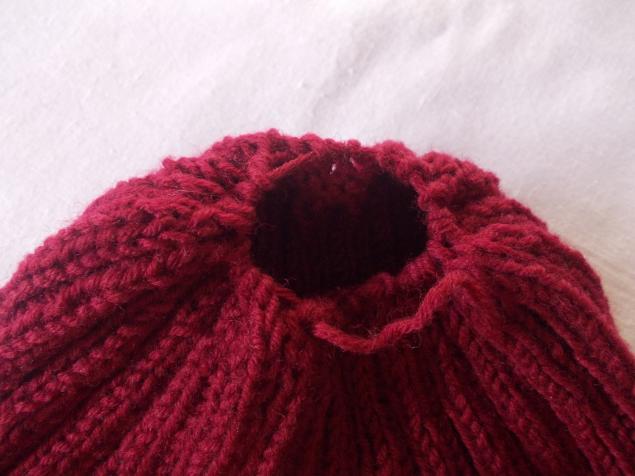
So, we put 114 loops on the needles, knit a finishing roll with a 3 cm faceplate and go to the main binding, which we knit 12 cm or 12 x 4.6 = 55.2 rows. This value is rounded for convenience in accordance with rapport, which is equal to 8 rows and we get 56 rows or 7 rapports. Next, we will reduce the loop for the formation of the bottom.
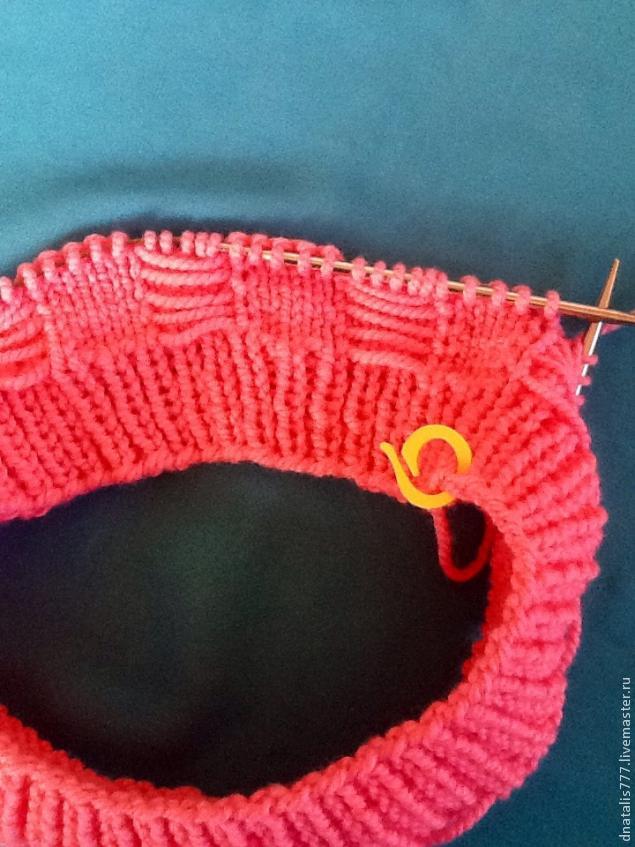
The choice of how to reduce loops depends primarily on the pattern. In our case, it is convenient to reduce the loops in the 2nd row of rapport, provyazyvaya 3 loops together with a purl, then nakid, remove the loop and further according to the scheme, and in the 6th row: nakid, remove one loop, 3 loops together with the wrong and then according to the scheme . Total bottom is 9 x 4.6 = 41 rows or 5 rapports. It means that reductions are possible in 10 rows. In total, 102 loops should be lowered to form the bottom: the remaining 12 loops (including the edge loops) will be assembled with a string. We divide 102 by 10 and we find that in 9 rows from 10 we need to lower 10 loops, and in one - 12. Considering that tying 3 loops together we diminish 2 loops at once, we get what we need to do in a row 5 decreases, distributing them evenly. In one of the rows (more convenient in the 26th row) you need to make 6 decreases. The reductions are distributed in the series evenly, but, preferably, not one above the other, but with a certain displacement, so that the points of reductions are less visible. For some patterns, on the contrary, the tracks at the place where the loops are subtracted create a decorative effect and then they are subdued over each other.
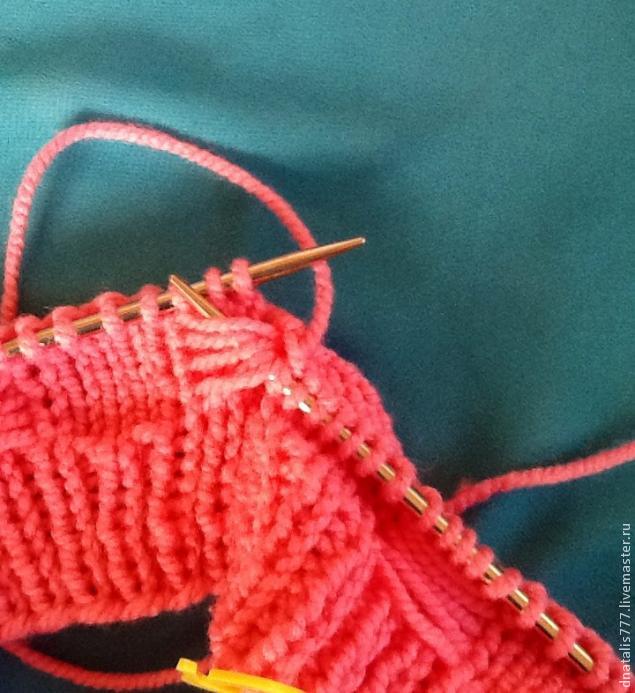
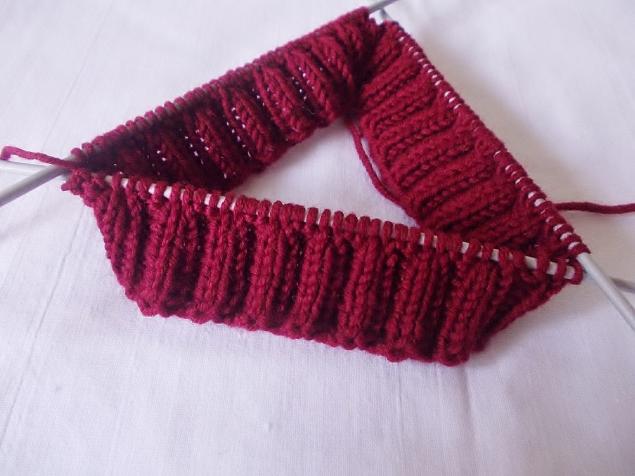
The cap is with a seam at the back, so you need to carefully knit the side edges of the canvas so that they can then be joined with the least noticeable mattress seam. Since the pattern is two-colored, let's see how best to introduce a new thread and then change the threads along the way of knitting.
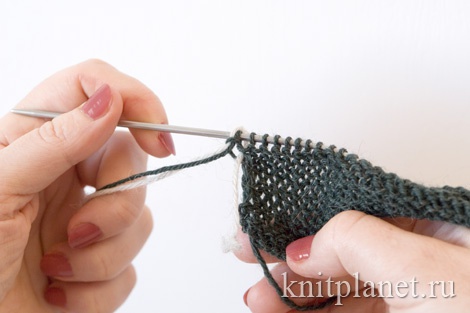
Attaching a thread of a different color
At the end of the row, we knit the edge loop with one thread and another. "Tail" thread of a new color then close up to the hem.
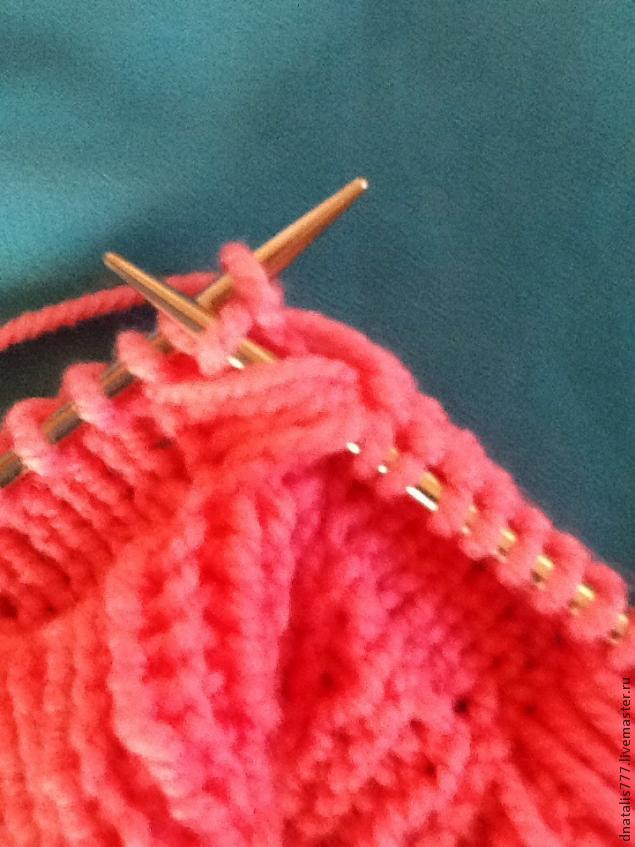
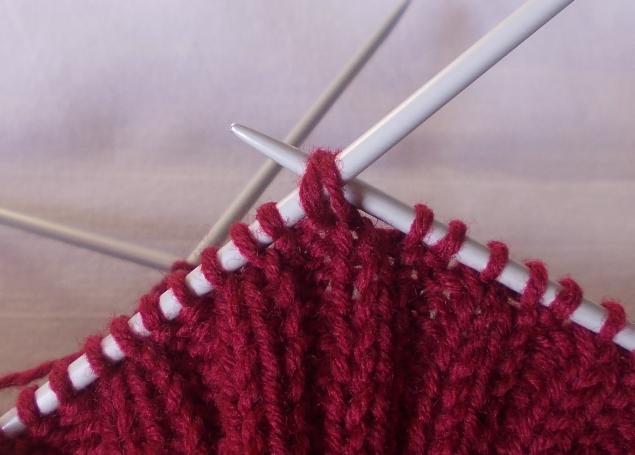
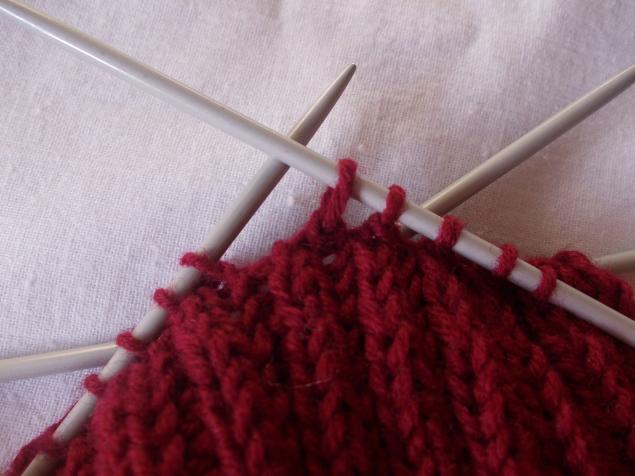
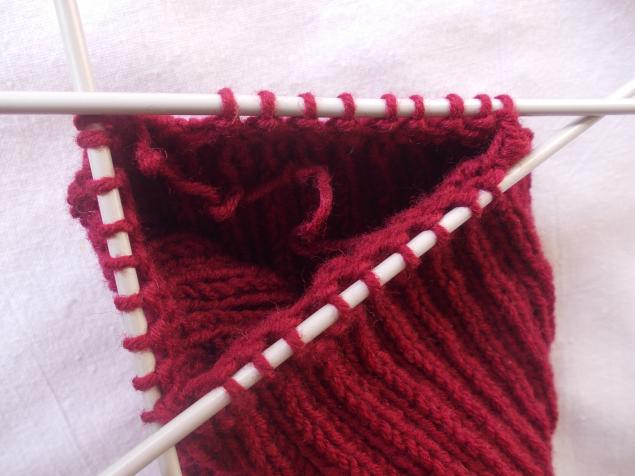
We always knit the last loop of the row with our grandmother's purl, turn over the work, remove the edge loop from the left spoke to the right.
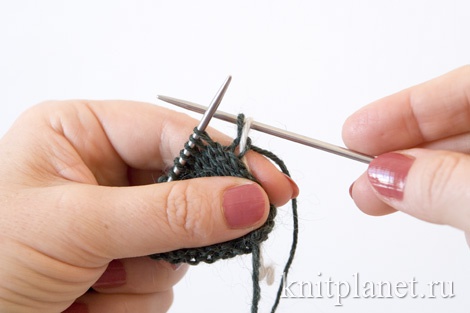
The thread, which tied the previous row, we bring forward, and the new (gray) thread we start at work and knit it the next row. Knitting lessons
Quoted
Before answering the question of how to knit a hat with needles, it is necessary to understand the basics of this case. The classic way to knit hats “on the head” is knitting from the bottom, with a seam located at the back.
Before you start the knitting process, you need to take the basic measurements:
Head circumference should be measured in the widest place:
The distance from the point of the base of the skull to the crown in the figure is indicated by the letters AM;
Distance from the crown to the hairline in front - MW;
The distance from the crown to the ear lobe - MU;
The distance from the base of the skull to the earlobe - AU.
Now you need to build a pattern that will serve as the foundation. Build a right angle to the top of point O. Delay horizontally the size of the girth of the head - this will be the point G. Delay the AM yarding vertically downwards and thereby obtain the back seam line. Divide the distance OG by two and get a point B - the middle line before the cap. Along this line, set aside the distance from the crown to the hairline in front. From the point O to the right horizontally to put the distance from the base of the skull to the ear lobe and, thereby, get the point Wo, down from which to draw the line of the ear. Distance WOW = MU. Through points AUV draw a smooth line.
If you knit a cap on this pattern, you will get a product with a seam at the back, with small ears and an assembly on the crown. The size of the cap in this case will be exactly the same as the size of the head of the person from whom the measurements were taken.
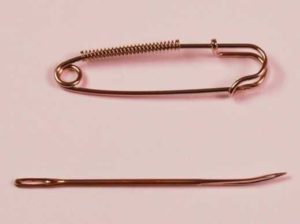
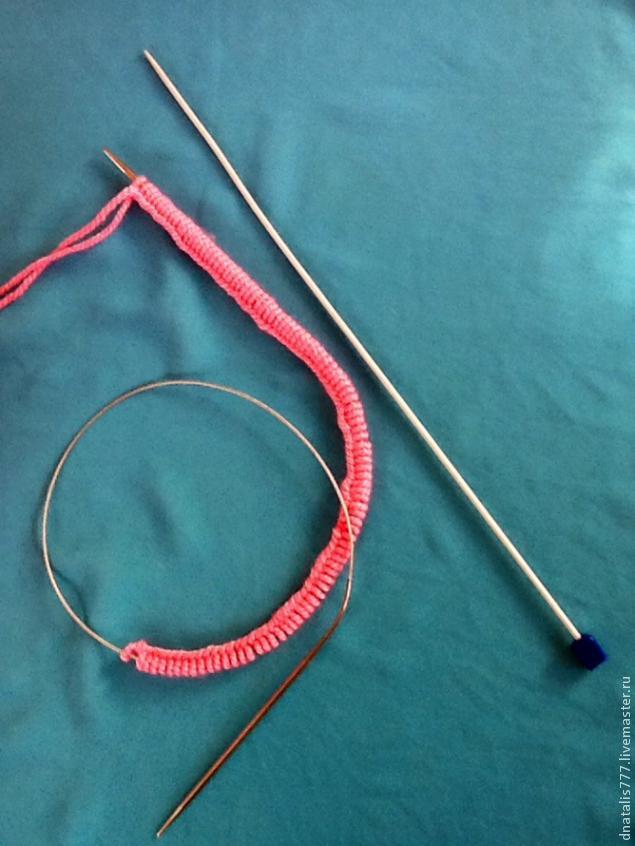
To knit this wonderful hat with your own hands you will need: circular knitting needles No. 4.5, knitting needles No. 4, a marker, which can be played with a simple clip or thread that differs from the selected yarn, and the yarn itself.
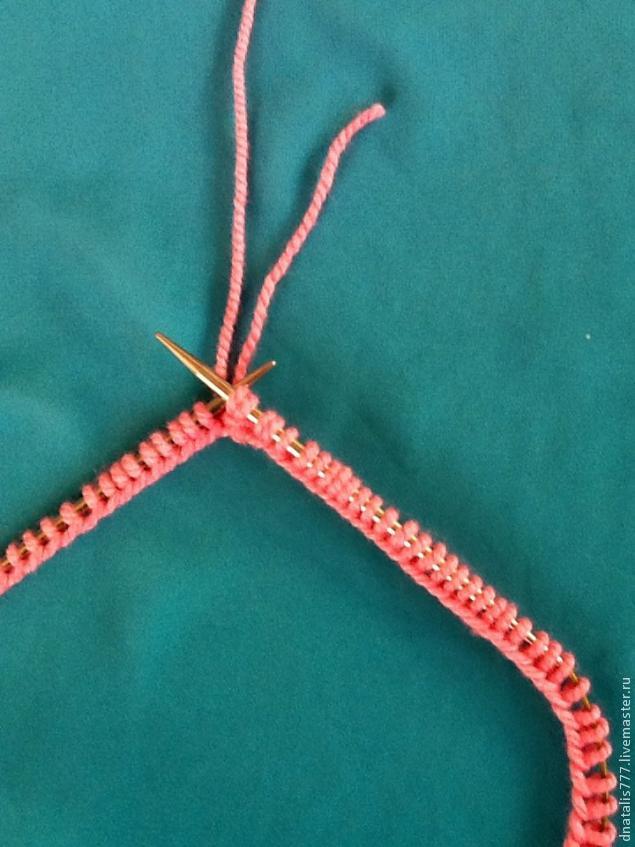
On the circular needles dial 90 loops (size 54). Mark the beginning of a row with a marker. It is more convenient to type loops on one circular and one straight needle, then you need to pull out the straight line.
Knit in a circle 4 cm elastic 1 × 1, i.e. 1 front loop and 1 purl. In this case, all loops knit the classic way.
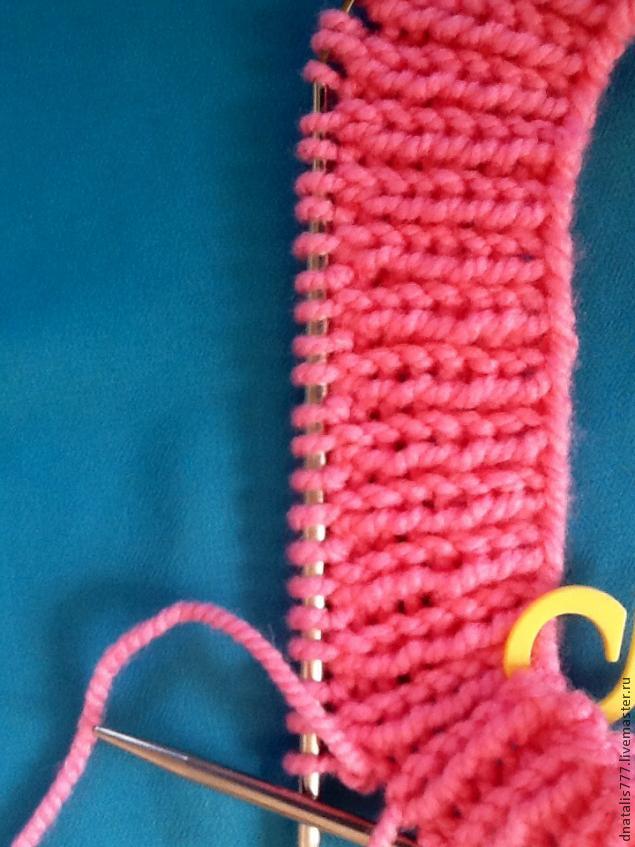
2, 4, 6, 8 rows - all knit loops face. Knitting 9 rows, it turns out like this:
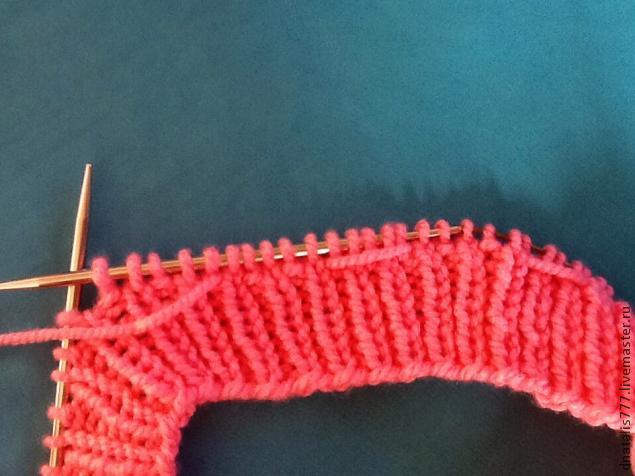
10 row: 7 facial loopsthen “dive” under the right needle under 5 broaches, knit 1 face loop from the left needle, remove it on the right loop and emerge with this loop back. Next, we knit 2 facial and repeat everything to the end of the row.
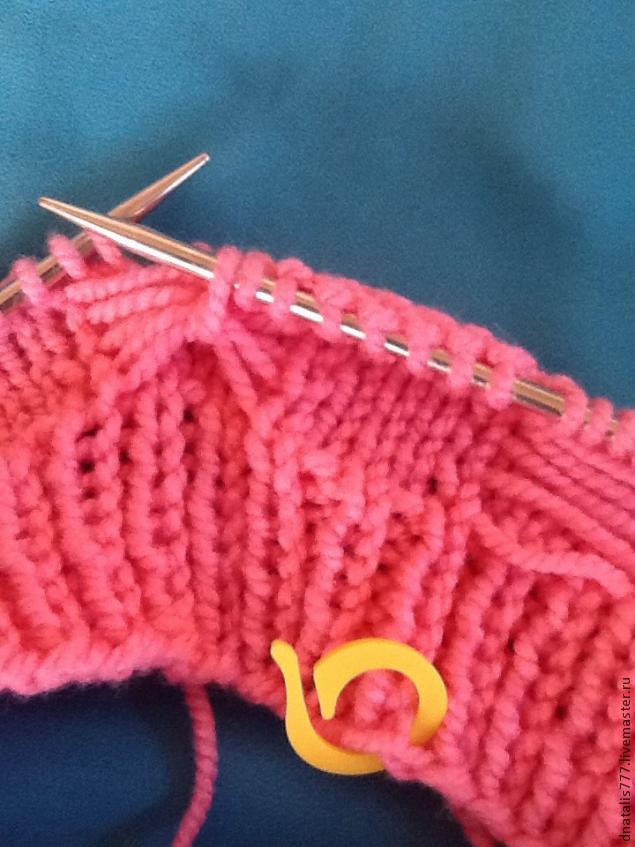

In the 11th row you need to change the location of the butterflies, that is, to shift the pattern in a checkerboard pattern.

11, 13, 15, 17, 19 rows knit like this: remove 5 loops on the right side. It is not necessary to knit the thread before work.Next, 5 facial loops. Rows 12, 14, 16, 18 are all facial. Row 20: 2 facial, "butterfly", 7 facial. Rows 1-20 need to be repeated one more time.
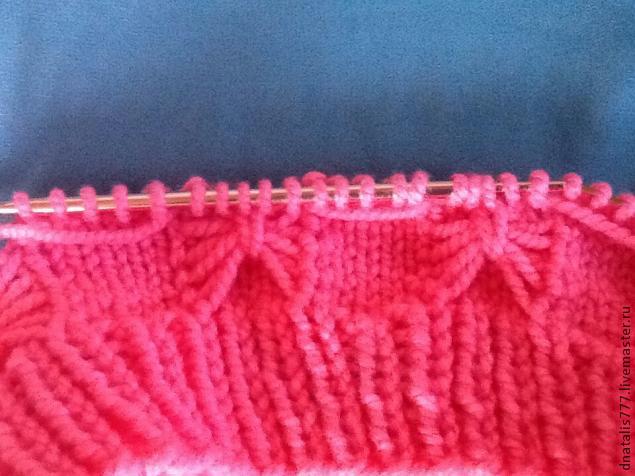
After the dressing is necessary to proceed to the reduction of the canvas.
At the stage of subtraction at will, you can change the spokes to stockings and go to the reduction of the cap.
Subtraction:
In 1-3 rows of decrease, repeat the pattern of 1-3 rows of main rows.
Row 4: 5 facial, 2 facial together, 3 facial, all repeat until the end of the series.
Row 5 and 7: 5 face, remove 4 loops on the right knitting needle untied, leave the thread before work, repeat until the end of the row.
Row 6: all facial.
Row 8: 7 facial, 2 loops together.
Row 9: 5 facial, remove 3 unpaved loops on the right needle, leave the thread before work.
Row 10: 6 facial, butterfly, 1 facial.
Row 11 and 13: remove 5 faces on the right knitting needle unbound, save the thread before work, 3 faces.
Row 12: all facial.
A row 14: 2 together front, 6 front.
Row 15 and 17: remove 4 loops on the right knitting needle unlocked, thread before work, 3 facial.
Row 16: all facial.
Row 18: 2 facial, 2 loops together facial, 3 facial.
Row 19: 3 remove the loops on the right knitting needle unlocked, the thread before work, 3 facial.
A row 20: 1 front, butterfly, 4 front.
Row 21: 4 facial, 2 together facial.
A number of 22: 3 facial, 2 together facial.
Row 23: 2 facial, 2 together facial.
A row 24: 1 front, 2 together front.
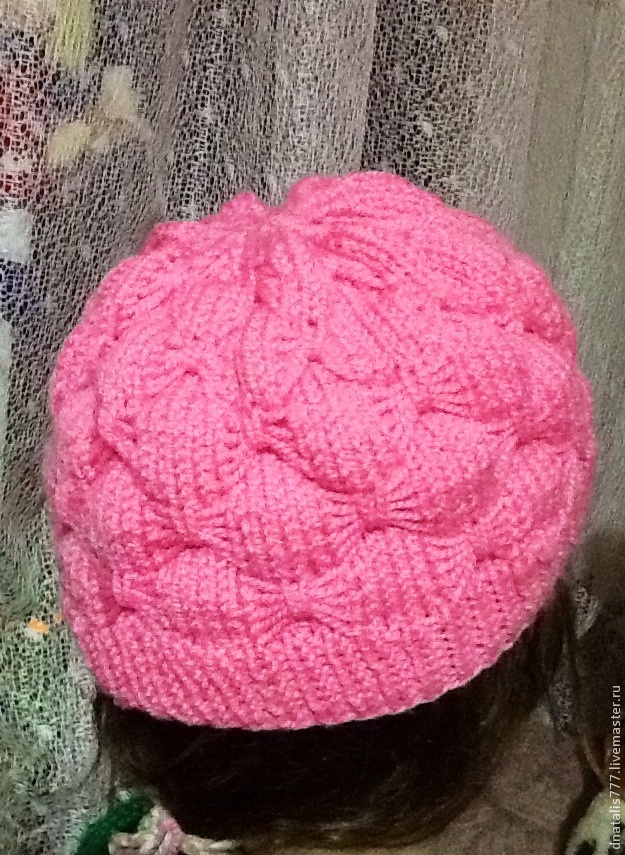
Row 25: knit all the loops of 2 together front. Cut the thread, leaving about 15 cm for the remaining stitches. Cap ready!
Before you start knitting, you need to measure the circumference of the head.
This size will be equal to the width of the cap. The height of the cap will be the distance from the lobe of the right ear to the lobe of the left.
Dial loops and distribute them into 3 needles. Knit an elastic band 2 × 2.
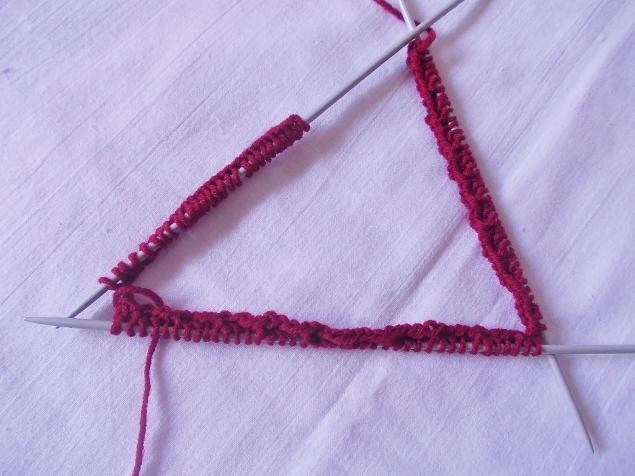
Knit circular fabric. Its length will depend on the height of the cap.
Start the subtraction - knit together the purl and facial loops. The needles will remain 2 facial and 1 purl loops. After 1 row as well knit decrease, as they did in the beginning.
Even through a series of knock down - 2 facial loops together. The remaining hinges to pull the thread and fasten.
Loops of the first row to pull the thread. Use the hook to thread the thread between the loops and secure.
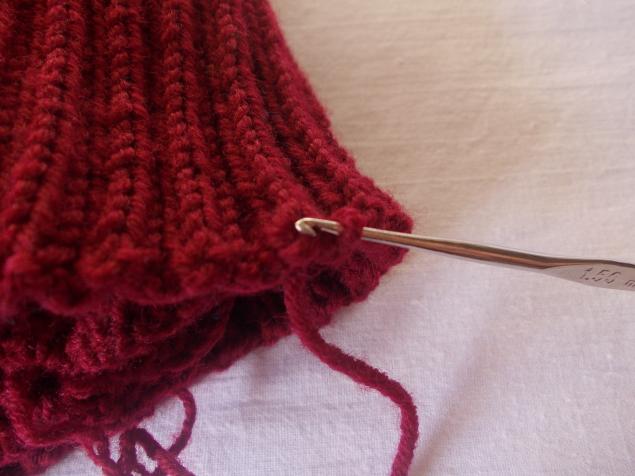
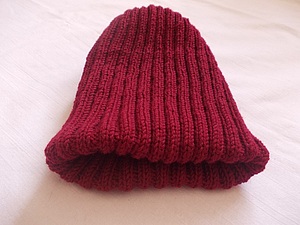
Wrap the cap inside. Cap ready!
Beautiful hats, knitting needles, often suggest the reduction of the web to form a rounded top. If you have not yet learned how to cut loops, a wonderful headdress can be made from a single rectangular piece.
1. Measure with a tailoring meter the head coverage on the line above the forehead and on the most convex occipital part. Make measurements of the depth of the future product, which will be equal to the distance from the ears to the crown.
2. Be sure to perform a 1x1 knitting pattern (alternating one face and one purl) or 2x2 (two faces - two purses). Stripe the canvas, gently spread it out on a horizontal surface and select a square with sides of 10 cm using a ruler. Count rows in height and loops in length on your sample - this will help you determine exactly how many loops you need for the bottom of the women's hat.
3. Type the required number of thread bows into two straight needles pressed against one another. It is important that the headband bead is well fixed on the head and at the same time comfortable to wear. The typesetting edge of the product must be equal to the head coverage minus from 5 to 10 loops (depending on the thickness of the working yarn).
4. Gently pull one knitting needle from the dial and start to knit the woman's hat, straight and back. Tie a rubber band with a 6 cm high elastic band.
5. Continue to knit the rectangle with the front satin stitch until its height is equal to the depth of the cap. Do another 3-4 cm of knitting and pull the string through the loop opening. Make the connecting seam by folding the knitted rectangle into a tube. You managed to knit a women's hat with needles, it remains only to tighten the top of the head, make a strong knot and tie a cord with a bow.
Helpful advice: the hat can be made on circular needles with a fishing line, then there will be no connecting seam behind the product. If you tie a high headband bezel, you can form a lapel.
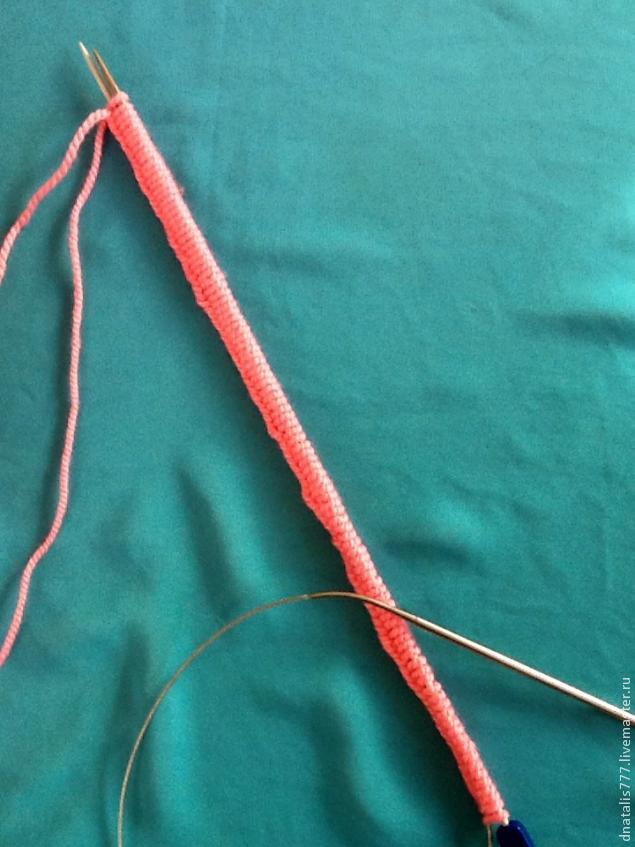
Knitted hats, strapped on the crown with a cord, look provocative and stylish, and the functional element has an additional decorative function. Decide in advance on the length of the cord and type the right amount of loops on a straight needle. Remove the edge loop, follow the front loop and pull it through the removed one.
This way you will knit a row and close it at the same time. At the same time it is impossible to tighten the hinges too tightly. Tying the cord, tighten last loop and when cutting the thread, leave the “tail” with a length of 4-6 cm. Imperceptibly cut it into the cord with a hook.
If the perky bow on the top is not your style, try to finish the work on the product to others. in a simple way. Close the loops last row rectangular knitted parts, make a connecting seam and turn the headpiece on the wrong side.
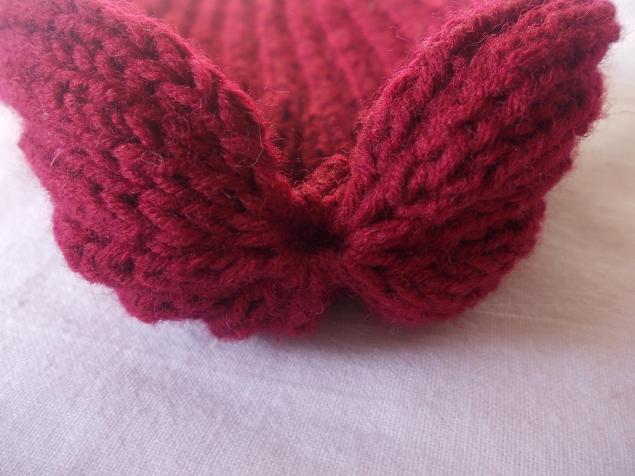
Sew the top of the cap, then fold the opposite edges with triangles and join them together with several stitches. Remove the finished product.
You can quickly master the formation of the top of a knitted cap on the basis of a rectangular piece of cut. When you tie up the headgear before the top of the crown is formed, begin to round the canvas with the help of hinge hinges. To do this, mark with bright threads on the working row 7 sections of the same length.
When performing the next facial row, knit adjacent loops together before the start of each intended segment. Cut the canvas through the row, and when there are 4 loops on the needle, pull the thread through them, tighten and cut. The rest of the yarn, you put it on the wrong side of the knitted hat.
Instruction
To knit a hat for a husband, type 98 loops on the needles, 2 of which 1 on each edge will be hemmed. Knit the product will be a rubber band 3x3 (alternate 3 loops front, 3 purl) until the canvas reaches 13 cm in height.
After this, proceed to lowering the hinges so that the cap sits exactly on the head. To make the decrease symmetric, mark every twelfth loop in the last linked row with a colored thread starting from the sixth (i.e., 6, 18, and so on). Now, through the row, knot each tagged loop with the previous one. There should be 10 such series with reductions.
After completing the described knitting fragment in the front row, knit 2 loops together. After that, the knitting needles will leave 10 loops that need to be tied off, threading the end of the thread into which they were knitted. Leave this end of the thread long so that they can make a connecting seam.
Thread the needle into the needle with a wide eyelet and gently align the edges of the canvas to sew the hat to complete the connecting seam.
The same cap can be tied in children's version. Choose knitting needles and threads, before starting work, knit a knit you want to knit a hat with; a test sample is 20 loops for 20 rows. Such a sample will help you to correctly calculate the density of binding, or the number of loops per centimeter of canvas.
To find out how many loops you need to make for knitting, measure the circumference of the child’s head in centimeters and multiply by the number of loops in one centimeter of the web. The height of the canvas without declines for the child will be equal to the distance from the eyebrow line of the child to the top of the head minus 7-8 cm. The distance of 7-8 cm will fall to a decrease.
Good looking hats, made of English elastic. For such a cap, prepare 200 g of wool of medium thickness and circular knitting needles No. 2.5. Before you begin, tie a sample that will allow you to perform a more accurate loop calculation. Type on the knitting needles, on which you will knit the product, 20 loops and knit 10-20 rows with hosiery knitting. Then attach to the resulting product line and count the number of loops in one centimeter.
Then measure the circumference of the head of the person to whom you will knit a hat, and the distance from the middle of the forehead to the top of the head.
Type the required number of loops (for this purpose, the length of the head circumference in centimeters should be multiplied by the number of loops that fit in one centimeter on the sample) with circular needles.
Knit 6-8 cm English elastic. English gum fit in the following way.
First row: tie 1 face, 1 nakida, remove 1 loop, not knitting. The thread must be behind the loop.
Second row: make 1 nakid, 1 loop, remove, without knitting, remove the loop and nakid the previous row, knit together the front.
3rd row - remove the loop and nape the previous row, knit the face together, then make 1 nakid, remove the loop.
Alternate the second and third rows.
Determine the front and seamy side. One row knit with facial loops, knitting together a lowered loop and nakid of the last row and nakid and not nakidov in the new row. On the seamy side should be a seamy row - this is the fold line of the flap.
Again, start the English gum and knit a cloth, equal in length to the distance from the middle of the forehead to the top. On the front side, tie a row of front loops, knitting a nakid and a loop that was removed from the previous row together with the front one, the front one - according to the drawing, no longer wear the nakida.
Sew a hat. Bend the flap.
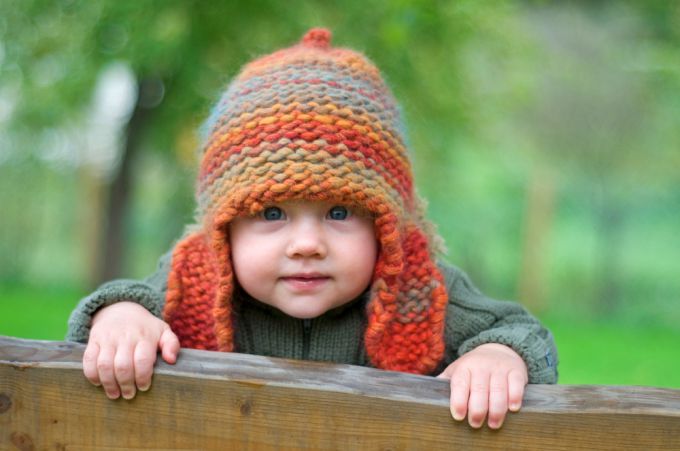
This simple model of children's hat is ideal for both boys and girls. For a boy, a hat does not need finishing, for a girl, decorate with knitted flowers or beads. The peculiarity of this cap is that it does not require any patterns and patterns. Calculations are given for caps on baby 3-5 months.
For the work, you will need soft yarn - 50 g and knitting needles number 3. For the flower, prepare wool yarn that matches the color of the cap or, on the contrary, contrast, and also hook No. 5.
When using knitting needles No. 3 and yarn corresponding in thickness, the density of knitting is obtained as follows. In the canvas 10 cm by 10 cm 21 loops and 27 rows. Hence the calculation of the loops.
Dial 65 loops. Tie 6 rows of 1x1 rubber band, alternating one front one purl (from the back, where the front was, the back loop is knitted, where in the first row was the back, front). Then knit 43 rows of the front satin stitch. To do this, on the front side, knit all the loops on the front, on the seamy side, all on the seamy side. In this case, do not forget, in each row to remove, without knitting, the first loop, edge.
Close the loop. This is done like this: knit two loops in one and re-loop the loop from the right knitting needle to the left. This should continue until all the loops end. Pull the thread into the last loop and finish the job. "Tail" can be left genuine. Thread this thread into the needle, fold the blank in half and sew the side and top seams. Cap ready.
Knitted hats never go out of style. They are convenient in different life situations. Wear knitted hat can be with an elegant coat, and with a sports jacket. Such a hat, bound with an English eraser, will suit both women and men.
You will need
Instruction
Measure the circumference of the head and the distance from the middle of the forehead to the crown. The hat is knitted with an English elastic band. For the sample, type an odd number of loops on the spokes.
1 row - 1 front, 1 nakida, 1 remove the loop, not knitting. The thread is behind the loop
2nd row - 1 nakid, 1 loop to remove, without knitting, remove the loop and nakid the previous row to knit together the front.
3 row - remove the loop and nape the previous row knit together the front, 1 nakid, 1 loop to remove.
Alternate the second and third rows.
After linking the sample, calculate the number of loops.
Dial the required number of loops on the circular needles. Knit a 6-8 cm English gum. Determine the front and seamy side. One row knit with facial loops, knitting together a lowered loop and nakid of the last row and nakid and not nakidov in the new row. On the seamy side should be a seamy row - this is the fold line of the flap.
Again, start the English gum and knit a cloth, equal in length to the distance from the middle of the forehead to the top.
On the front side, tie a row of front loops, knitting a nakid and a loop that was removed from the previous row together with the front one, the front one - according to the drawing, no longer wear the nakida.
Turn the work around and knit a number of purl, without subtracting the loop.
Turn the work over again and reduce the loops according to the following scheme: 1 front, 2 together front. The next row of knit purl.
Tear off the thread, thread it into a thick needle. Pull the thread through the loops, starting from the first one, tighten it and fix it properly on the wrong side.
Sew hat. Bend the flap.
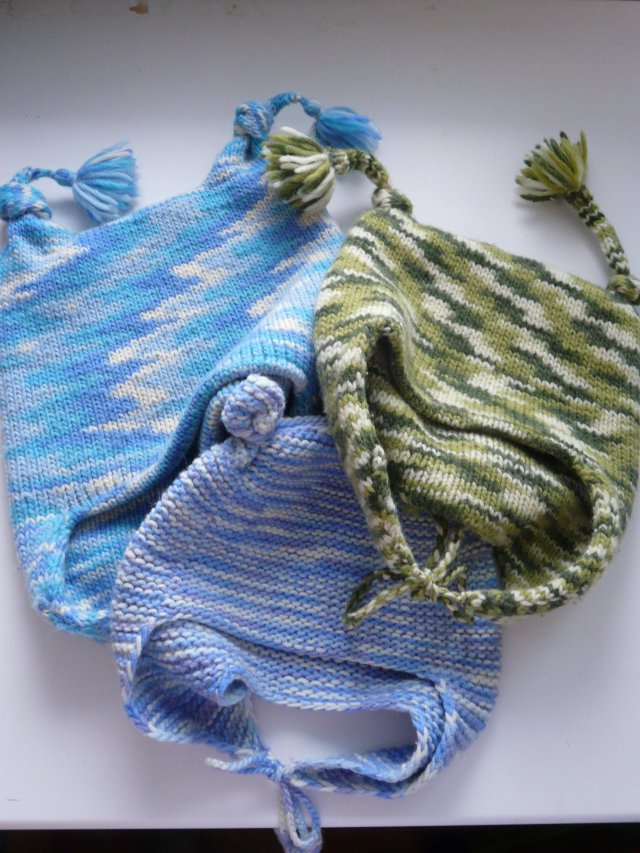
With the onset of cold weather, the wardrobe of the child is replenished with caps, but it is not at all necessary to purchase them in the store. The headdress can be knitted independently, spending a couple of evenings on it, and the cost of the thing will be much lower than the purchased one, because one coil of yarn is enough to make it.
There are three types of knitting needles: simple, circular and stocking. When working on the first two, the canvas will come out straight, so the headgear will have a seam at the back. Spokes of the third type allow you to avoid the presence of an ugly seam and make the thing completely symmetrical, which is very convenient when the child puts it on himself. Since the baby cap is a small product, any one will work, but in the process of knitting on stockings you can try it on.
The calculation of the loops begins with vyvyazyvaniya sample, performed in the same pattern as the main canvas. The simplest option is a single or double elastic band, which is a uniform alternation of facial and purl loops. If the set is carried out on stocking knitting needles, then the number of loops should be a multiple of the 2nd or 4th, depending on the type of gum.
Face knitting is also suitable for making a baby cap, as yarn is a rather elastic material, stretching regardless of the type of pattern.
After gaining about 30 loops and tying 10 rows, measure the width of the sample, for which you need to take a ruler or tailor's centimeter and spread out the canvas on them. You shouldn’t stretch it a lot, just lightly smooth it with your palm. The number of loops minus edging is divided by the resulting size, and the final number will indicate how many loops fit in one centimeter. Next, a centimeter tailor must measure the girth of the child’s head and calculate the number of loops that should be dialed for knitting a baby cap.
For knitting children's clothes you need to buy only the appropriate yarn, as even with a large percentage of wool to acrylic, it does not prick.
The headdress lapel is not knitted if it is made with a harness or other thick pattern. A simple gum will look better if it is combined with a lapel. Having knitted a hat on 3-4 cm, one row instead of an elastic band is knitted with purl loops - they form the fold of the future product. Next, the cap knits with the selected pattern. If the thread is torn or a thing is knitted from several balls of yarn of different colors, then the knots connecting them should be left on the wrong side.
Finish knitting in several ways. The first of these is a gradual decrease. Not reaching centimeters of 2 to the crown, each 6th loop is knitted together with the previous one, and the wrong side is executed without decrease. Then in the same way each 5th, 4th, 3rd, 2nd loop is removed. Having knitted the last row and not going to the wrong side, the thread is cut to 20 cm, if the canvas is flat, and to 10 cm, if it is circular. Further, this thread with a knitting needle or a hook is successively pulled through each loop, then tightened and tied, after which it sews the edges of the part. On a circular canvas, the thread is fixed on the inside of the product and cut off.
The second method is simpler; when it is executed, every 2nd loop decreases immediately. This is done twice, after which the crown is closed by the method described above. The third method does not require a decrease: the loops of the last row are closed, forming an edge. Turning the product inside out, sew the hem with a thread of yarn, after which the cap is turned back to the front side. Having introduced one more thread into the extreme loops, it is tightened and tied into a knot, after which a narrow pompon of a small amount of threads is sewn to the crown. If the latter method is chosen, then the length of the product should be slightly increased.
Knitted hats never lose their relevance, especially if made with their own hands and really unique. A practical and trendy headdress, indispensable in the cold, can be a bright accent of the image. Simple recommendations for beginners will help create a variety of hats for children and adults on the basis of the simplest rectangular parts.
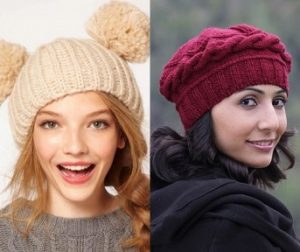
Women's knitted hat is not only a necessity, but also a fashionable wardrobe item that allows you to bring variety and zest to everyday looks. Today you can find and buy a model of a headdress for women for every taste and color, but such a thing as knitted hats can be made quite easily even by an inexperienced knitter. A product made by hand, will be exclusive, and wearing it is much more pleasant than the thing made on the conveyor.
A video workshop on knitting will help a beginning master to create her first exclusive knitted model. Below in the article will be presented lessons on knitting.
The first thing to do is decide on the time of year when the hat will be worn, and choose the appropriate yarn. For the summer openwork model, yarn from 100% cotton is suitable, and for winter you need to choose a woolen thread so that they are warm. If it be autumn hat knitting needles, in this case it is better to choose mixed yarn, for example, acrylic with wool, so that it does not turn out to be too warm. In the spring, too, should choose this type of yarn.
Manufacturers of yarn always indicate the recommended size of knitting needles on the label, but knitting hats has certain nuances, therefore knitting needles should be bought on the floor size smaller. This is done to make knitting more dense. And in order for the hat to fit snugly and tightly to the head, you need to take a second pair of needles less than the recommended one and a half size - for knitting gum.
For stitching the final product need a special wide needle with a large eyelet and a rounded end.
Women's hat can be tied in the most diverse color range. This may be the trendy colors of the current season or a color suitable for outerwear, shoes or a bag. But it is best to choose a color depending on the pattern, which will be associated headdress for women. If the pattern is voluminous with interlacings, such as braids, then it is necessary to stop at light colors so that the texture of the pattern is more clearly visible. But a hat with a small pattern can be knit with dark yarn.
Another nuance when choosing a yarn - for beginner needlewomen it is better to choose a thick yarn, since with thin one it will be difficult to immediately achieve a beautiful and even blade.
The main difference of knitted hats is the degree of their density. The denser the product - so it is naturally warmer. Depending on this criterion, hats are divided by season into: winter, spring, summer, autumn:
| Related articles: | |
|
How to knit a hat with needles - a manual for beginners
We will knit a classic hat "on the head" with knitting needles, starting from the bottom, ... How to rejuvenate your face at home
Anti-aging face cream plays a big role in how a woman ... Earnings and promotion on the Internet
In this article I want to write a review about cloud mining in 2017, which ... | |


