Reader's Choice


Popular articles
Parents seek to develop their baby from birth. They acquire a huge number of toys that help the crumbs to explore the world. The children's developing rug enters the list of useful devices for the child. It is sold in a children's store, but most want to build it with their own hands. And it's pretty easy to do.
Children's developing rug 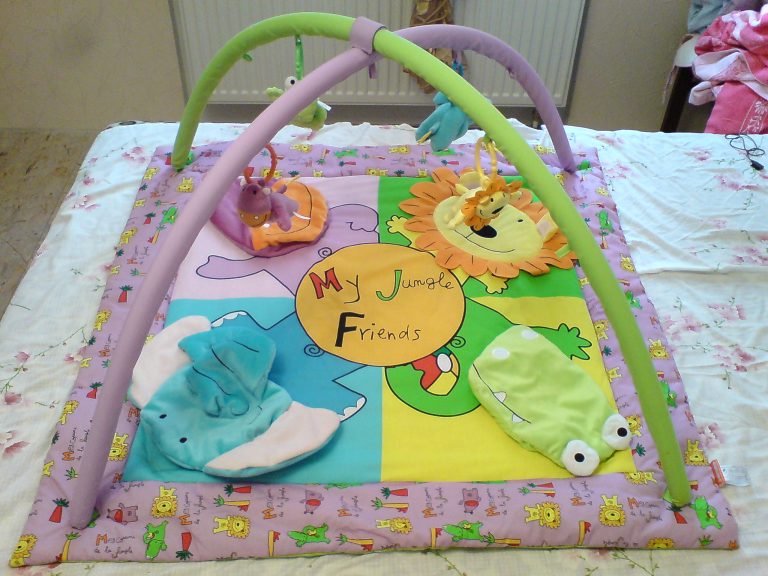 Children's developing rug
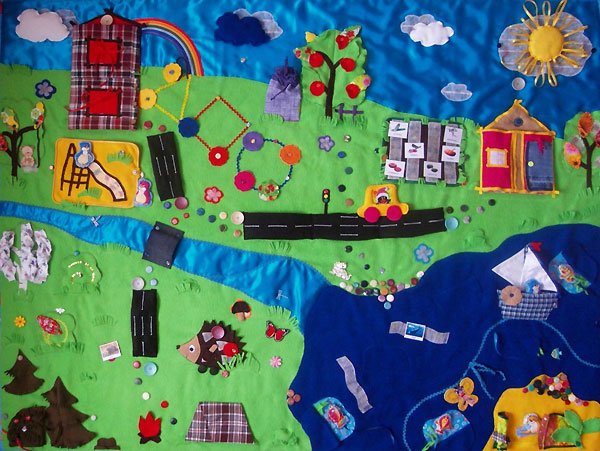
The educational mat is a canvas that is made of fabric or is associated with the use of yarn. It is complemented by bright appliqués and various moving elements with which the baby can play. Sometimes the rug is equipped with a frame to which toys are hung. It is used from the moment of birth, which allows you to begin the development of a child from 0 years and older.
Among the functions of the children's developmental mat, the following are noted:
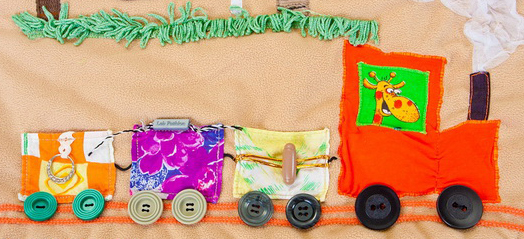
 Children's rug with locomotive
 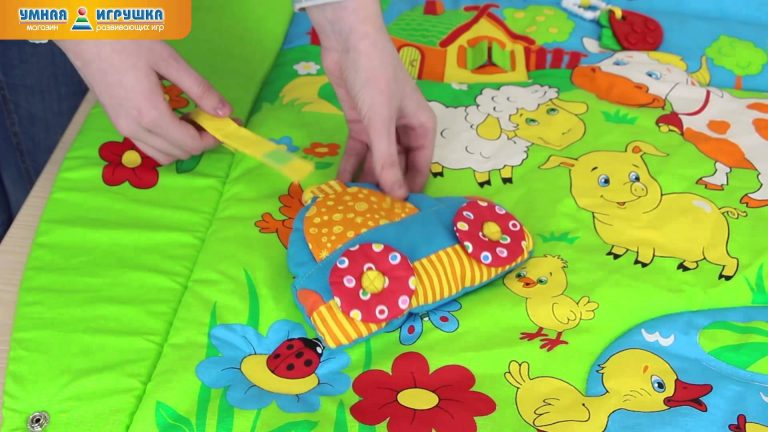 Light developing rug for a child with sheep
 In a newborn baby, the brain is not fully developed. At the beginning of the life path, neural connections begin to develop most actively. The environment that surrounds the child has a positive effect on this. Of great importance is how often and effectively engaged with the newborn.
The developing rug is one of the most useful toys. Combines a platform not only for the game, but also for the development of the child. When the crumb to learn to sit on their own, you no longer need to engage outsiders, and he will play alone, without a mother.
 Bright
 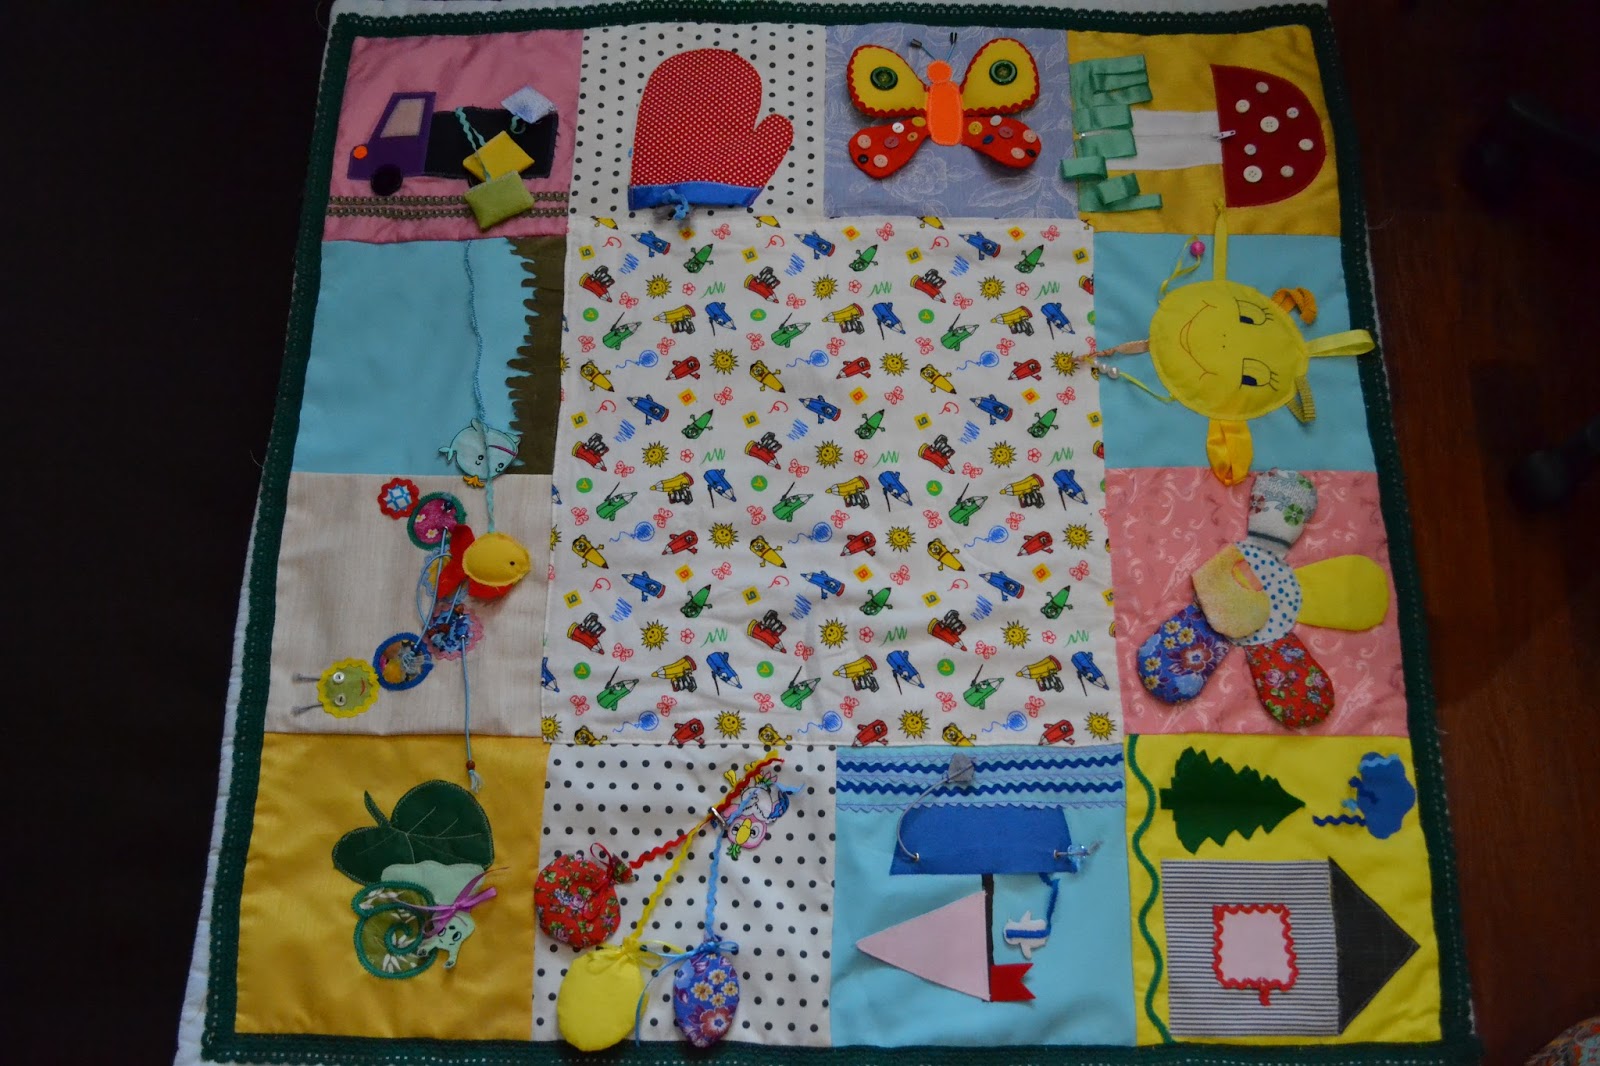 Developing a rug for a child
 Among the advantages of building a rug do-it-yourself, the following factors can be noted:
 Baby mat
 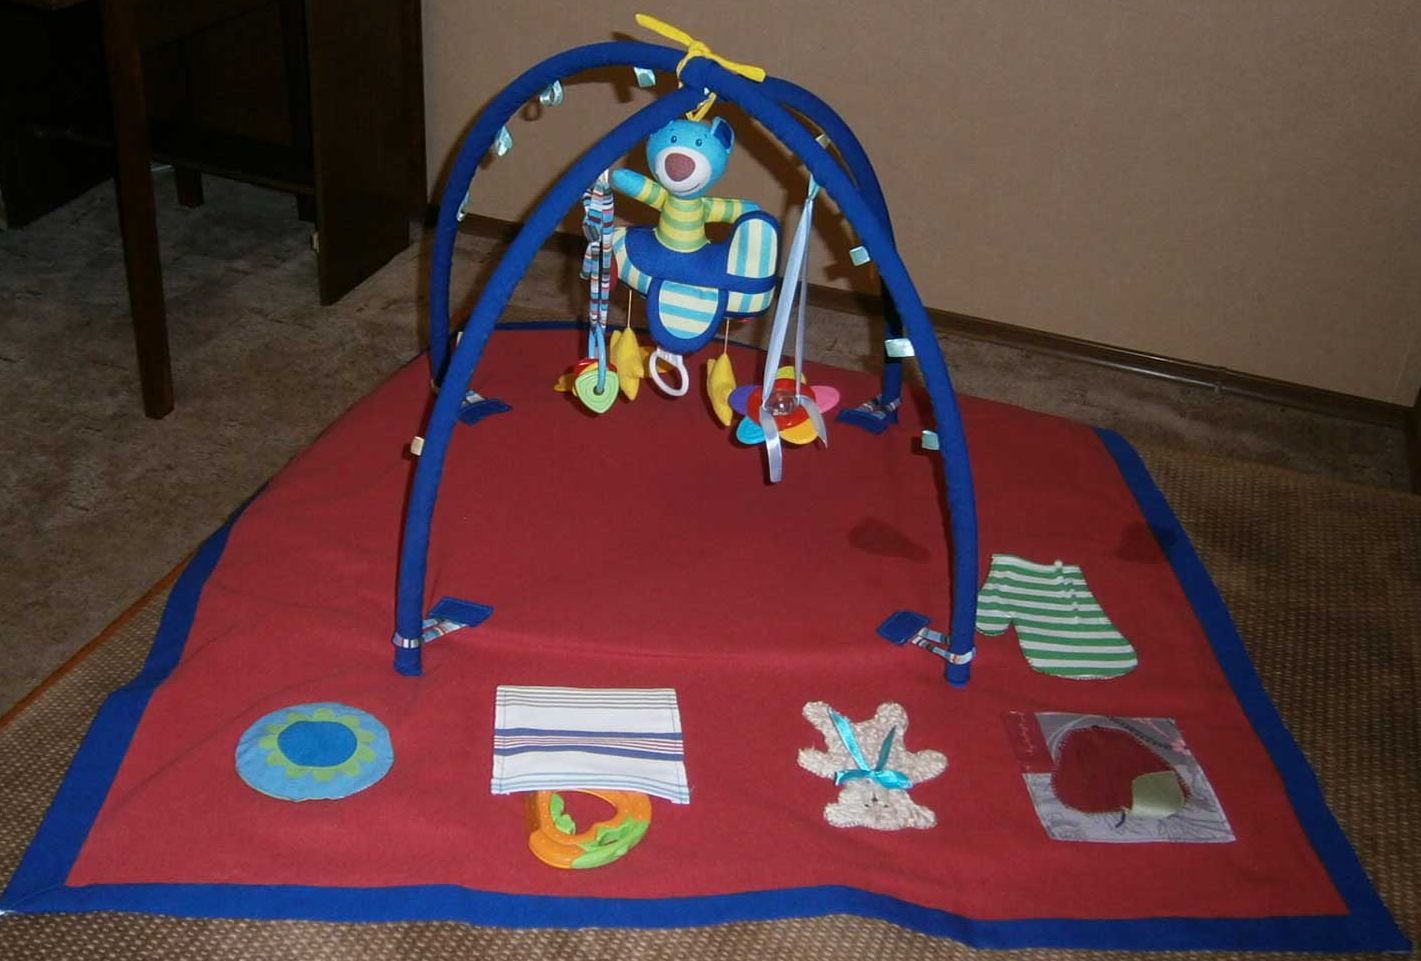 Developing a rug for a child
 The final model will depend on many factors. The first thing that matters is the gender of the child and the range of interests. Girls prefer round rugs. It is necessary to divide them into large areas, which should be clearly defined. Do not make the details on the toy too small.
Boys fit a separate type - this is autorugs. And everything should be on it as in real life, traffic lights, zebras and so on. If the baby prefers to play alone, you can arrange the canvas in more detail and stylized. If he prefers to use the design in a company with someone, for example a brother, then it is recommended to depict everything more closely to the real road.
 Developing a rug for a child
 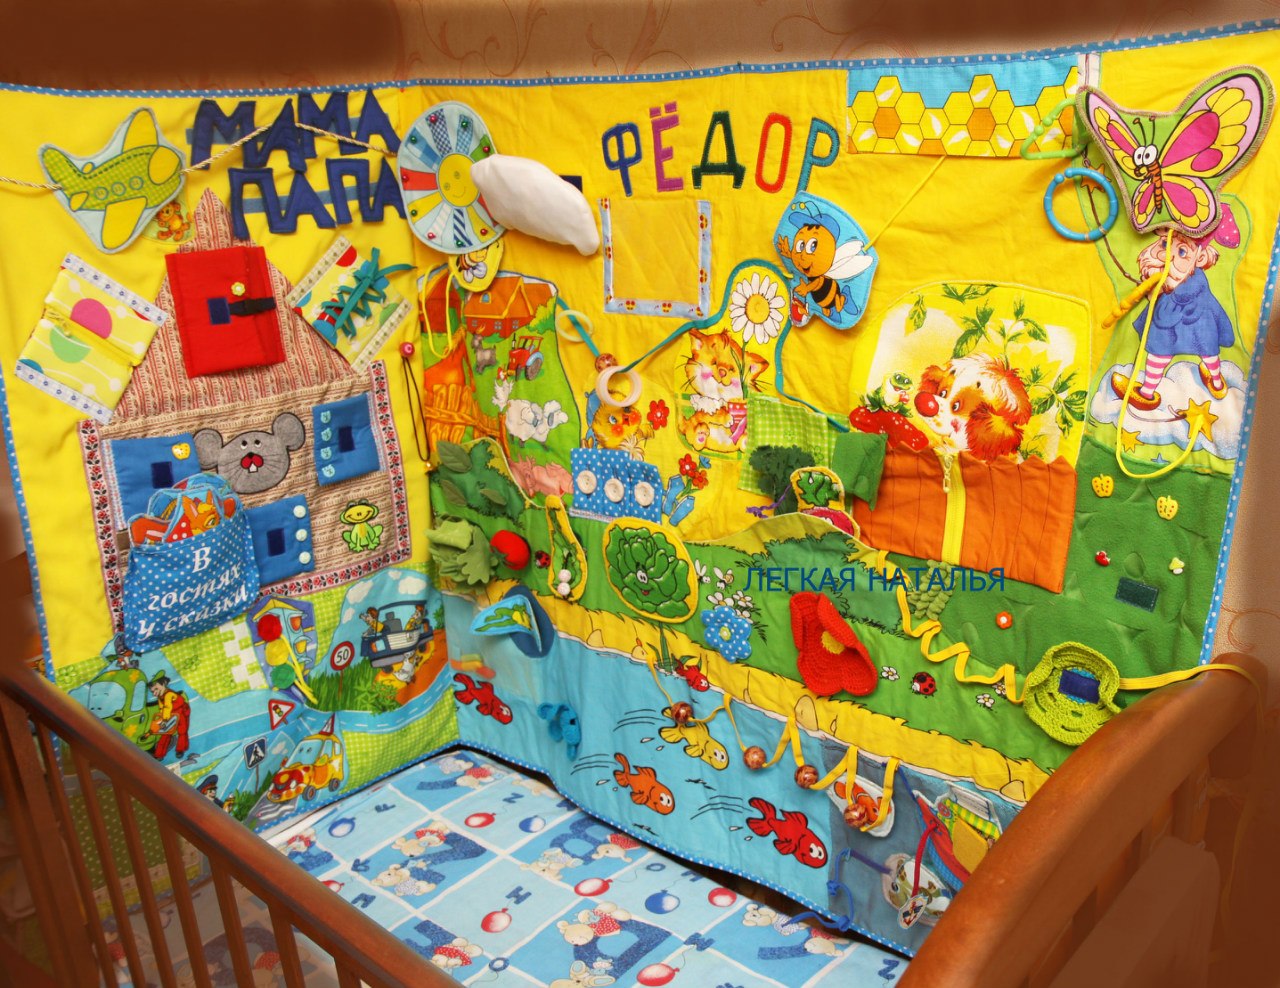 Beautiful big rug with baby name
 If the toddler is difficult to sit on the spot, then the product is complemented by a soft barrier. It is not necessary to build it massive and high. Place the barrier in the center. This will help keep the baby on the mat for development. A soft barrier is preferable to a children's playpen psychologically. It helps unobtrusively to keep the child in the play area.
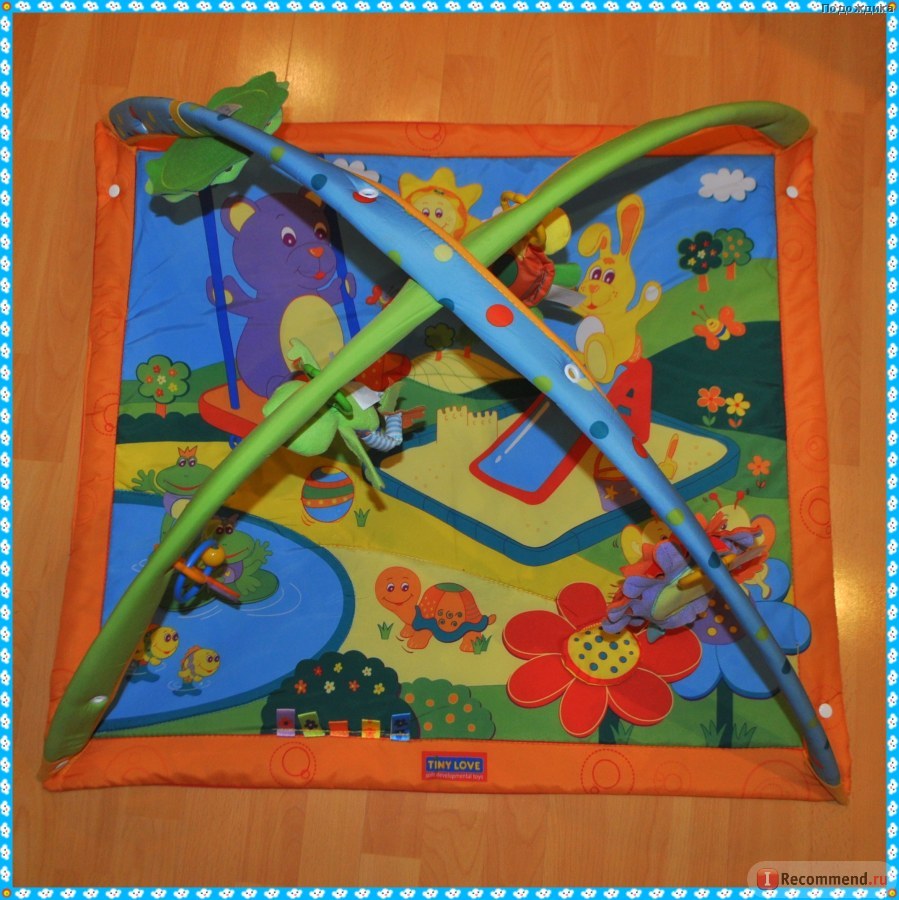
There are models equipped with special arcs. They can be made by hand. Such a rug can replace a children's playpen and not have an obsessive fence. He will help the child develop self-discipline and will not create physical barriers that cannot be overcome. Developing a rug with arcs will not allow the little one to fall backwards, unlike the arena.
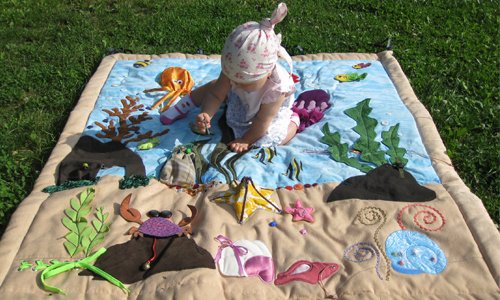
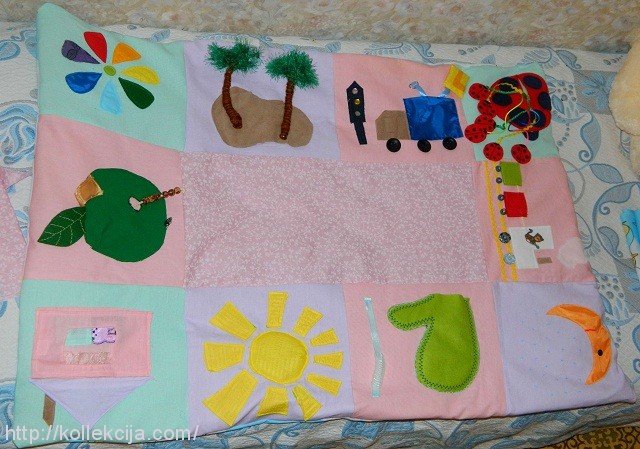
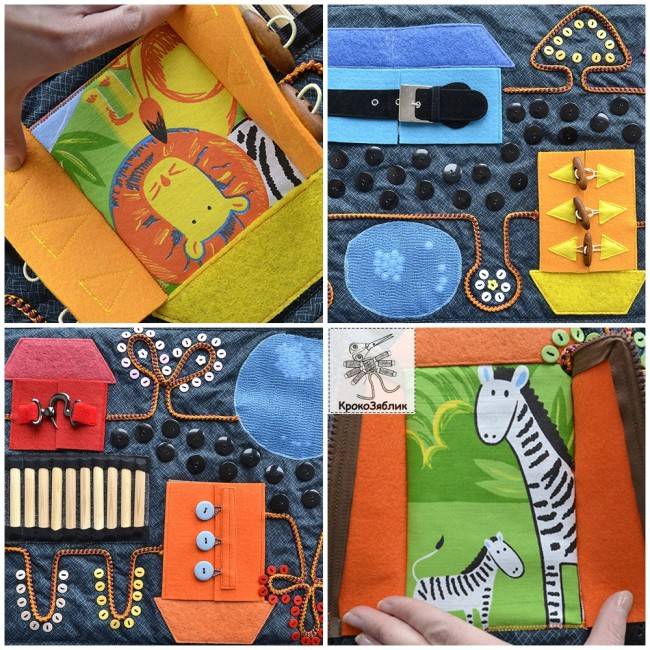
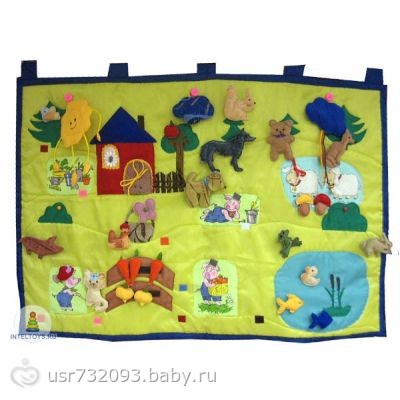
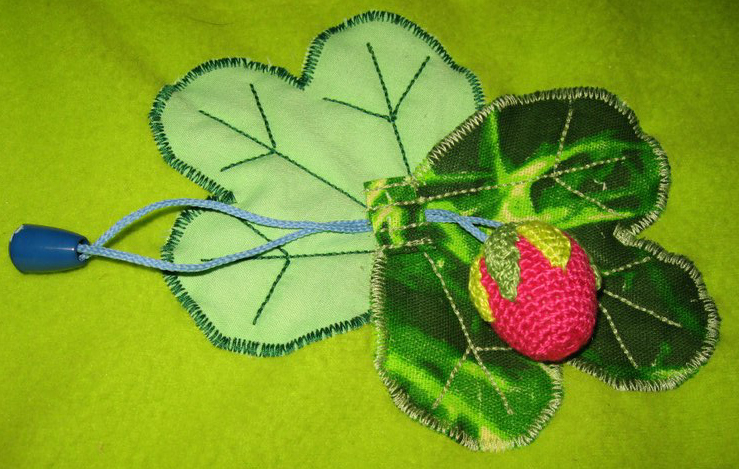
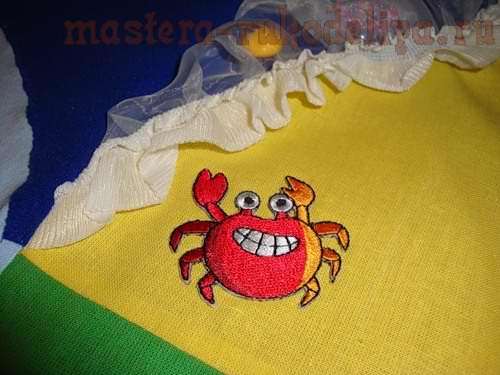
 The children's developing rug with various drawings
 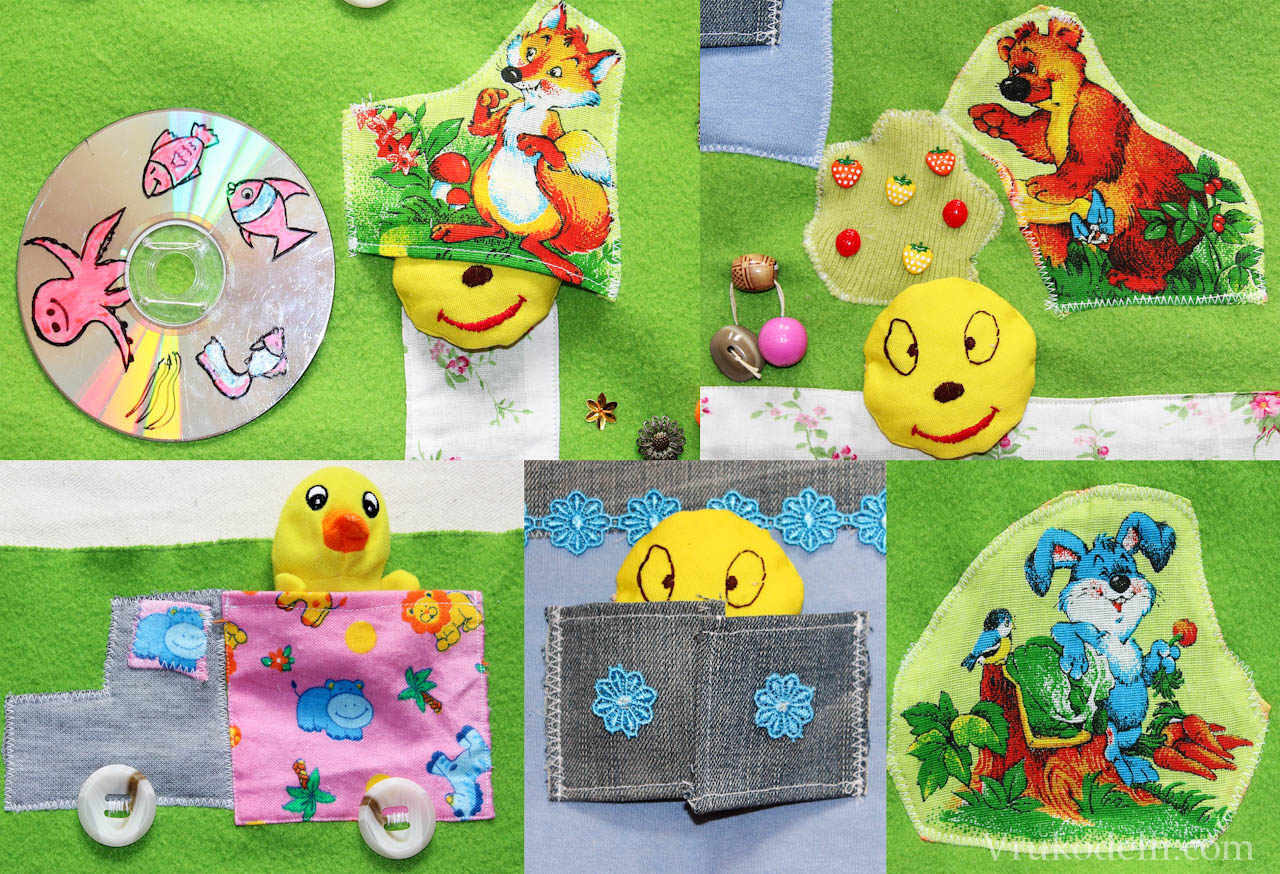 Children's developing rug
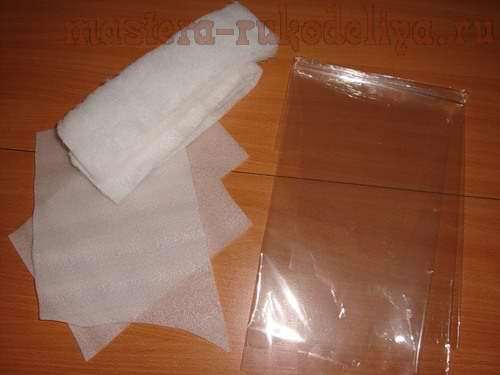
 To build a developing mat stock up the following materials.
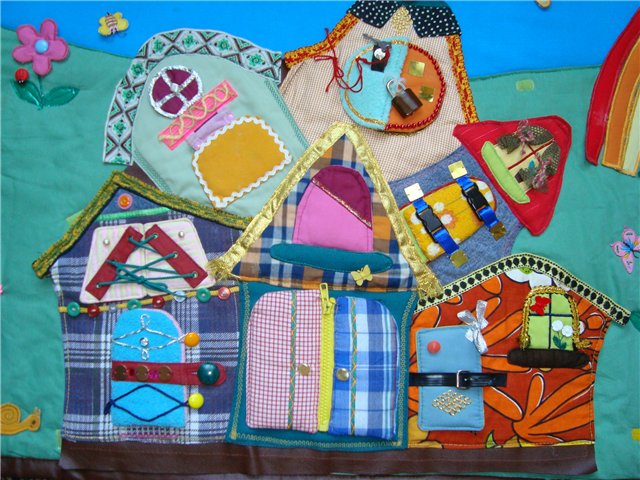
 Children's developing rug with a house
 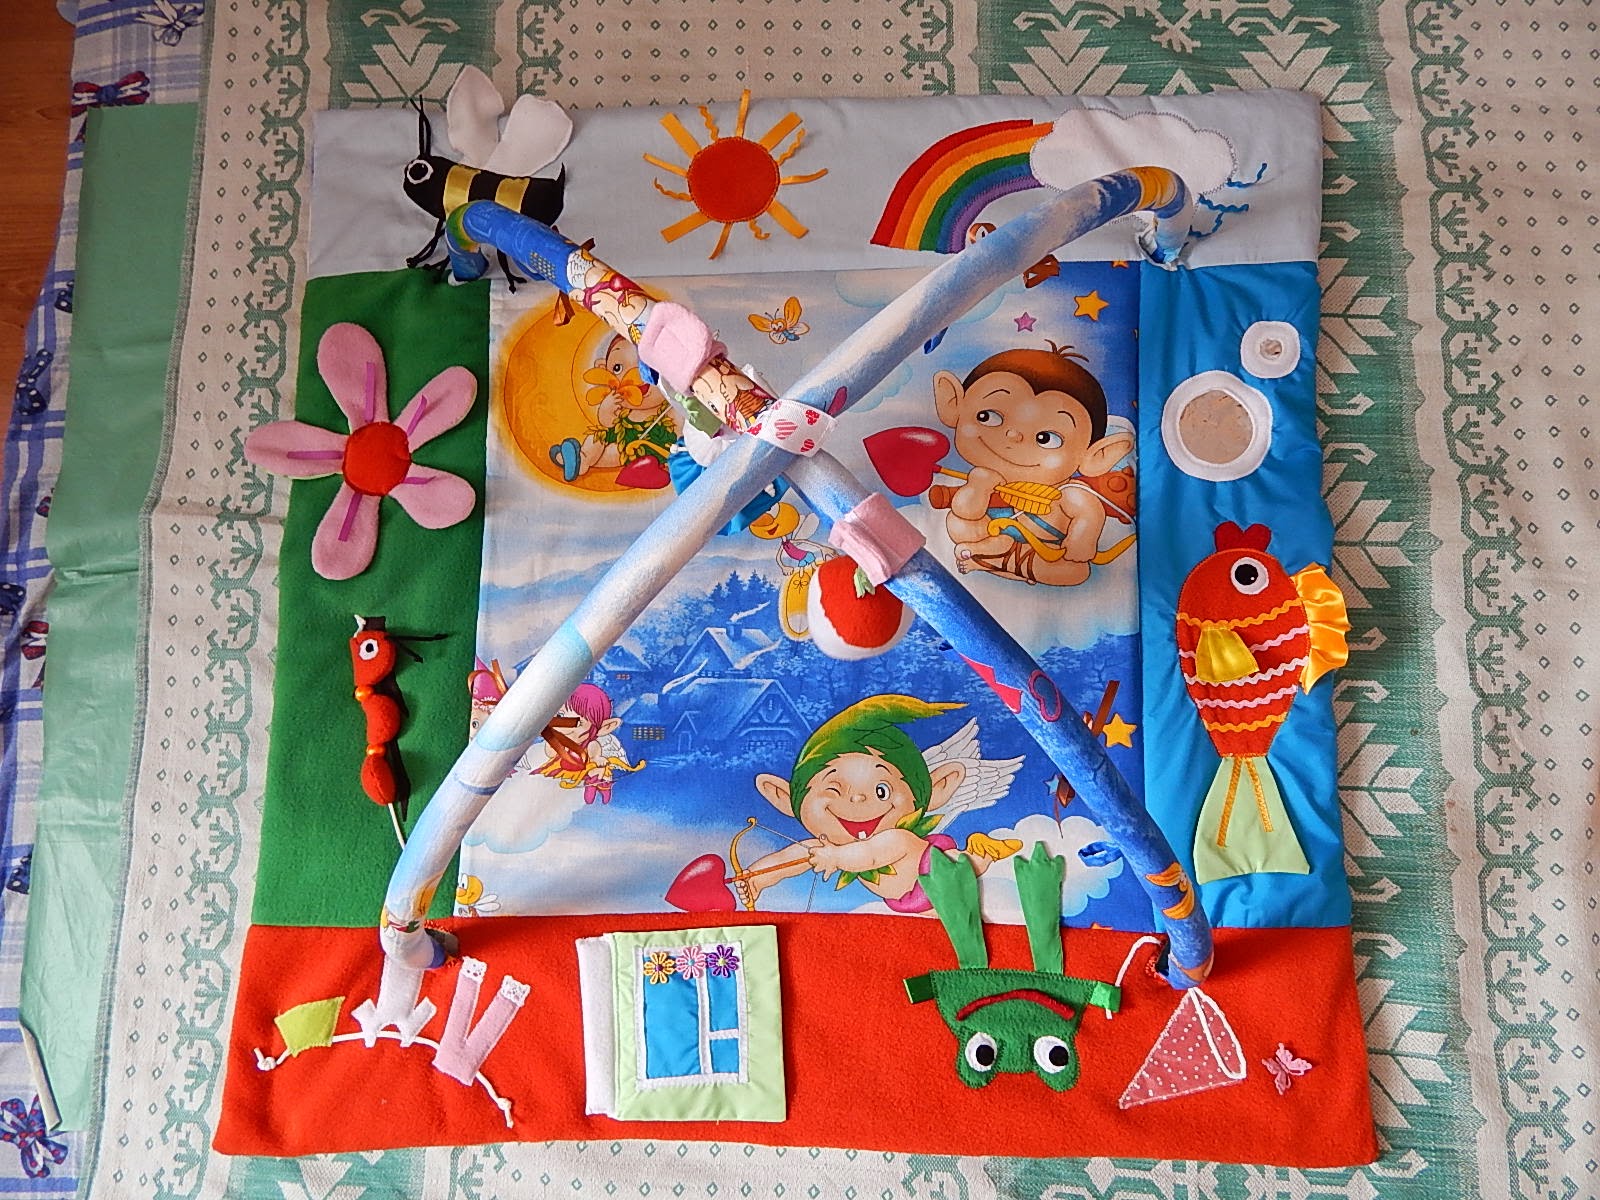 Children's rug with a pattern
 To build a developing mat use the following tools:
Little tools are needed, much more material is needed. The process itself is quite easy and simple.
 Children's rug with a house
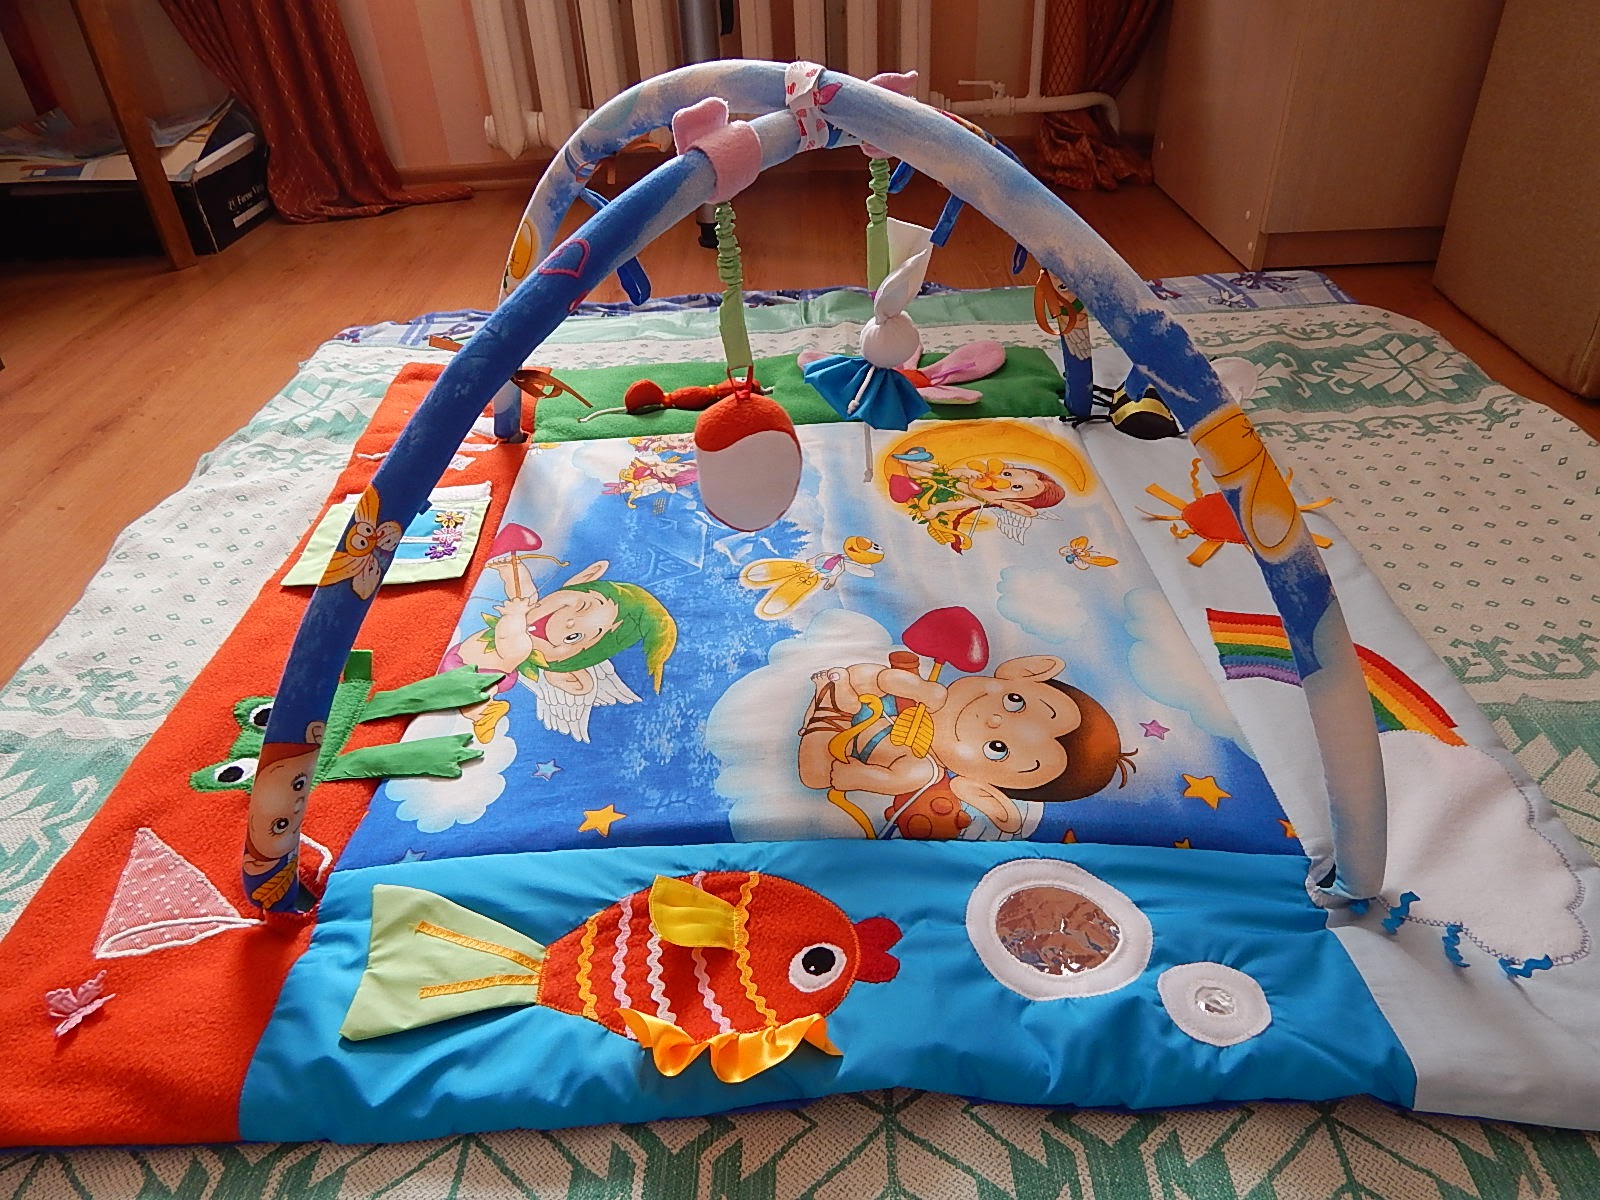
Will help in the manufacture of simple scheme. Draw on paper what the future toy will look like, its shape, size, draw additional details. This will make the job faster and easier. When making a gaming accessory, follow the instructions.
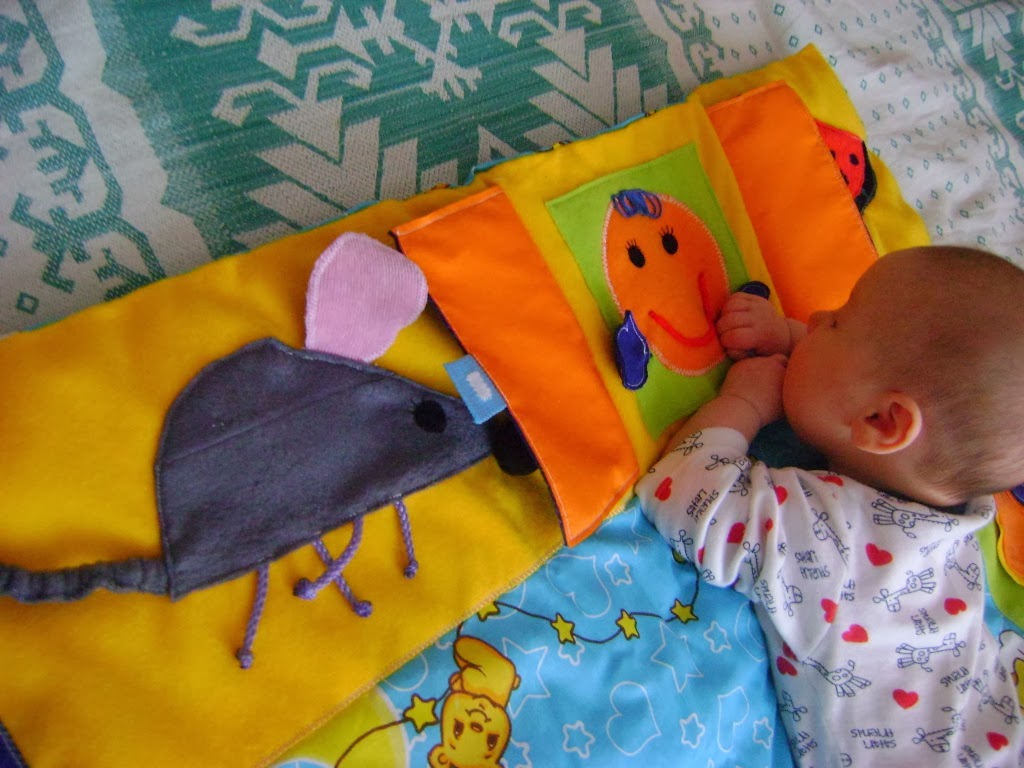 Baby mouse pad
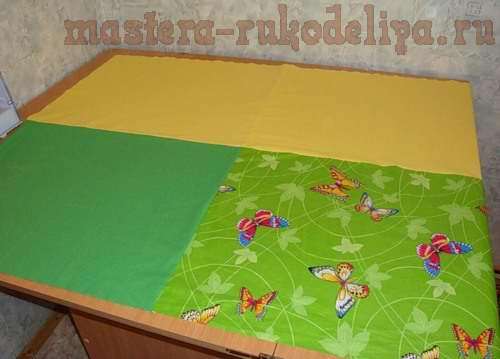
 Using scissors from the main fabric, cut the panel in accordance with the selected parameters. The same is worth doing with the future lining and padding. The resulting elements are arranged with three layers so that the synthetic winterizer is in the middle. Using threads and needles, join the pieces into one whole base. The edges are processed by overlock. To do this, you can take the edging or just bend them.
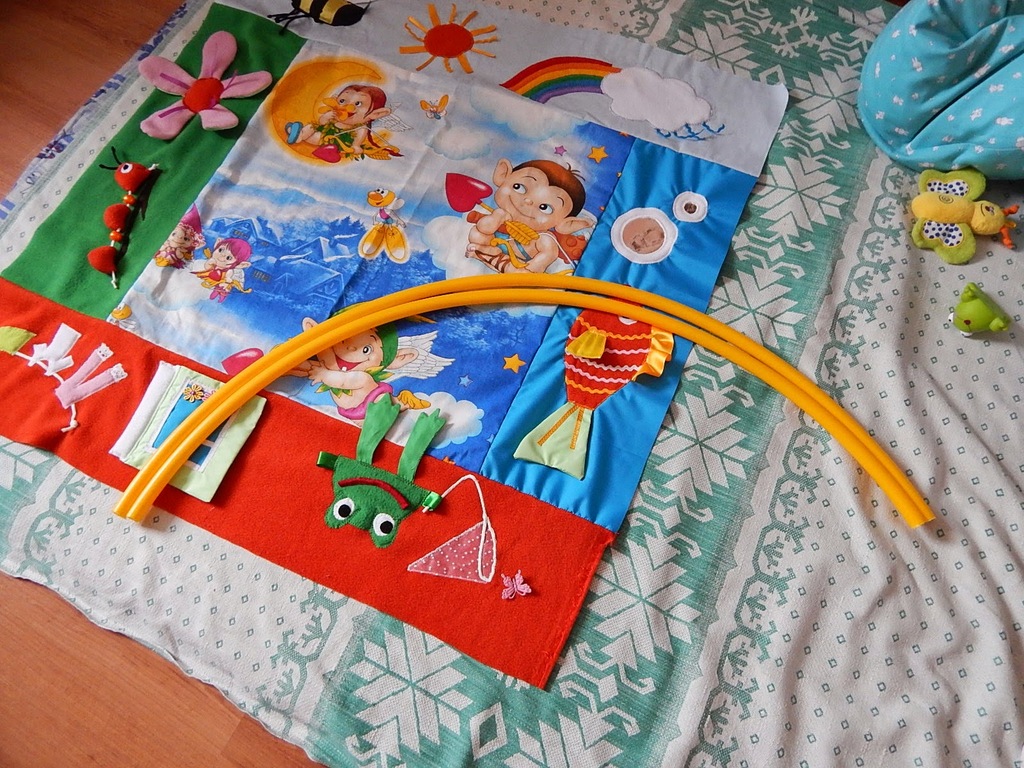
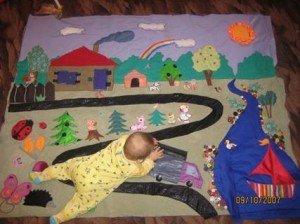
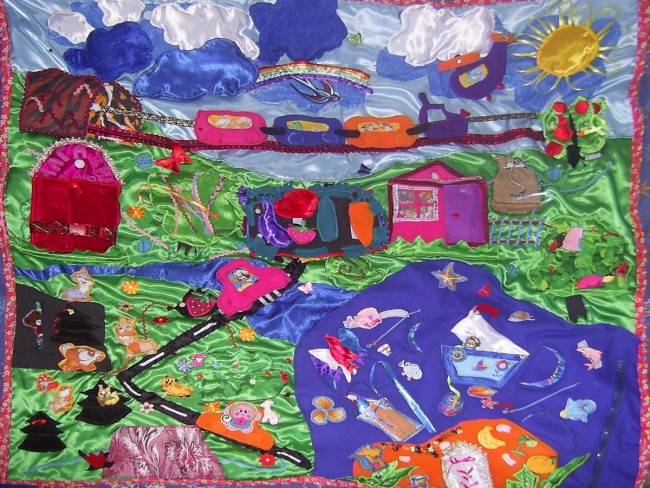
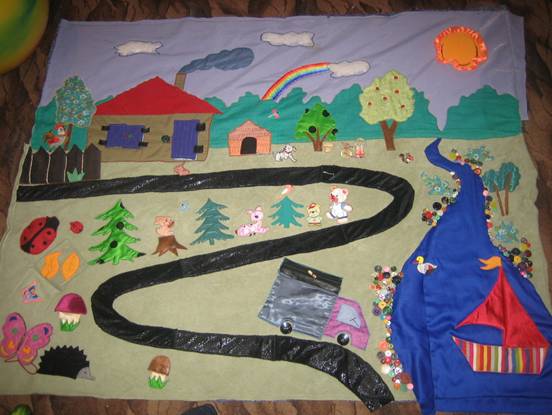
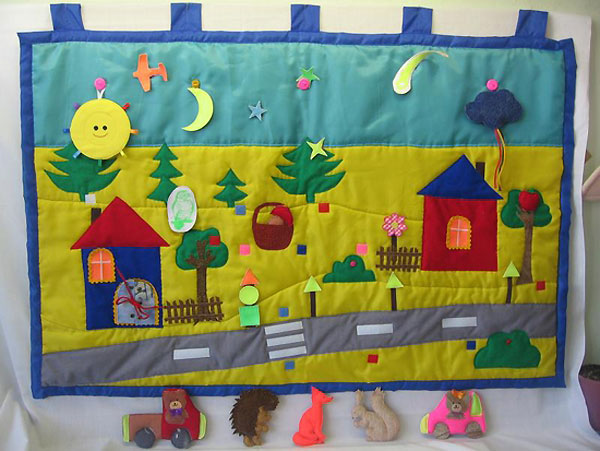
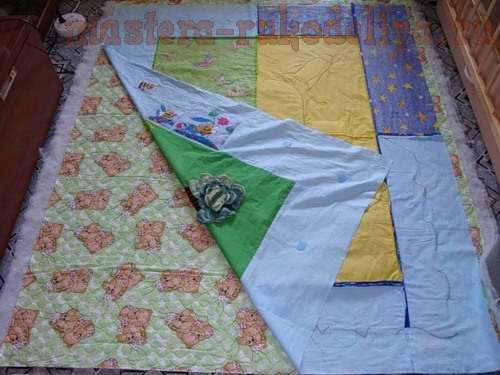
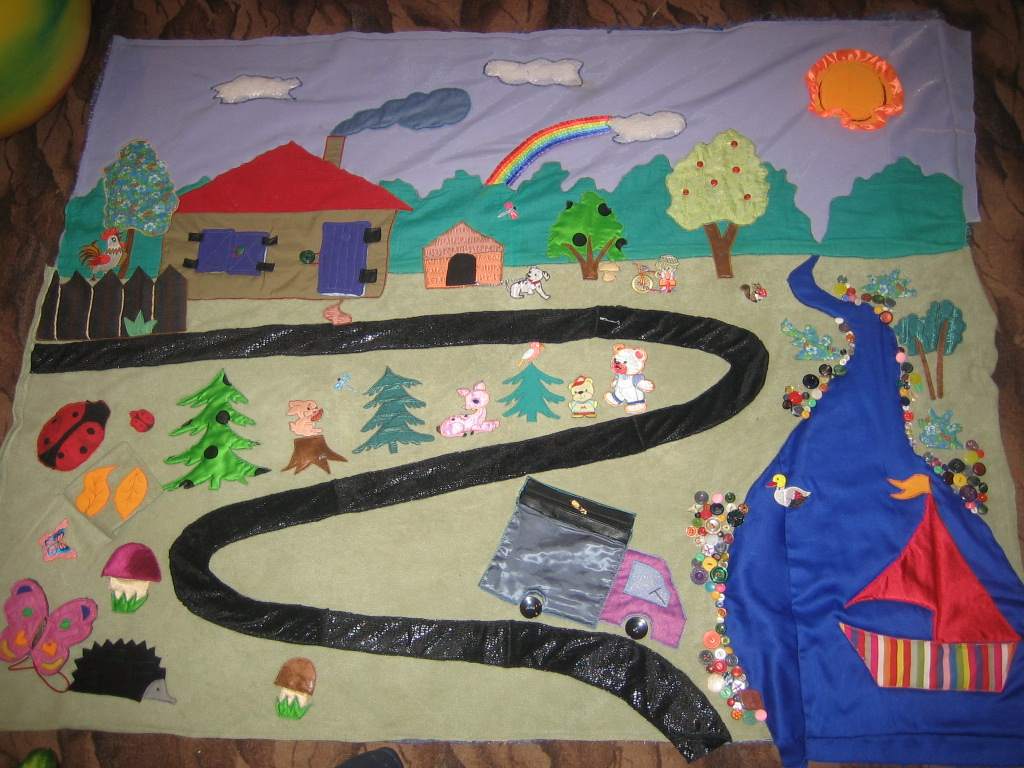 Children's rug with the road and the river
 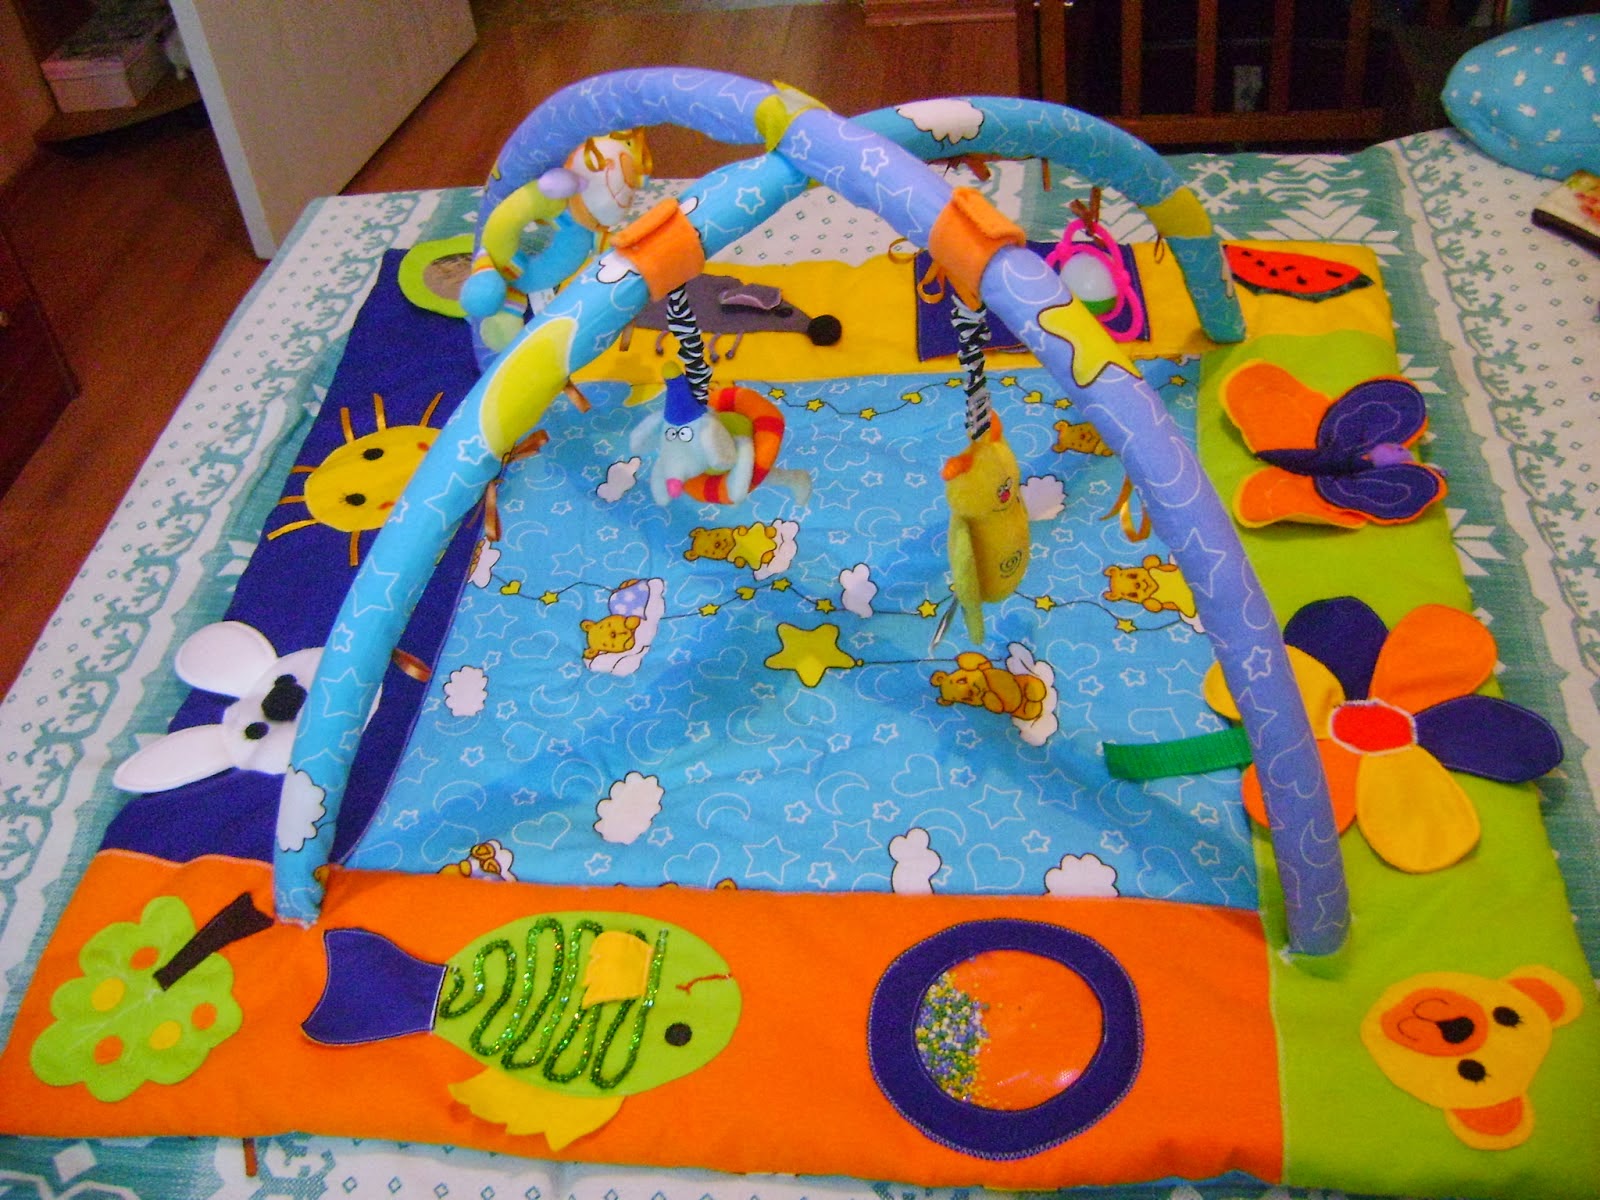 Children's developing rug with fish
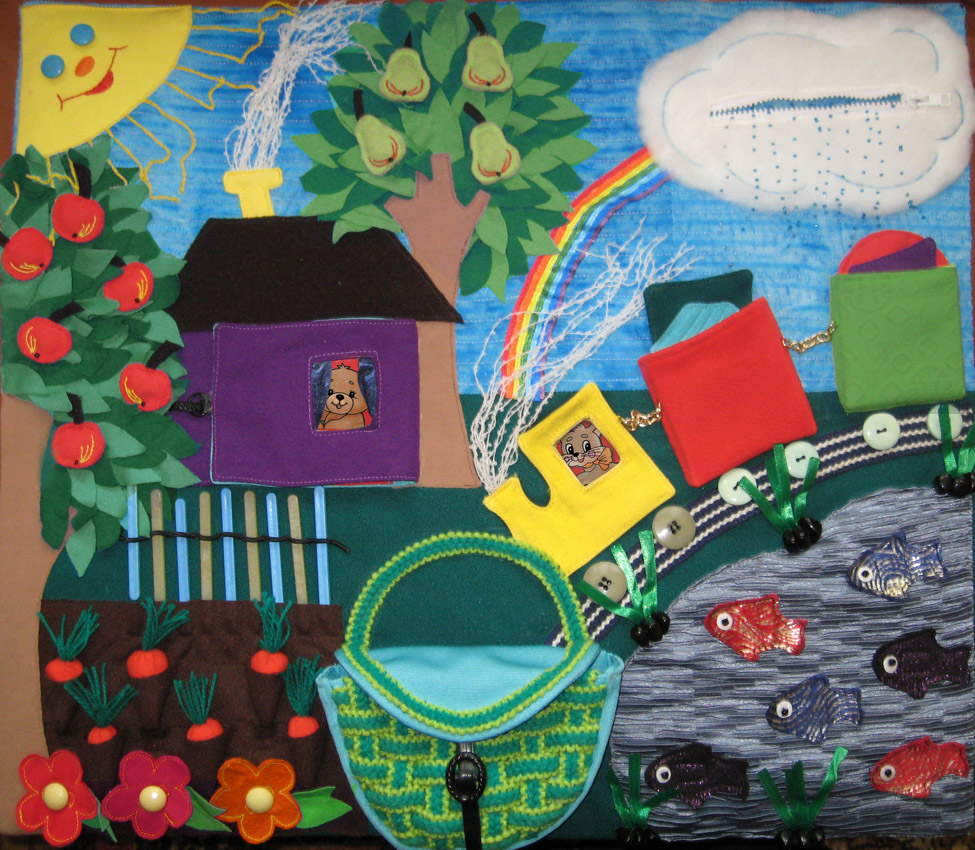
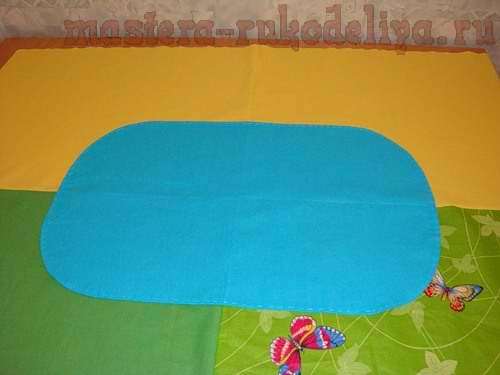
 When the basis will be finished, on it begin to recreate the playing field. It has already been noted that before starting work, a sketch should be made of how the product will look in the future. You can place in this area any items, a flower bed with flowers, a forest, a river, cars and so on will follow the road. Turn on the fantasy and remember about the hobbies and interests of the child. From the fabric should be cut shapes of the desired color and size. After production, they are fixed to the base. First sew everything manually, then use a sewing machine. Some parts can be attached to the base with a soft adhesive composition - non-woven fabric. It is easier and more convenient to work with him.
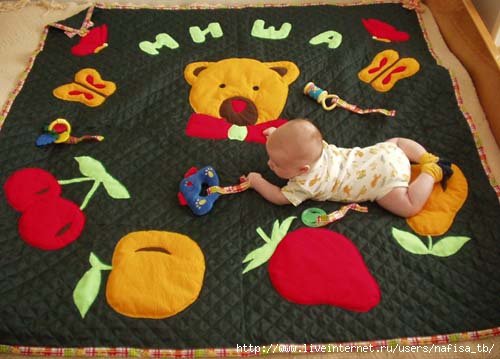
 Children's rug for games and development
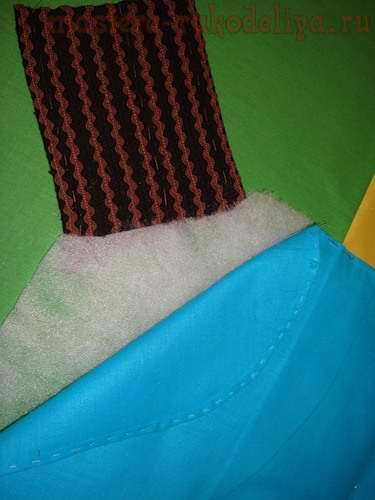
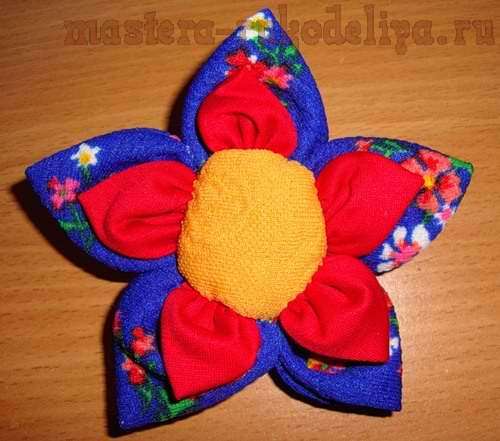
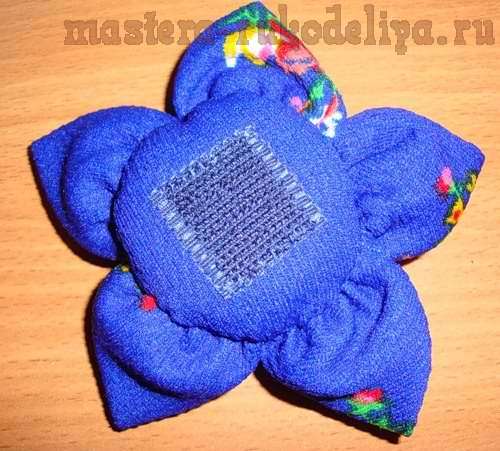
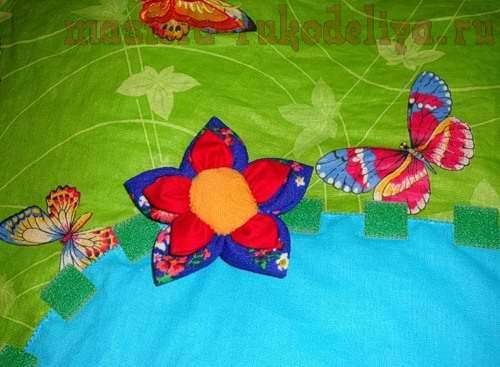
 This stage of work is the most laborious. Flowers, mushrooms, birds from fairy tales and so on can be parts of the game. The boy can build ships, cars or airplanes. After the gaming parts are made, they can be fastened using laces or ribbons attached to buttons or velcro. Thanks to this they will become mobile. They can simply sew. To add volume, fill them with padding polyester.
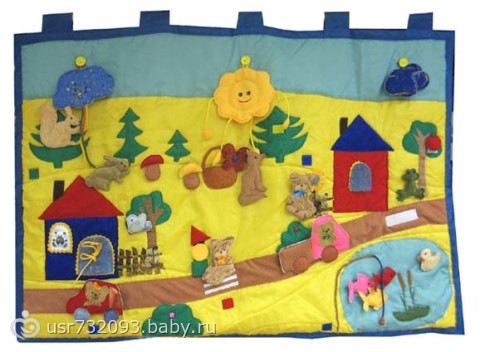
 Bright children's developing rug
 Place the prepared parts on the base as shown in the sketch. Each composition must be fully completed. Arrange objects in the right places, securely fasten them. Then you need to check how firmly everything is fixed, so that during the game nothing falls off, or the crumb of not tear something off.
 Kids rug
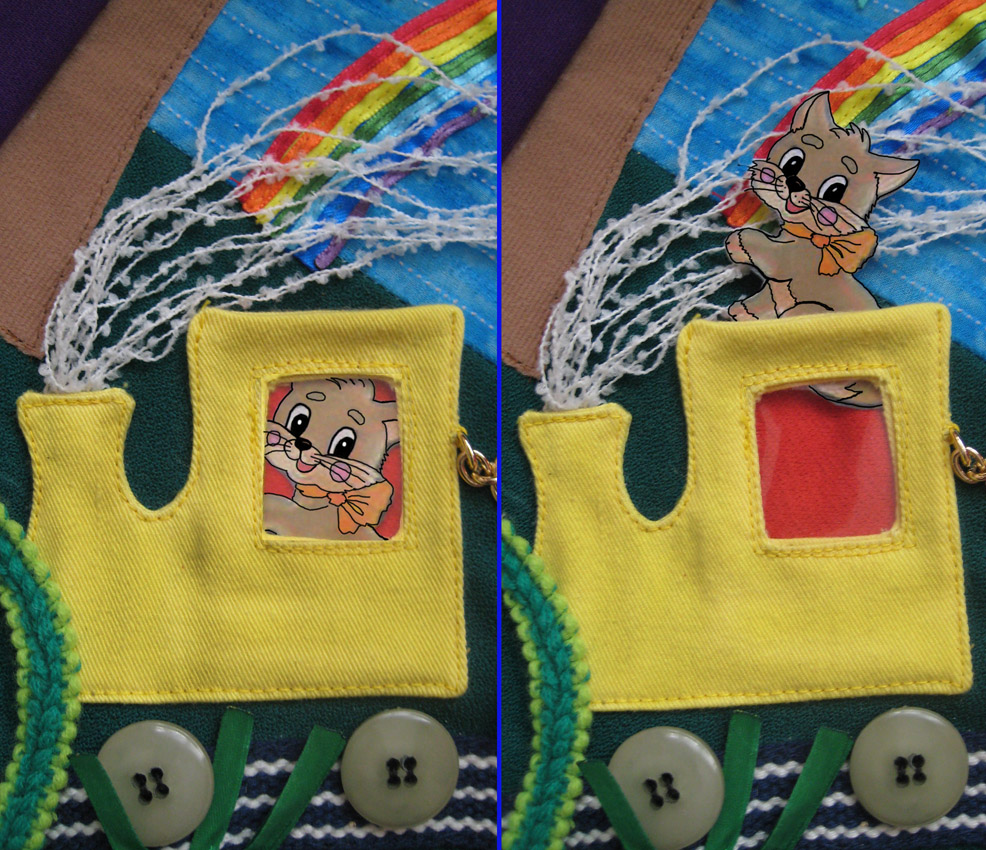
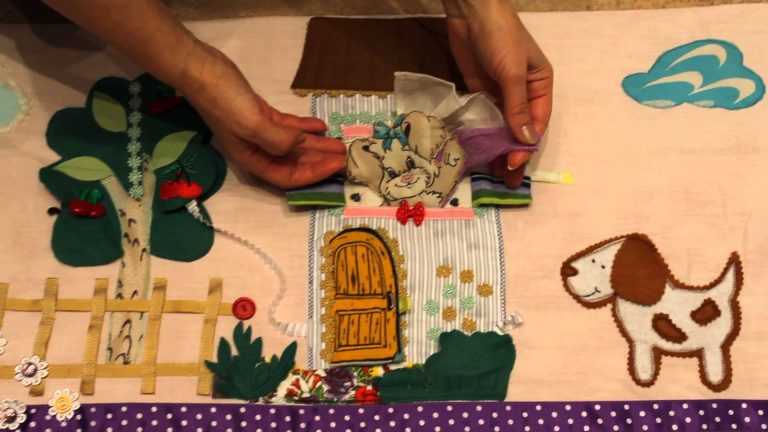
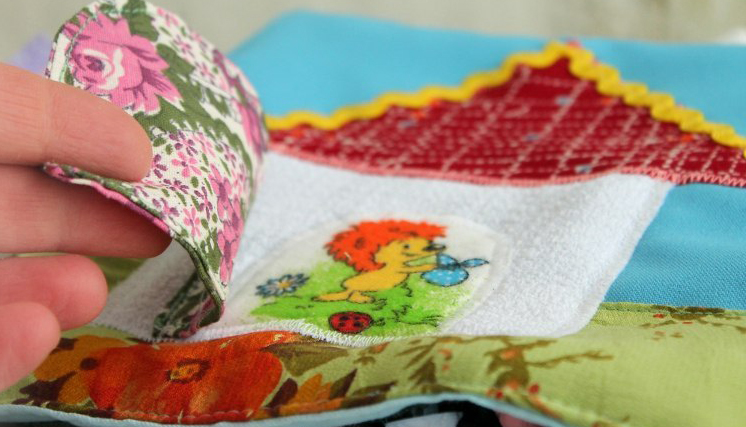
 It has already been noted that as a decor one can build various figures from fabric or other raw materials. Make a craft that can move along a special fixed cord. If there is a house on the canvas, build windows and doors that will open so the fairy-tale characters can go inside.
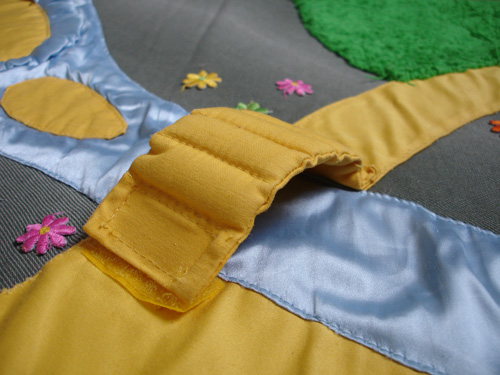
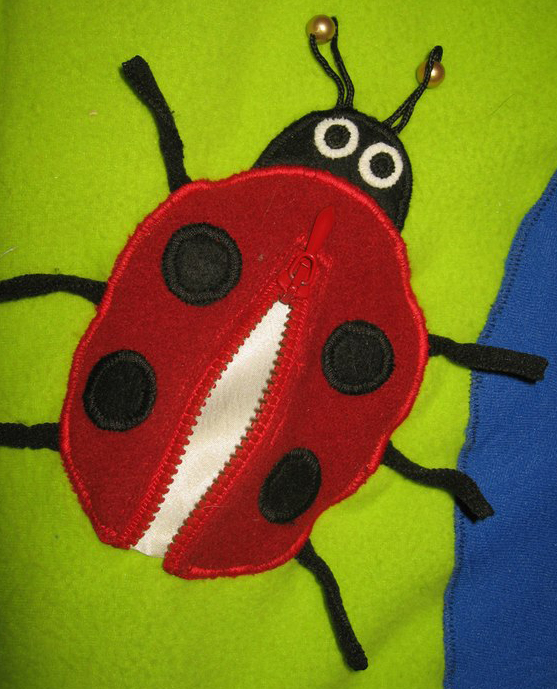
For small objects make pockets, closed with a zipper. Buttons on a lace or small beads will be an excellent addition. It is important that they are of different colors, and the child can move them.
 Children's rug with pictures
 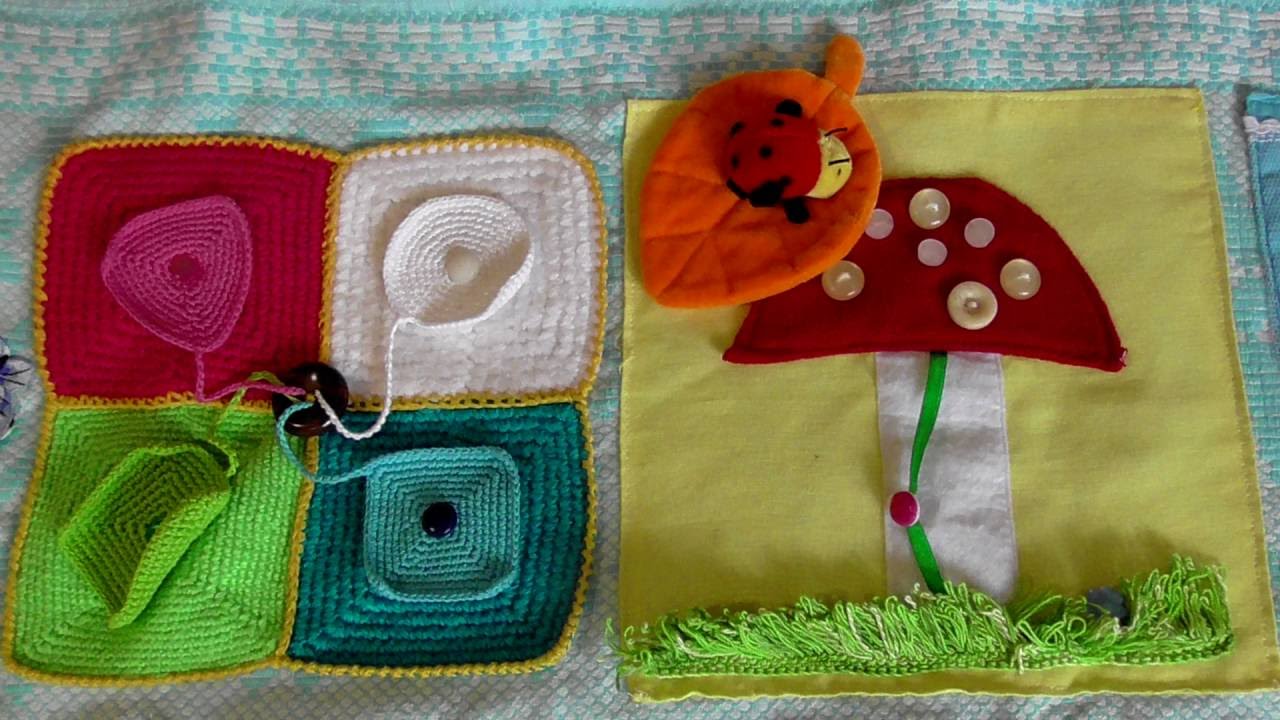 Children's developing rug
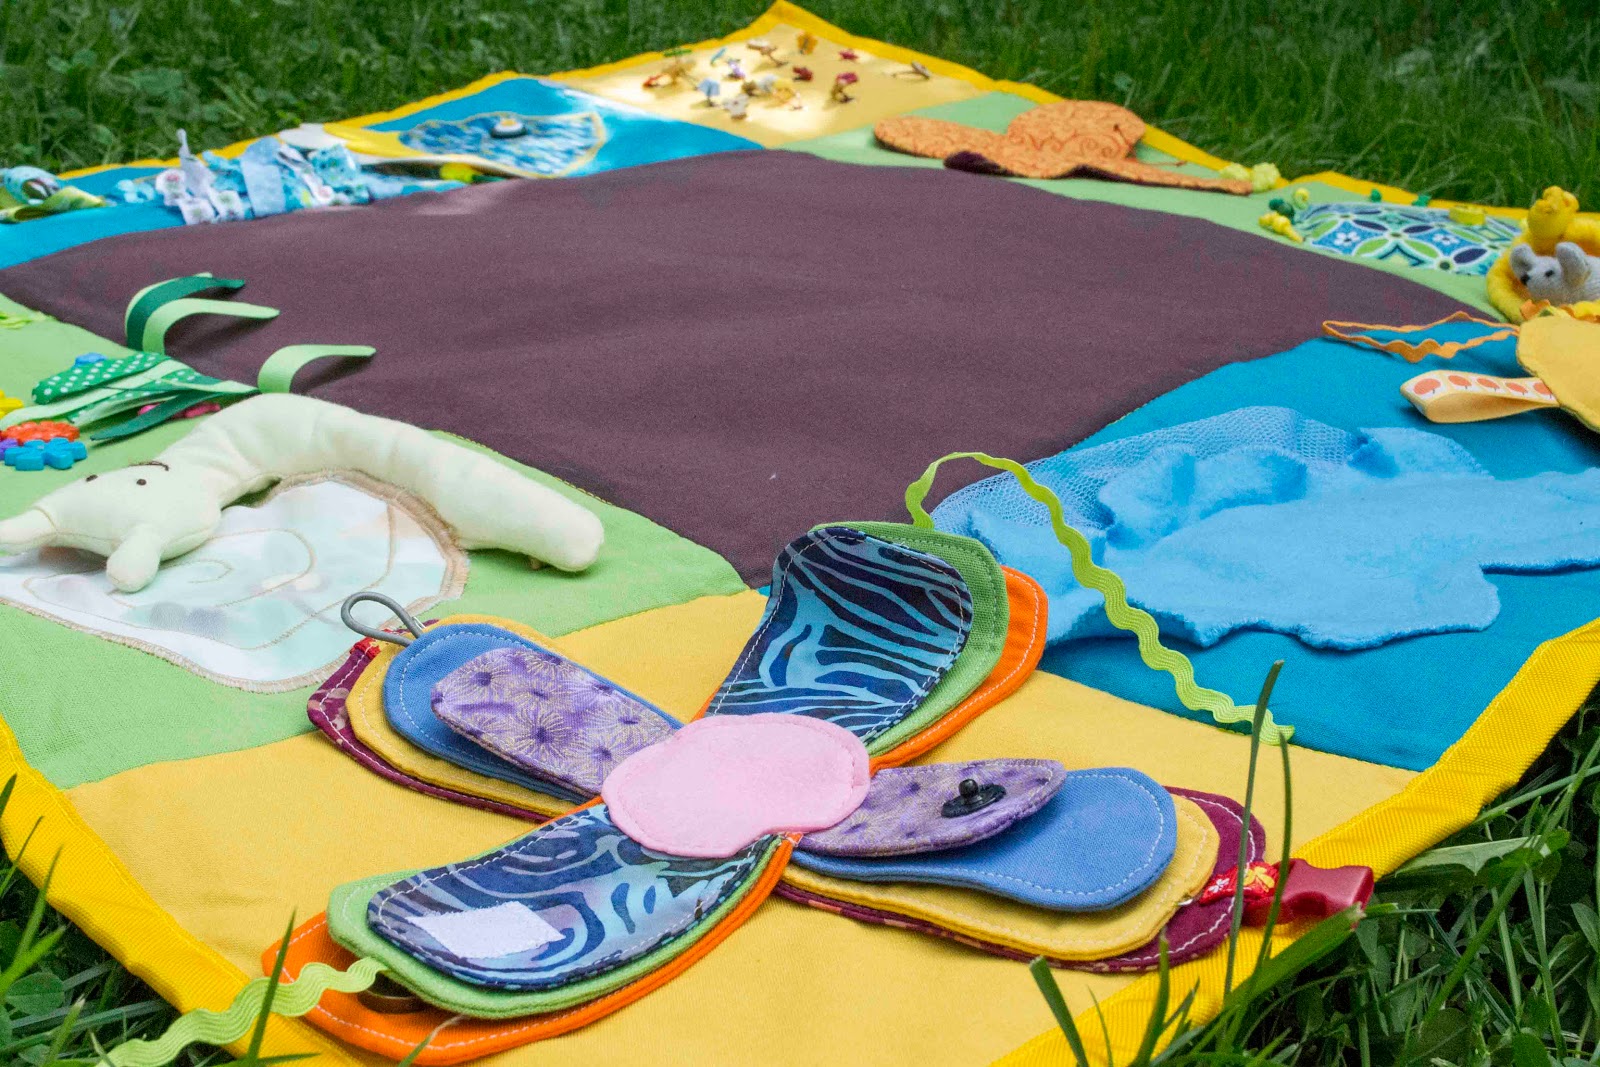
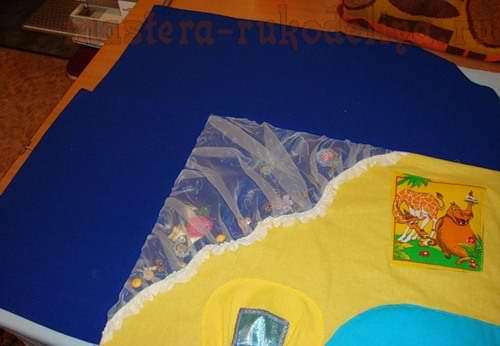
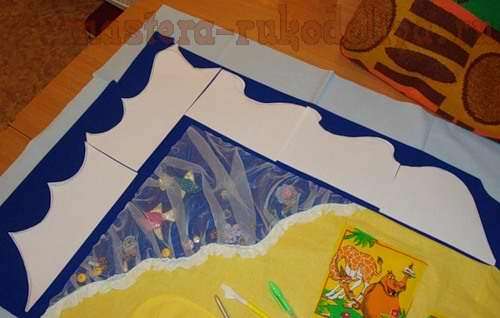
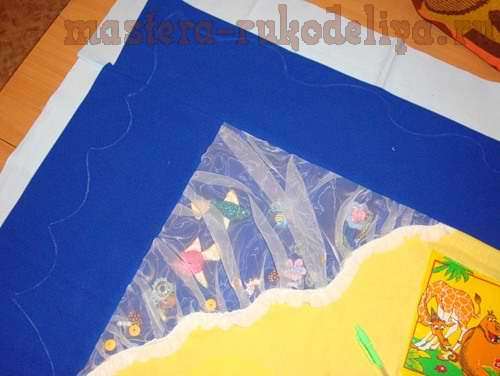
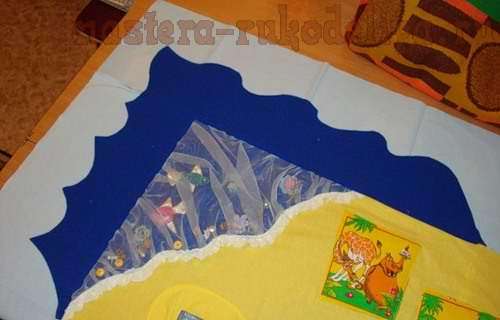
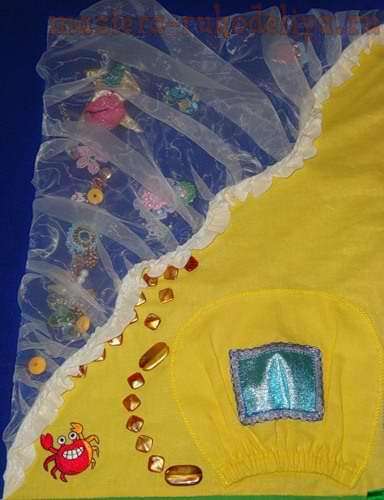
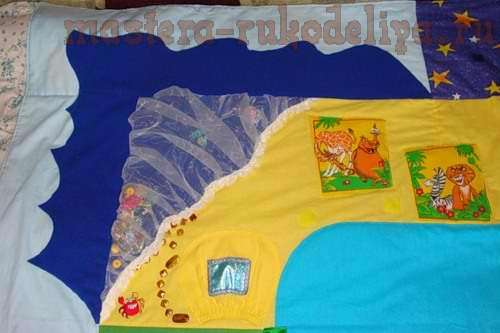
 In addition to houses and machines, you can make various animals. If you decide to place a lake on the canvas, make it out of polyethylene. It must be transparent. Can be replaced with organza. Under the polyethylene place the fish. For the construction of the lake itself, use a fleece fabric of a suitable shade. Developing a rug that you make your own hands, will be able to reflect your ideas and fantasies, and the crumbs will deliver a large portion of positive emotions, fun and joy. Especially if it becomes a reflection of the interests and hobbies of the little ones. Game and development will take place simultaneously.
Many parents find this accessory very useful. In addition, while the toddler is busy with bright parts of the canvas, mom and dad have time to do household chores.

Every mother dreams that her child would develop properly, be smart, inquisitive and capable. To do this, now the industry produces a huge number of educational toys. But there is nothing better than the toys that Mom made herself. These toys include children's developing rug, with their own hands, which is not only easy to make, but also very interesting. The main idea of such a rug is to combine on a small area a variety of different parts, different textures, shapes. For example, doors that fasten and unfasten different ways. In order to attract the attention of the child, the rugs should also be as bright as possible.
Suitable for children of different ages - from birth to 5-6 years old:
Children from birth to six months develop their fine motor skills on the mat. Feeling small details of different textures on the rug, he also develops his tactile ability. The child, trying to reach the toys of interest, develops the coordination of the arms and legs, learns to focus on the objects.
From six months to one year old, the child develops his own logic and thinking, unbuttoning and buttoning the zippers, buttons, pressing buttons to get sound.
Older children are already playing role-playing games on a developing mat. After all, all the characters on the rug are easily detached and can move either in the house or in the boat, depending on the fantasy. If the child has already grown enough and interest in the mat is minimal, then it can be used as a rug for playing games on the floor.

Here is described in detail how to make a developing rug with your own hands, the photo of the process will reveal all the secrets as much as possible. The main materials for the manufacture of the rug are:
First you need to create a sketch of the future rug, think about what elements will be on it. Ideal to design a future mat on paper, describing in detail every detail. Then it will be clear how much and what is needed in the course of work, what materials, what size and color, what accessories will be useful in the course of work.
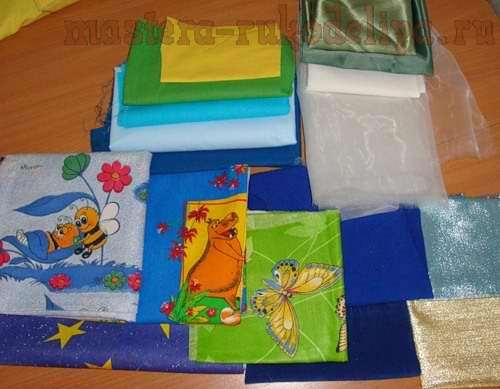
The next very important issue is the choice of fabric. Fabric for trimming the base is better to choose natural. Cotton is ideal for this purpose. Further, for the manufacture of rug elements, it is better to choose different fabrics according to the texture, for the development of a child’s tactile ability. It can be:
Fabric should be varied not only in texture but also in color. It is not necessary to run after the cloth to the store. You can sort out the wardrobe and find things you no longer need.
For the manufacture of the rug base, it is better to use foam rubber, a baby blanket, a synthetic winterizer, so that the child can comfortably lie on it on a cold floor. It is recommended to sew the wrong part of the base out of dense fabric that will not slide, for example, from Jeans.
Any mother can create such a bright and colorful rug to her baby. Moreover, this is done for the development of their own children. Before you make a developing rug do it yourself, the video will be useful to see any mother-needlewoman for inspiration and possibly for new ideas.
Every mommy wants her baby to be an intelligent and developed child. Therefore, today toys and aids that speed up the cognition of the world around are very popular. They are expensive. And this is a reason for the masters to try to make all the same developing rug for children with their own hands.
This is the best toy for kids from zero to one year, performing several functions - massage, sensory and developing. Any mother can master the technique of making a play mat for kids. Here are a few useful tipsthat will help with this.
What is a developing mat? This is a decorative panel of colorful pieces of fabric. It is used to actively play with the child. Ready-made patterns can be taken on specialized blogs. And, having seen a master class, it is not at all difficult to independently sew such a children's rug. It will be relevant throughout the first year of the child's life.
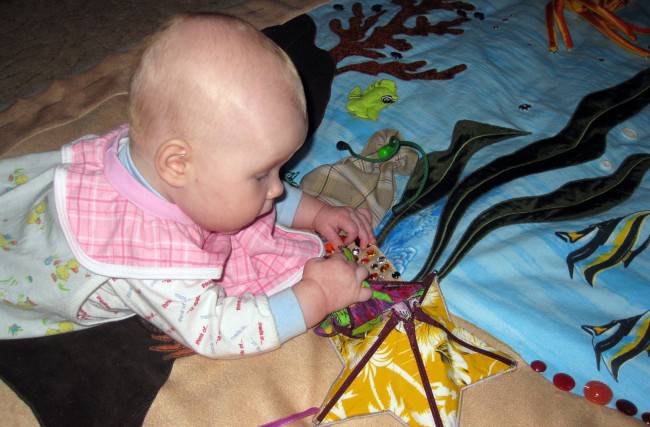
At the age of 2-3 months, the baby can be laid on the tummy. This posture allows you to study the multicolored decor, and the child will concentrate his eyes on any one color. This is very useful exercise for newborns. Catching color, the baby tries to fix the head in a raised position, and this trains the muscles of the neck.
A little later, lying on his back, a boy or girl will reach for some interesting object on the mat, developing coordination of movements. Hands and feet act simultaneously, and the baby first turns over, then crawls to it, touches it with his hands and continues to develop his interest in bright images.
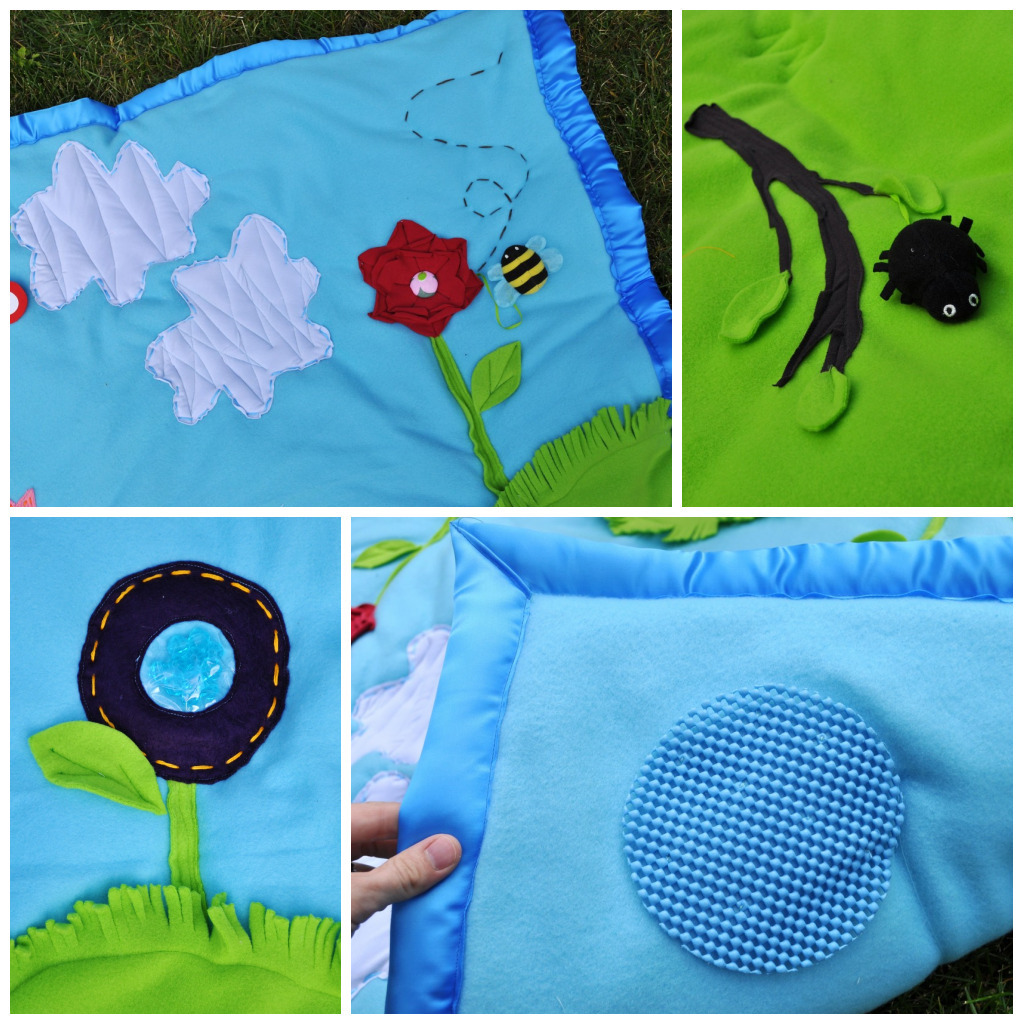
For newborns, such toys are the first steps towards mastering the world. Soft floor bright and voluminous mats become the basis of full development. Feeling different textures of tissues, children learn the technique of sensory perception. Therefore, it is so important to use soft and fleecy fabrics, smooth and firm, cool summer and winter wool for sewing play mats for children.
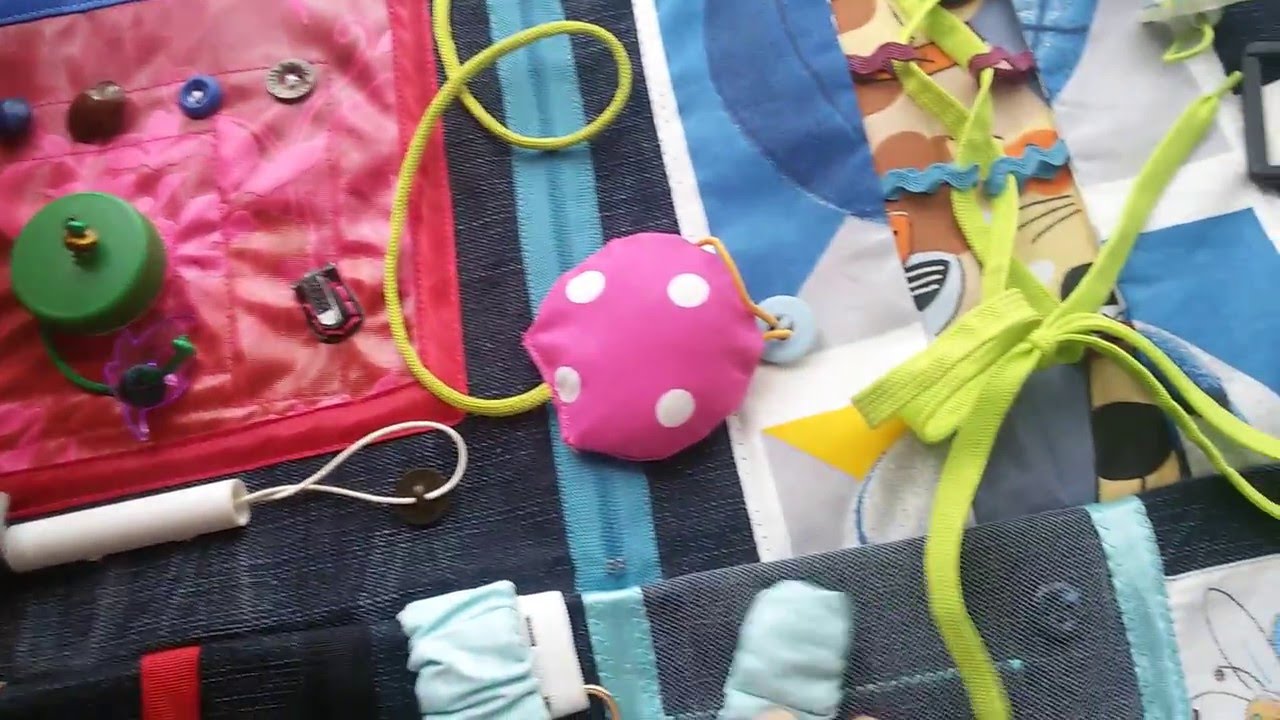
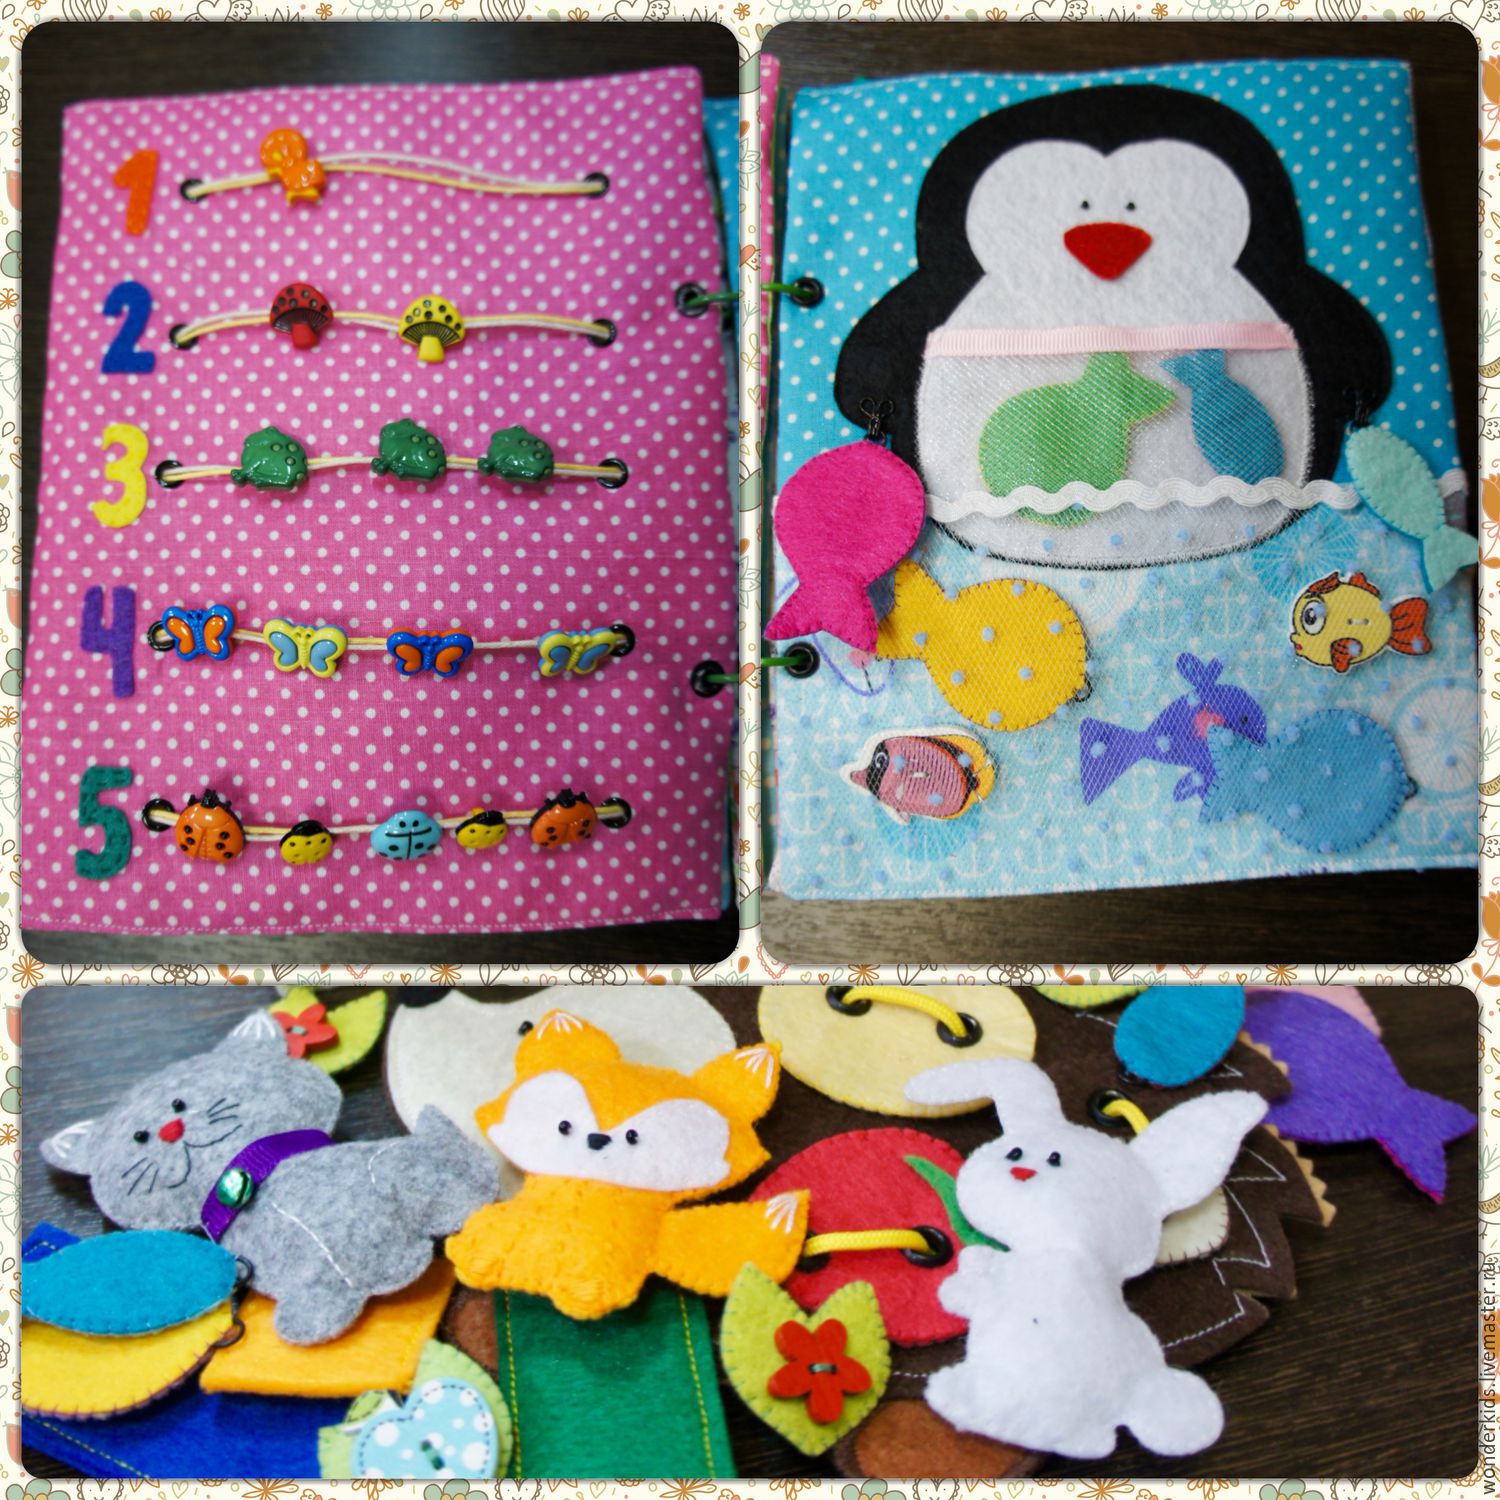
On soft bedding, you can sew any items - buttons, zippers, fringe and lacing. Separate elements can be voluminous, for which a synthetic winterizer is used, removable, trimmed and even musical. Well, if some of them will be removed, then the mat will look like a puzzle that you need to assemble, straining your imagination.
Buttons for motor development
Such a subject will allow to develop not only fine motor skills, but also sensory perception. And it is responsible for the development of the child’s memory, hearing, and expansion of its linguistic base. When the kid grows up a little, he will be interested in unbuttoning buttons and zippers, removing small toys from the pockets. Acting in this way, he develops memory, learns to think and achieve the first goals. And that's good too.
Closer to the year, boys or girls usually lose interest in such activities. But this does not mean that you will have to forget about the floor mat. It can be spread and poured on him other toys. In this case, the product will be used for its intended purpose.
Before you begin to sew a rug for children, it is necessary to determine its purpose. The described products are different. On sale you can find a ready-made massage mat, orthopedic for legs and floor developing.
Rug "Polyanka"
Any massage mat is a good path for the prevention of flatfoot. Making it yourself is not so difficult. Here is the simplest example of solving a problem. As a basis, you can take the rubber floor mat for the bathroom. His back side need to sheathe oilcloth, and inside to lay the fabric. Then everything sewn will hold very tight.
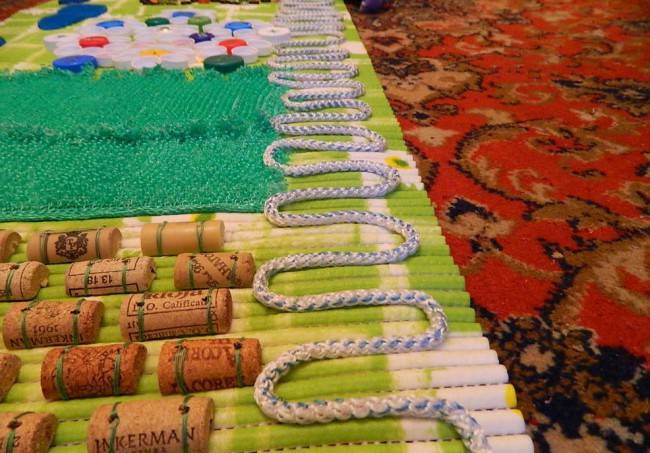
Corks from wine and champagne, cut in half, voluminous large and small buttons, ripped washcloths, clotheslines, soles from bath slate or ready-made massage traces will be suitable as massage elements. A butterfly can be laid out with buttons, and a tree can be laid out of the halves.Rope imitates clouds, massage insoles - puddles. It will be very interesting to run along such a path, and various textures will massage the feet. The child is simultaneously engaged in the prevention of flatfoot and studies, as a puzzle, three-dimensional drawings. Therefore, a massage rug made with your own hands will delight everyone without exception.
For the manufacture of orthopedic cloth suitable river stones, polypropylene balls, large beads and covers from plastic bottles. Attach them to the base can be different. Covers, for example, are attached with thread and sewed. Two holes are made in the cover of the needle, and it is attached to the fabric, like a regular button. In order to increase the strength of the joints, it is better to use a fishing line instead of threads, and a wool blanket for the base.
Making an orthopedic pebble carpet is also quite simple. As a base fit rubber flooring, which is used in the bathroom. Pebbles are glued to it with universal glue. Pebbles can be placed in any order. The main thing is that they completely cover the entire surface of the rubber.
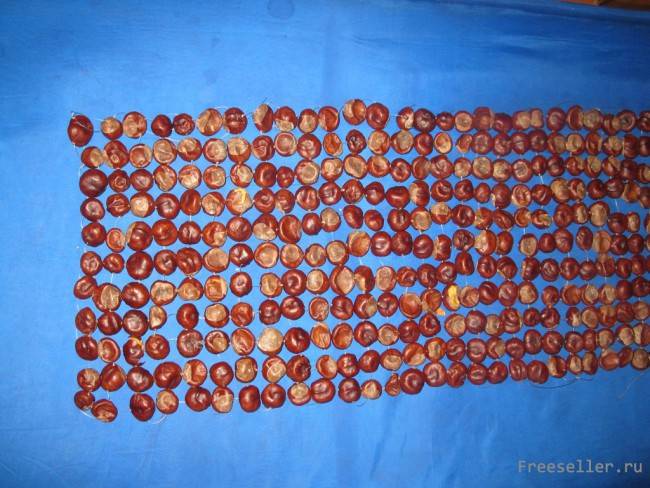
"Massage" chestnuts
A good massage trainer can be made from ordinary fabric. Convex elements are formed from the remnants of different materials. With the help of them balls roll down and sew to the canvas. Make the ball easy. A round pattern is taken, a circle is cut, a cotton wool or synthetic winterizer is placed inside it, as well as some solid pebble. Similar blanks will have to be done a lot, and then they will simply be sewn to the base.
An interesting workshop will tell you how to make a massage orthopedic mat of soft floor tiles, coffee beans, stones for fillers, chips for games or any other similar elements. Small wooden sticks or carpet inserts - all fit for the upcoming work.
There are many ideas that allow you to create your own interesting massage and orthopedic foot mats. The main thing in their manufacture is to understand that there are two models. One preventive, and the second medical. Prevention mats have a softer texture due to the use of padding polyester or cotton. Treatment models should be more rigid and hard. Therefore, in this case, the use of pebbles, plastic caps and coffee beans is justified.
Note! The most important thing in making your own medical benefits is to understand that ready product should not cause pain or swelling of the feet in a child. In the treatment of flatfoot can not be used only massage equipment. Therapy should be comprehensive and combine different methods of elimination of the pathology prescribed by an experienced doctor.
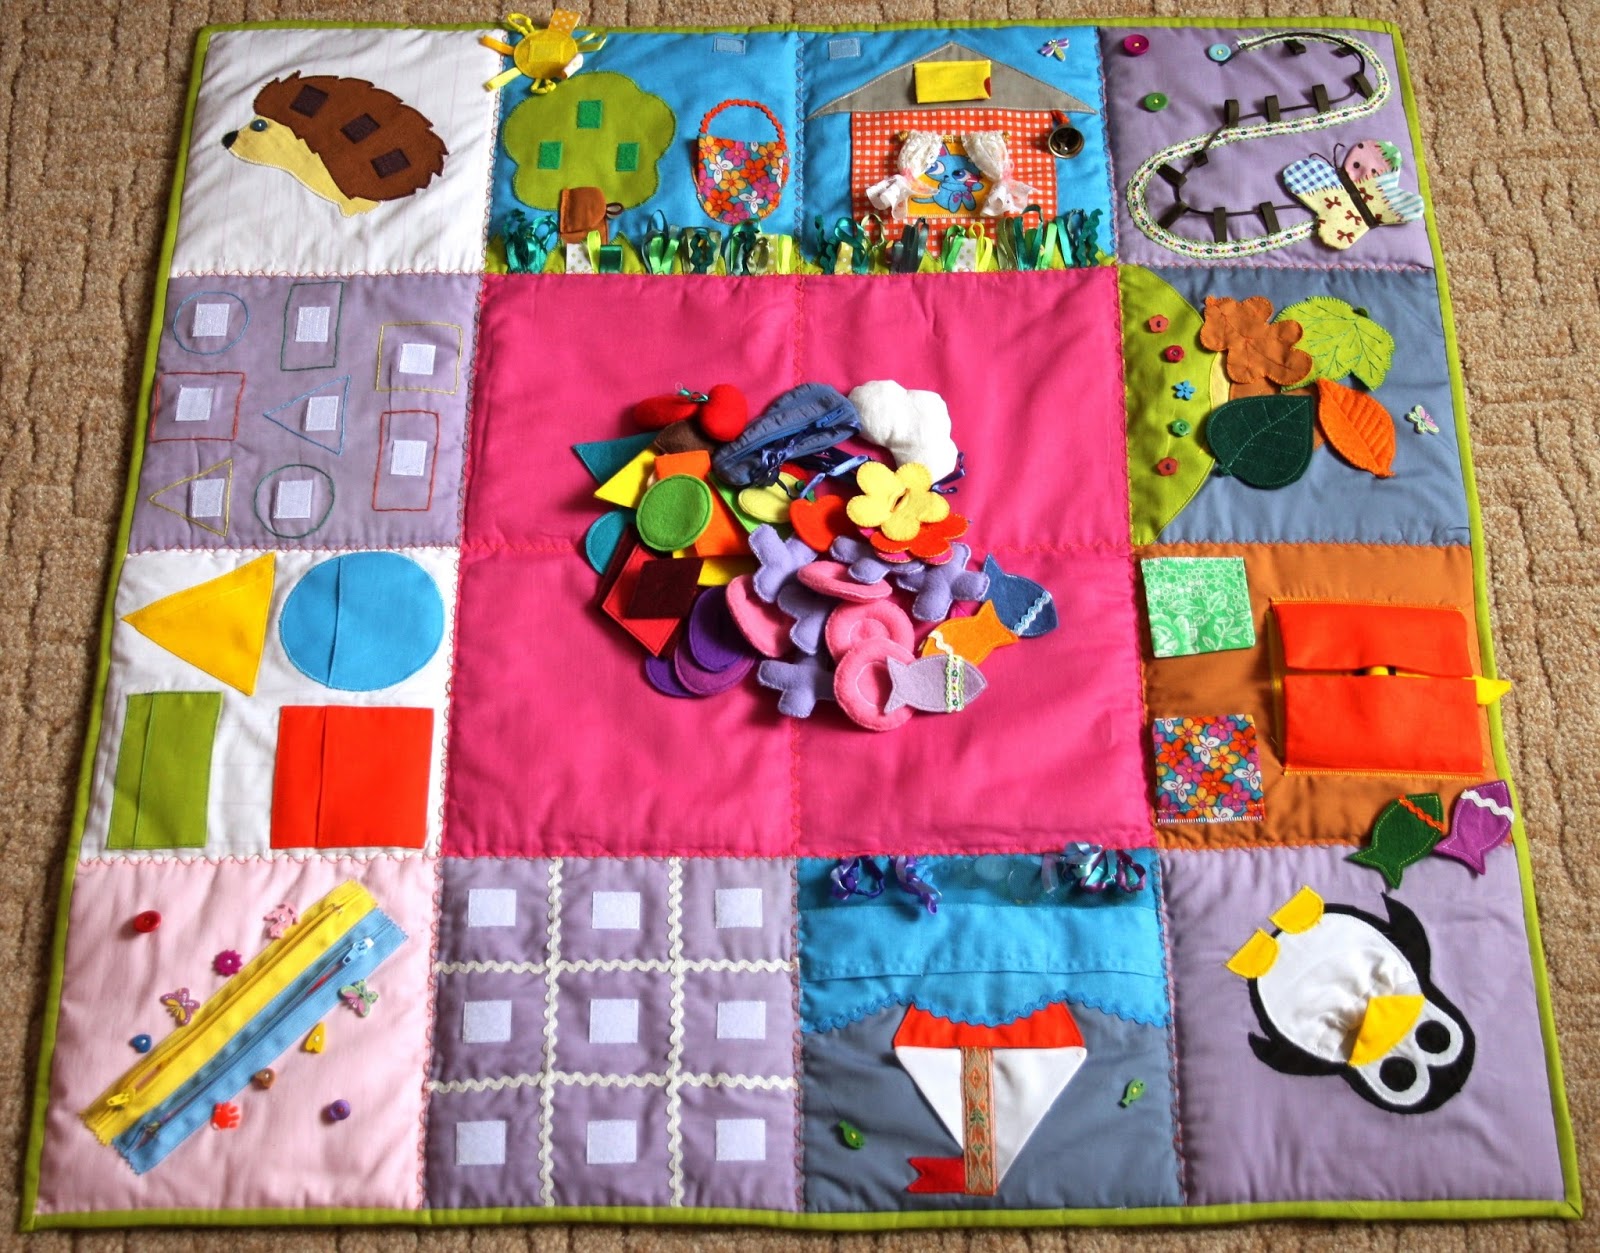
Sensory development
Mats for the development of sensory sensations have other goals and objectives. They are not sewn for the legs, but for the hands, so they should have as many different-sized objects as possible. As a basis the cotton or foam blanket will fit. The main thing is that the fabric is dense and hypoallergenic. Color solution may be different - bright, but not catchy. It is better not to use neon shades for sewing such a product. Children's eyes quickly get tired of them.
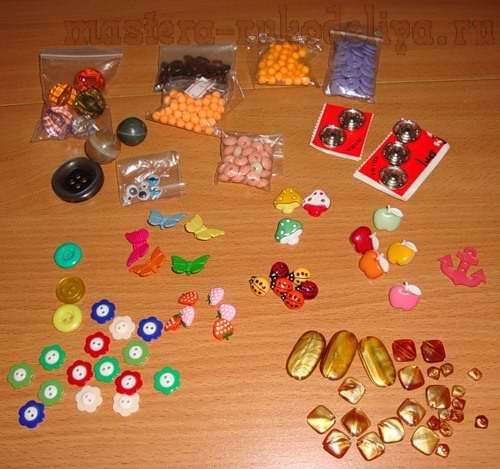
The following materials can be used as volumetric elements:
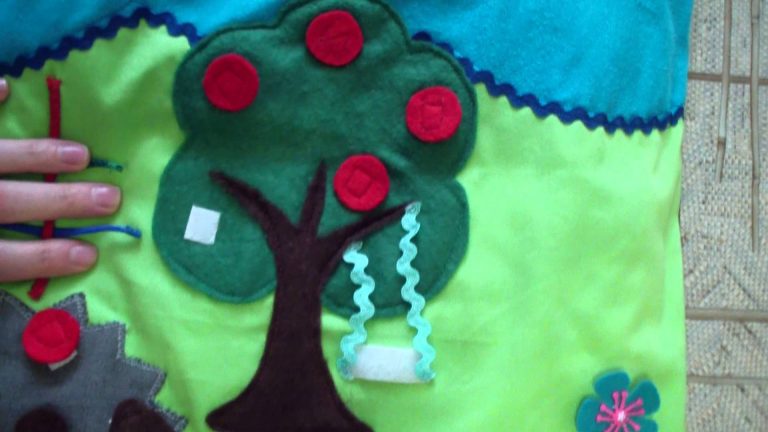
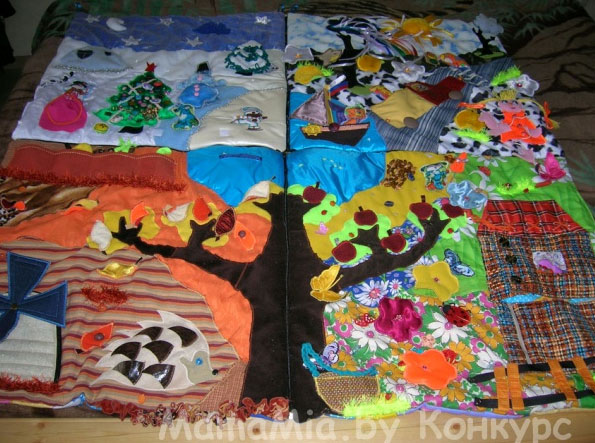
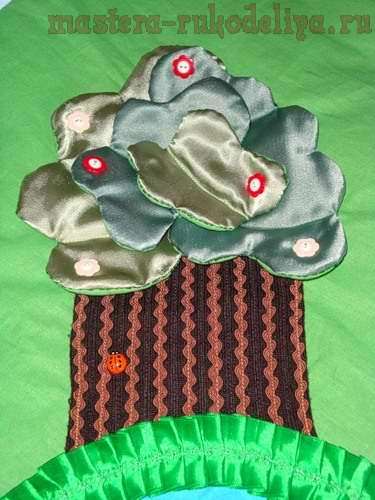
To make it easier to work, it is better to immediately come up with some topic. So it will be easier to make patterns. The easiest way to sew developing mat "seasons". In this case, in the center of the canvas, a branchy tree is created with the help of rags. In the summer, it will be covered with removable foliage, in the winter with a hat of snow, in the fall it will be decorated with gold, and in spring with green buttons-buds.

Excellent motor skills
The central element can be a body of water. Beat him too easy. In winter, the reservoir is covered with snow-white floes, in spring the ice hides, in the summer Tina blooms, and in the fall the foliage falls. The central object by volume should cover all four sectors of the carpet. Then on the sides you can place anything, animals or birds. They can be made from mittens, and then inside it you can put braid, strings, rubber bands, small small objects that are easy to reach and feel.
Note! All these items are better to sew on velcro - so they can be removed and fasten something new. Such a move is also played up in different ways - in the fall a harvest is gathered, withered leaves, sleds are fastened in winter, and flowers are watered in summer.
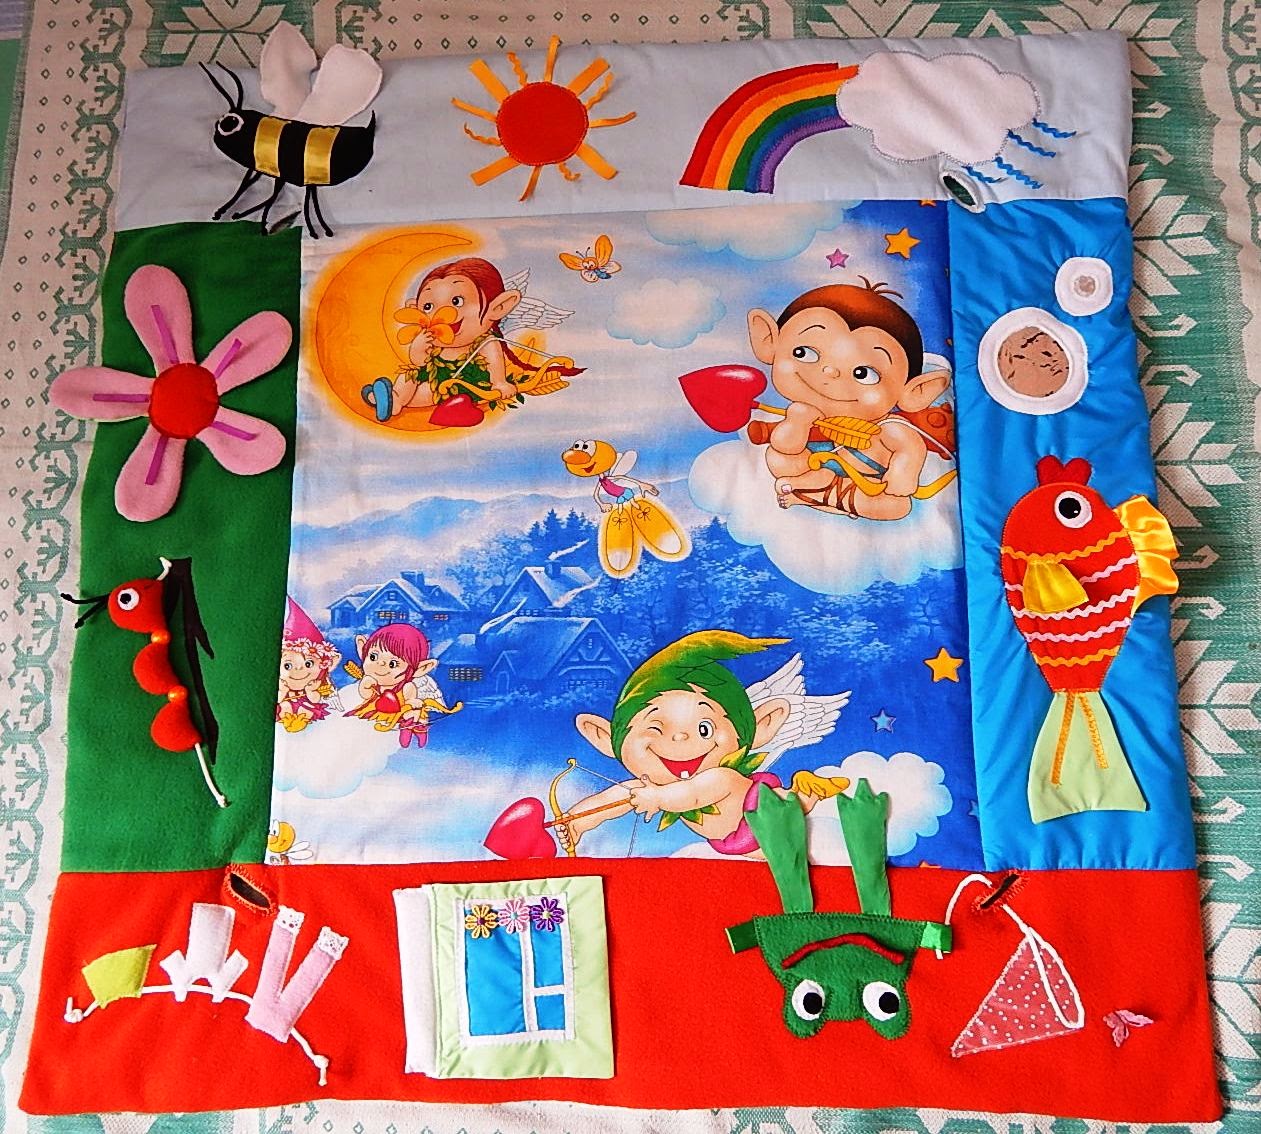
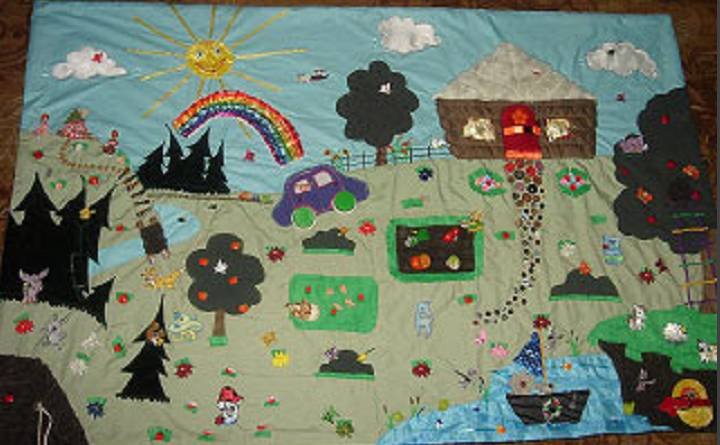
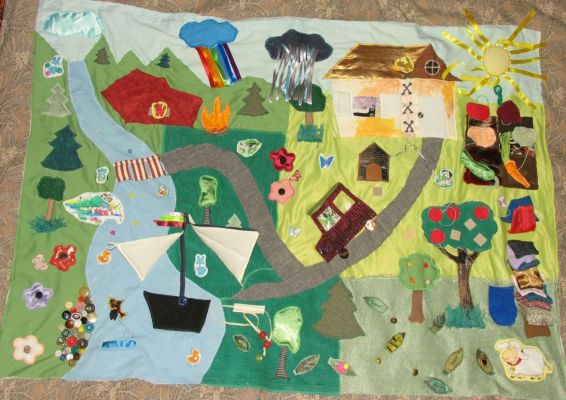
Adventure mats are very popular with children. Their main feature is the ability to move heroes and objects, such as ships, spacecraft, rabbits and dolls. How to organize a game? We outline the route, determine the trajectory of movement, furnish it with central objects - houses, forests, fairy kingdoms and fasten with them sticky mechanisms. In this case, it is necessary to show all his imagination and ingenuity. For example, a rug through a river can be made of foam rubber and thick fabric. The house is best done in the form of a pocket. Butterflies, frogs, dragonflies, sun with rays, grass from the fringe - you can do anything.
For boys it is better to arrange geographic travelers. Choose a typewriter and put it in the mountains and plains, cities and villages. This puzzle should be as close as possible to real objects. That is, the cloud should be like a cloud, the mountains on the mountains. All items are volumetric. On the rug you need to make pockets disguised as geographic objects. They need to store removable elements that could complement the landscape of a particular area.
Weather conditions
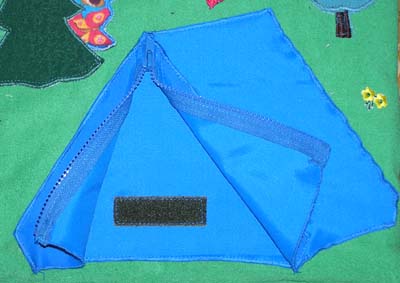
Another one interesting idea - “rug-weather”. The basis is again divided into flat sectors. In one there is a rain of multicolored ribbons, in another sector the sun is shining, birds are flying, flowers are blooming, and ladybugs are crawling. The moon and the stars, the tourist's tent and fire from the fire can appear on the rug.
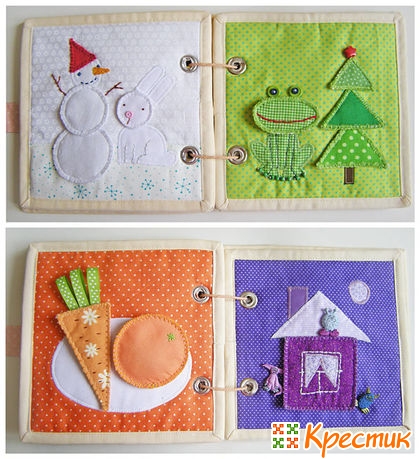
Developing children using mixed rugs is very easy. There are many themes for their manufacture. This is the wonders of the world, and travels over land, as well as cities of the world. Than older childthe harder the plot. Such benefits are relevant in the period of preparation for school. With them, you can learn the alphabet and prepare for reading. The letters are again hiding in the pocket-houses, and next are depicted objects, symbolizing them. Thus, a watermelon appears next to the letter “A”, a bear and the letter “M” are hiding in the den. In these pockets, you can hide figures or geometric figures. They are attached to the canvas with buttons or buttons, stickies or cords.
Creativity & Hobbies
Lit up the idea to sew a voluminous mat for your child at the time when he will sit and crawl. But since, firstly, I am limited in time (the child also eats the lion’s part), secondly, it’s quite painstaking and tedious work, I decided to create a goal that would spur me on.
The rug consists of 144 parts, which are “balls” of fabric, filled with holofiber, 9 * 16 parts (in the illustration, a rug of a different size and configuration). It will be made of cotton, bright, "children's" colors. In the original manual, which I looked at, it was made of flannel, because it is a soft, pleasant to the touch fabric. For me, the priority is a bright and colorful coloring, so I will proceed from what I have.
Also, in all the variants that I saw, a fringe or a “skirt” is sewn around the perimeter, as in the photo. I do not like it, and the fringe seems dangerous for the child. Therefore, I will simply process the edges with an oblique bake.
I will try to give at least an hour a day for sewing, so as not to delay the manufacture for a very long time. I will try to post regularly photos of various stages.
Well, for someone, perhaps it could become some kind of MC for making such carpets here, although I don’t hide it, on YouTube a lot of video lessons on their sewing (I actually took the idea from there.)
Rug sewn.
Time, desire, money.
The child has a great educational toy, I have a feeling of satisfaction from the creative process.
1. Cuts of bright cotton for the top of the parts - 16 pieces of 50x50 cm.
2. Cut durable cotton no matter what color - such size to cut 144 square 11x11 cm.
3. The cut of beautiful, but not too easily cotton 90x160 cm.
4. Oblique inlay to the color of the cut from paragraph 3 - 5 meters.
5. Strong thread for stitching parts.
6. Hollow Fiber for Stuffing
* I already ordered some of the parts, but there was a problem with the delivery, so I do not know when I will receive them and I can proceed. As soon as something clears up, I will set the deadlines for the stages.
1. Decoupling. Never, never, never be lazy and do not miss this stage when working with 100% natural fabric. It always shrinks during the first wash, so that a surprise can await you. I remember how I once was lazy (I love this thing) and sewed my handkerchiefs to my husband just like that. After washing, he had a set of beautiful patches.
So, wash, dry, iron all fabric.
2. We cut the corresponding cuts on one million two hundred eighty eight squares. We cut bright patches into 15x15 cm squares, and a nondescript cut into 11x11 cm squares.
1. We take a couple of squares - one large and one small. With a large one on each side, we make an opposite fold of 2 cm (4 cm of length is “eaten up” like this) and pinned up with a pin.
2. Combine the squares face out (now they are the same size), we pin, sew, leaving a gap for stuffing.
3. We fill, but not too tightly, as the parts "hush" during assembly.
4. Sew the gap.
And so 144 times. You can kill yourself :)
Getting to the most important thing. It is going like this: two parts are put to the front (convex) side to each other, carefully combine one of the sides, we cut as many as three pins so that it is as smooth as possible. Then sew. When a square of 4 parts is assembled, seam allowances are sent in different directions.
When a baby appears in the family, every mother has many questions. The main topic that interests everyone is the problem of proper education. In children's stores you can find many educational and educational games. But you want for your child something original, made by yourself. Try to make a children's mat for development, it will be quite easy to make it with your own hands.
Take a thin foam or baby blanket as a base for a rug. Fabric, which will cover the base, choose natural.
You will need:
- several patches of material;
- scissors, needles, thread;
- applications;
- candy wrappers to create rustling buttons;
- decorative elements (braid, zippers, velcro, rattles, rubber bands, etc.). All accessories for finishing should be safe for the child.
To clearly demonstrate what can happen as a result of your creativity, we offer a selection of photos with different variants of children's educational mats:


A selection of videos will help young mothers who are just starting their way into needlework:
They are easy to come up with. Elements can be filled with sound and rustling components, contain pockets for other toys. The use of zippers, braids, beads and other accessories will help you create original compositions.
How to make a developing rug do it yourself, it has already been discussed above. Now a little information on how to decorate it. What are the developing elements suitable for its manufacture.
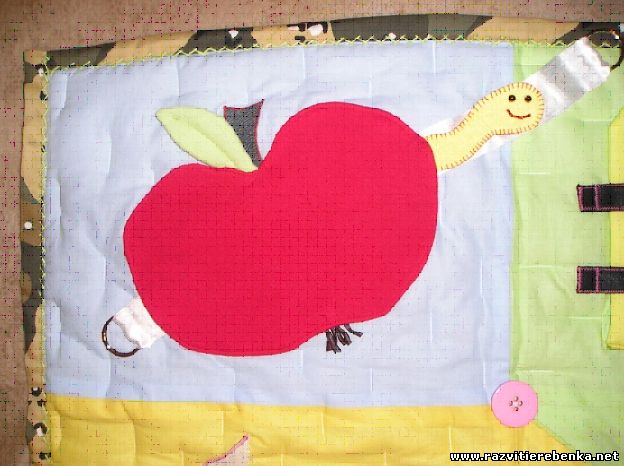
4. "Apple with a worm." Attached in such a way that you can hide it in an apple.
We prepare materials of different texture, finishing elements, threads, needles and a sewing machine.
We make a rug from four squares, which we stitch together.
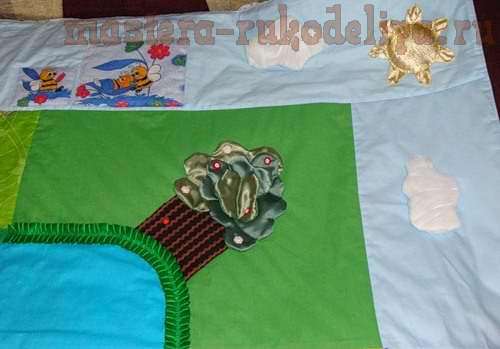
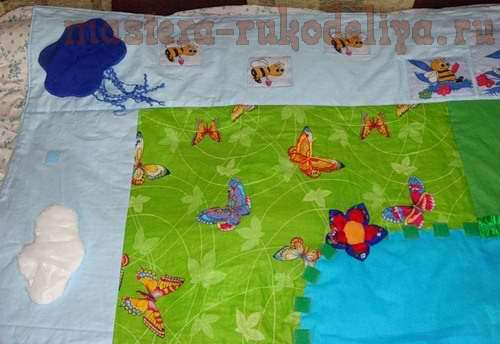
In the center we attach a large piece of blue fabric. It will be a lake.
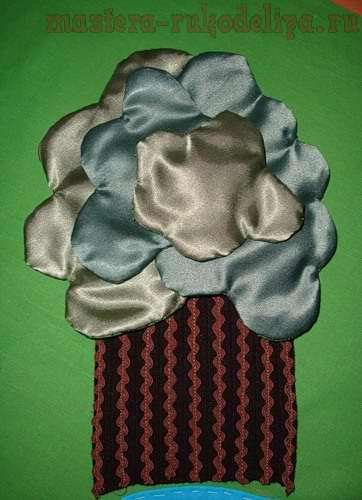
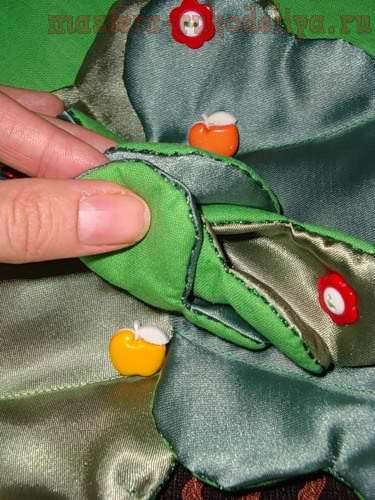
As a tree, you can use a brown flap with a stitched tape.
We skip grass (collected by an accordion of green color) along the edge of the lake.
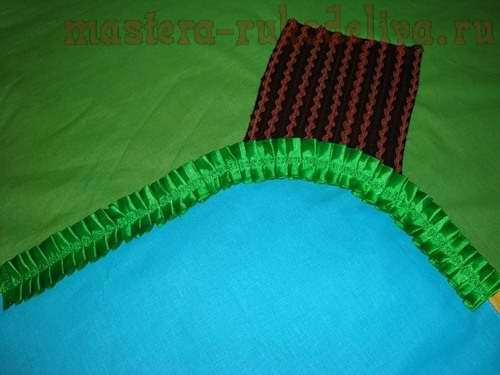
Attach the crown on the trunk, consisting of several elements.
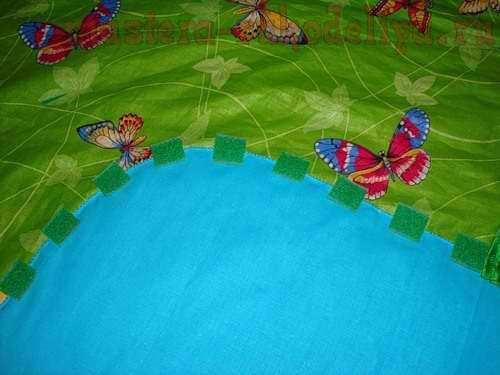
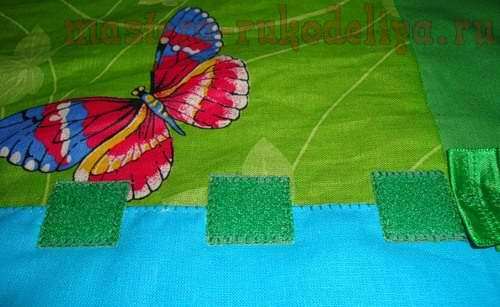
On the edge of the lake we sew velcro, cut into squares.
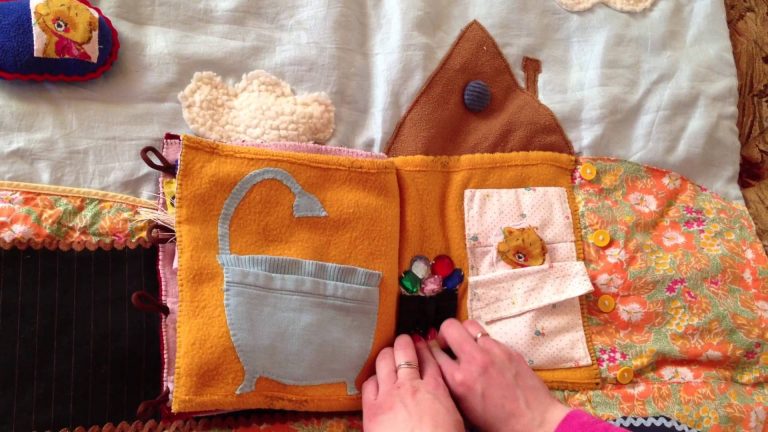
We are building a house on the shore of the lake.
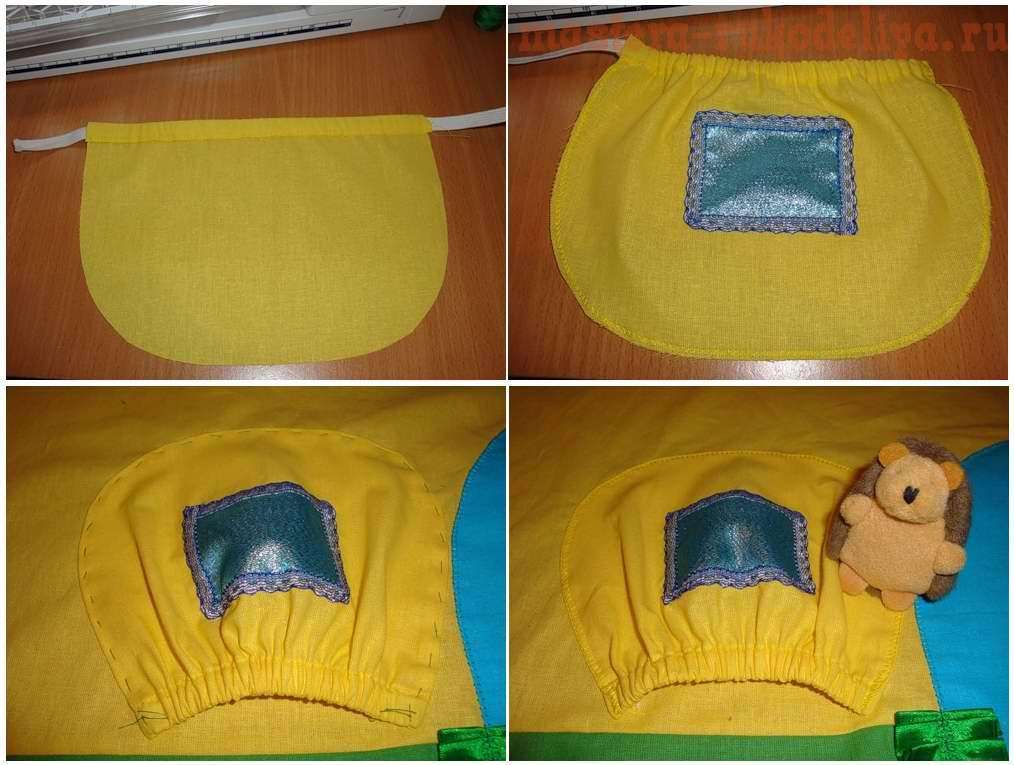
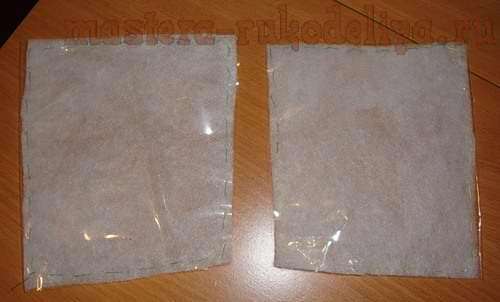
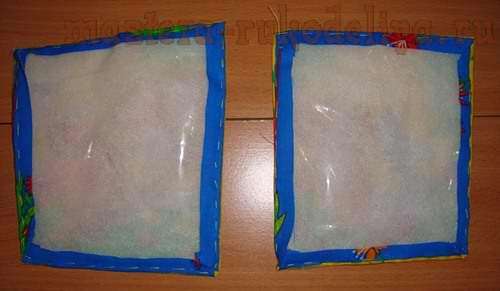
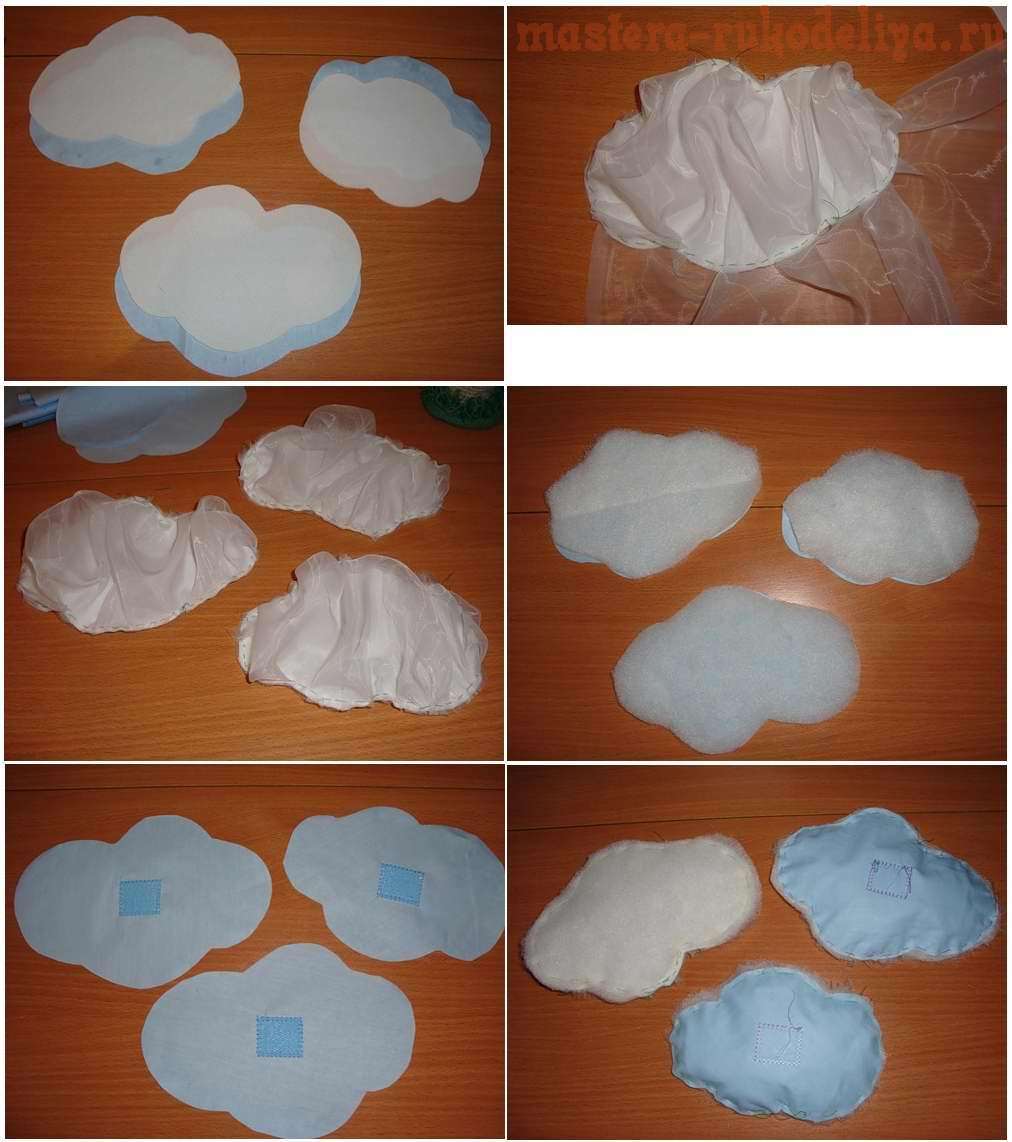
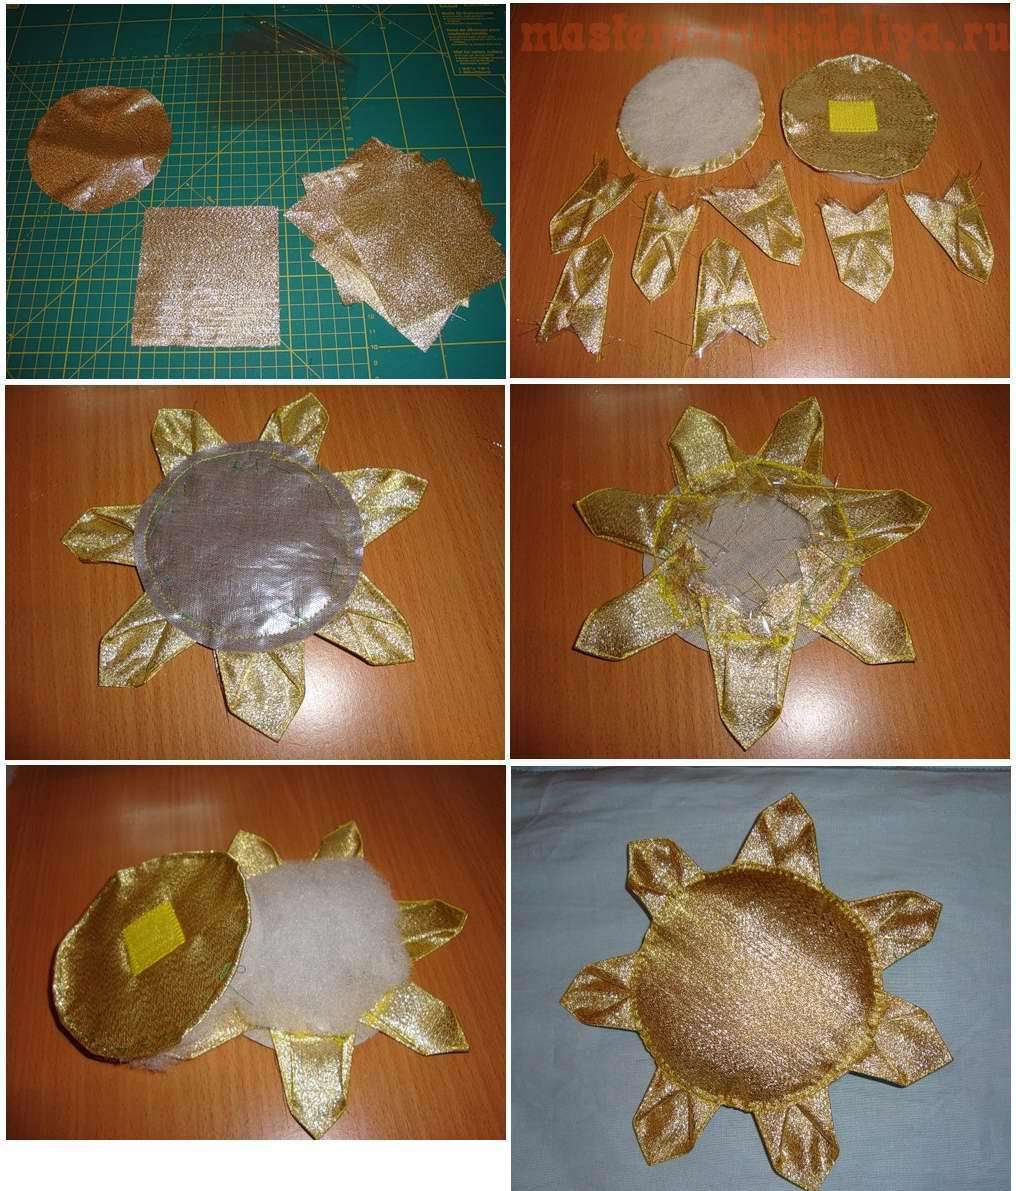
Cooking animals. We put a thin synthetic winterizer, a film on the material with the images of animals and we shave everything.
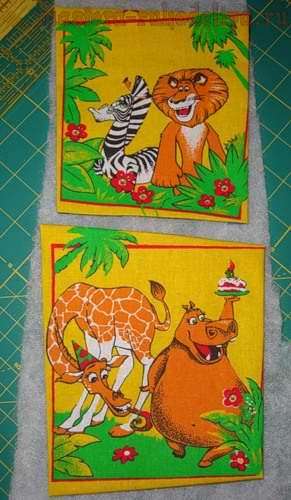
We place animals on the carpet.

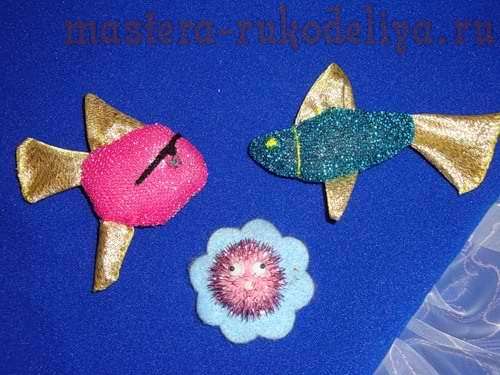
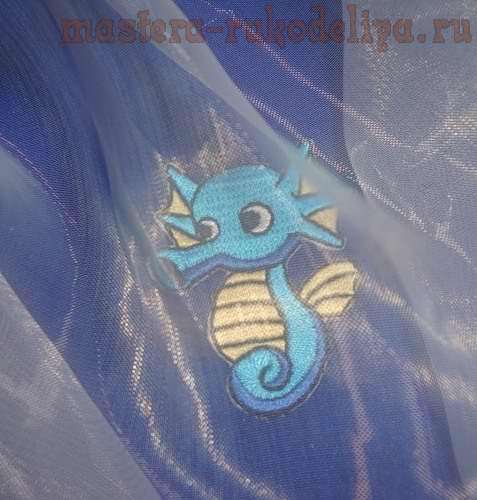
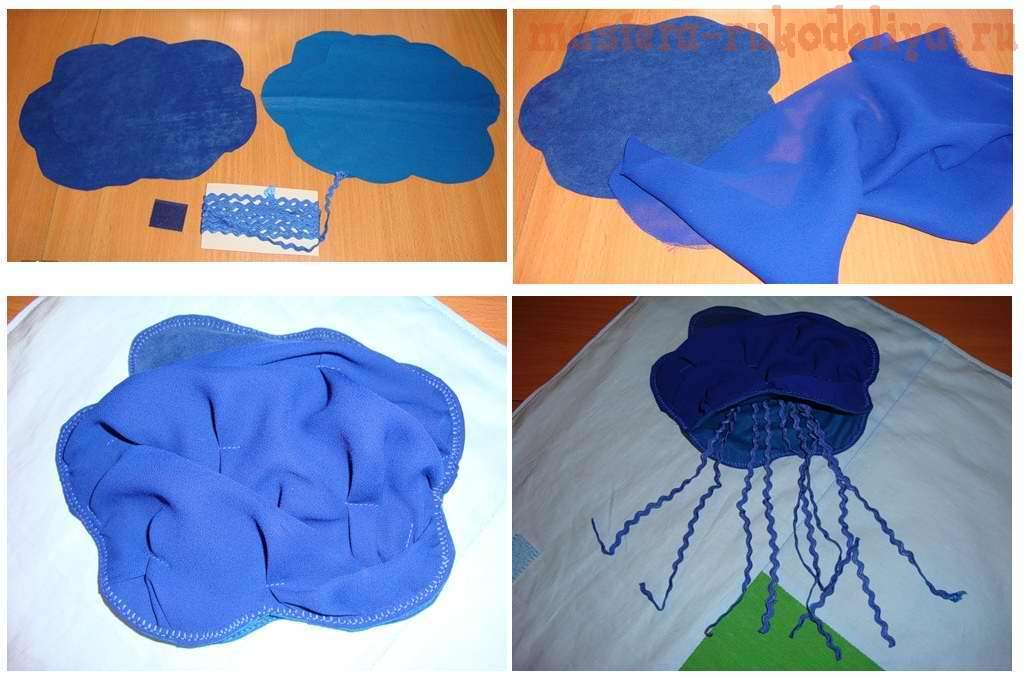
We make sea creatures.
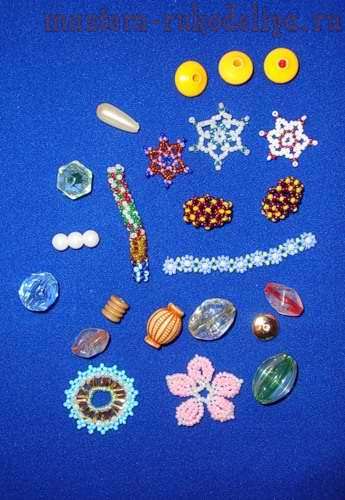
Master the sky.

Bees are flying across the sky over the meadow.
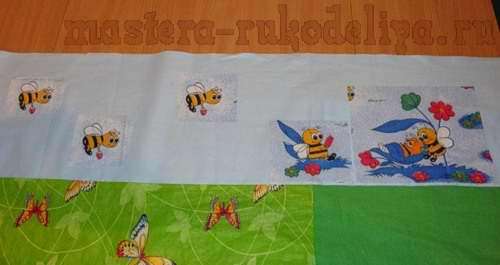
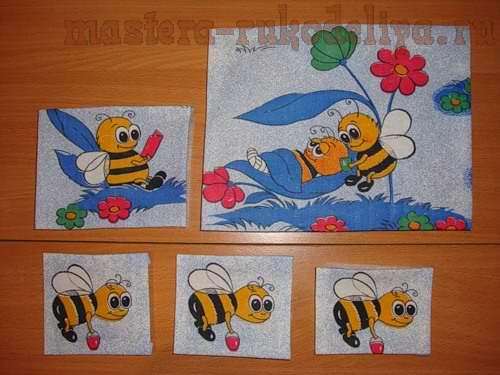

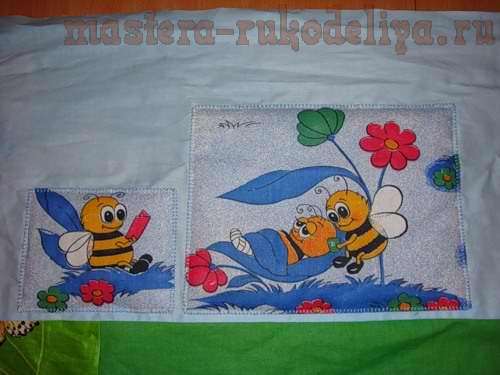
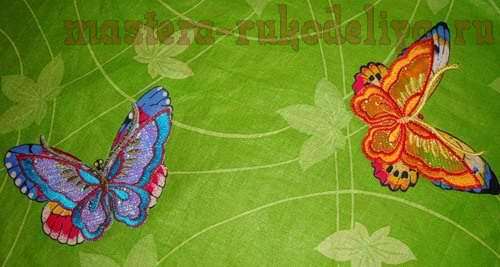
Insects in the form of applications.
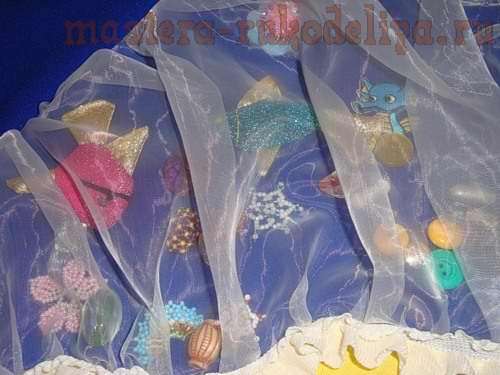
Ready to sew a rug on the lining material face down. We sew on three sides, turn out, smooth the corners and close the remaining side with a secret seam.
We have on the children's developing rug game elements.
| Related articles: | |
|
The use of protein cream
Regular readers know my love to cook and eat well with ... Symptoms of lactose deficiency in adults
Lactose intolerance is a clinically significant condition associated with ... How to mine Bitcoins - the essence of the process and where to start, types and profitability of earnings
Surely almost everyone who is just starting to get acquainted with Bitcoin, ... | |


