Reader's Choice


Popular articles
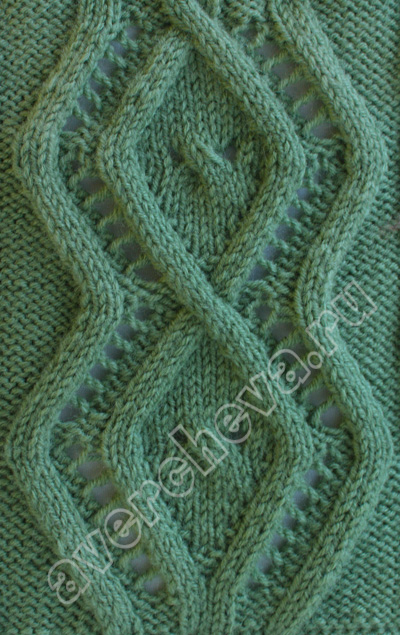
Interlocking of 30 loops (highlighted in pink) should be done as follows: remove 10 loops per second. knitting needle and leave to work, knit 1 purl and 4 facial loopsthen with Tie 4 knitting needles face, 2 purl, 4 face. The next 5 loops are transferred to the auxiliary needle and leave before work, then we knit 4 face, 2 purl, 4 face; then with Spokes knit 4 facial and 1 purl.
1 time to repeat from the 1st to the 34th row, then from the 7th to the 34th row
front loop. inner looped loop 2 purl with inclination to the left; 2 purl with inclination to the right.
Cross the 4 loops to the left (remove the 3rd loops on the auxiliary knitting needle and leave before work, 1 knit the loop with a purl, then the 3rd loop with auxiliary knitting needles)
Cross the 4 loops to the right (remove 1 loop on the auxiliary knitting needle and leave it at work, knit 3 loops with the front ones, then knit 1 loop with auxiliary knitting needle)
specialist. symbol: knit like this: leave 3 loops on the auxiliary Knitting needles before work, knit 1 facial, 2 together facial, then with a second knitting needles knit as follows-1 loop to remove as with facial knitting, next to knit the front and stretch it through the removed, then 1 front.
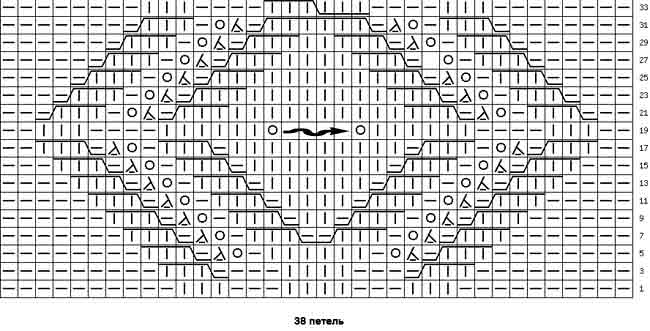
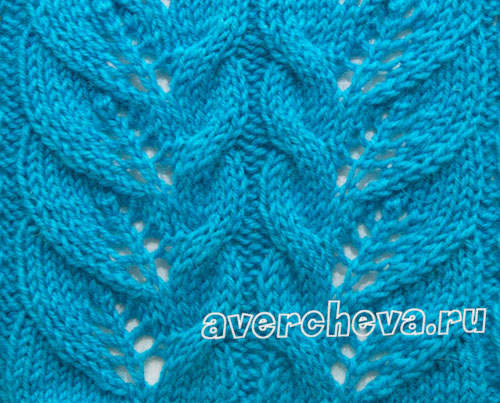
The diagram shows the front and back rows. The width of the braid is 35 loops; we repeat in height from the 1st to the 44th row.
EMPTY CELL - unmolled (in the facial rows of the purl, in the purse rows of the facial)
facial (in the front rows - facial, in the purl of the purl)
Two facial knit together the front with a slope to the right (Enter the needle into the 2nd loop and 1st loop, starting with the second and knit them together.)
To knit two face knits together with a tilt to the left (Remove the first loop as if by knitting the face, knit the 2nd loop on the face and pull the removed loop through it)
facial crossed In purse rows knit as purse crossed. 4 loops together with a slope to the right
Cross the 6 loops to the left (leave 3 loops on the auxiliary spice before work, knit the next 3 loops with the front loops, then 3 loops with the auxiliary spokes with the front loops)
Cross the 6 loops to the right (leave 3 loops on the auxiliary needle at work, knit the next 3 loops with the front loops, then 3 loops with the auxiliary spokes with the front loops)
Cross the 5 loops to the left (remove the 3 loops on the auxiliary knitting needle and leave before work, knit 2 loops with the front loops, then 3 loops with the front loops with the spokes)
Cross the 5 faces to the right (leave 2 loops on the auxiliary spoke at work, knit 3 faces, then 2 loops with auxiliary spokes
Cross the 6 loops to the left (leave 3 loops on the auxiliary needle before work, knit the next 3 loops with purses, then knit 3 loops with auxiliary needles as follows: 1 person crossed, 1 wrong, 1 face crossed)
Cross the 6 loops to the right (3 loops left on the auxiliary needle at work, knit the next 3 loops as follows: 1 person crossed, 1 wrong side, 1 face crossed, then 3 loops with a right side needle)
Cross the 6 loops to the right (3 loops left on the auxiliary needle at work, knit the next 3 loops with the front loops, then knit the 3 loops with the auxiliary needles like this: 1 face. Crossed, 1 back, 1 face crossed)
Cross the 6 loops to the left (3 loops left on the auxiliary needles before work, knit the following 3 loops as follows: 1 person crossed, 1 wrong, 1 face crossed, then 3 loops from the auxiliary knot needles)
Cross the 5 faces to the right (leave 2 loops on the needles at work, knit 3 faces, then 2 loops with auxiliary needles: 1 face. Crossed, 1 wrong side)
Cross the 5 loops to the left (3 loops to remove on the auxiliary knitting needle and leave before work, knit the following 2 loops as follows: 1 purl, 1 person crossed, then 3 loops face up with the knitting needles)
 :
:
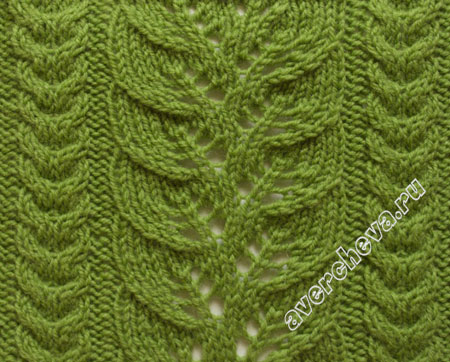
Both front and back rows are indicated in the diagram. The pattern is 17 loops wide. We repeat the height from the 1st to the 10th row, then from the 3rd to the 10th row. The rapport of the side braids is highlighted in blue.
In patterns, where it is necessary to make nakida in purl rows, knit 2 or 3 loops together. It is imperative that you follow the instructions for knitting these loops.
Empty green cell - NO LOOP
The purl (purl-in the front rows, the front-in the purl)
Facial (in the front rows - facial, in the purl of the purl)
Two facial knit together the front with a slope to the right (Enter the needle into the 2nd loop and 1st loop, starting with the second and knit them together.)
In purl rows, a loop with the same designation is knit as 2 purl with an inclination to the left
To knit two faces together with an inclination to the left (Remove the first loop as with the front knitting, knit the 2nd loop of the front loop and stretch the removed loop through it)
In purl rows, a loop with the same designation is knit as 2 purl with an inclination to the right.
Cross the 4 loops to the left (remove the 2nd loops on the auxiliary knitting needle and leave before work, knit 2 loops with the front loops, then fix the 2nd loops with auxiliary knitting needles)
Cross the 4 loops to the right (remove 2 loops on the auxiliary knitting needle and leave for work, knit 2 loops with the front loops, then knit 2 loops with auxiliary knitting needles with the front loops)
The diagram shows the facial (odd rows — we knit from right to left) and purl (even rows — we knit from left to right). Nakida knit purl.
It's no secret that all girls love to dress up. But sometimes it is very difficult to please a little fashionista. Therefore, many mothers themselves beautiful things for their beauties.
And today we suggest you to tie an elegant bandage on the head, which will certainly please even the most demanding girl.
In order to tie such a bandage, you will need:
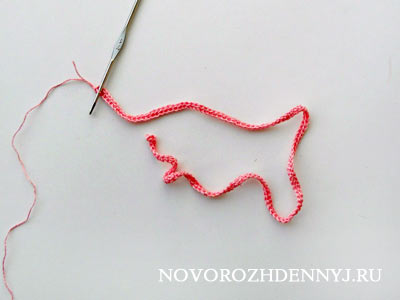
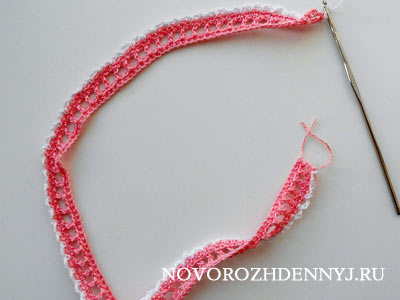
First, tie the bandage itself. To do this, measure the circumference of the child’s head and knit a chain of air loops.
The length of this chain should be equal to the length of the head circumference.
First row of bandages knit with single crochets. At the end of the row we knit 3 air loops to lift the loops of the next row.
We knit the second row as follows: 1 double crochet in the third loop from the hook, 2 air loops, 1 double crochet to the third loop from the original. And so knit until the end of the series. The row ends with one air loop.
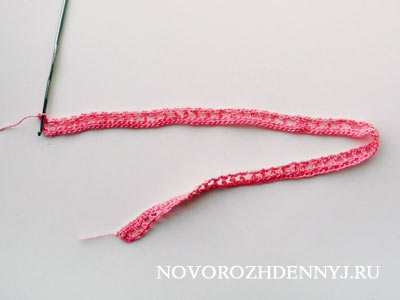
The third row again knit with columns without nakida.
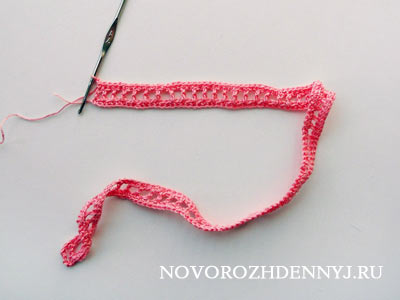
Now tear off the pink thread and attach to the knitting thread white color.
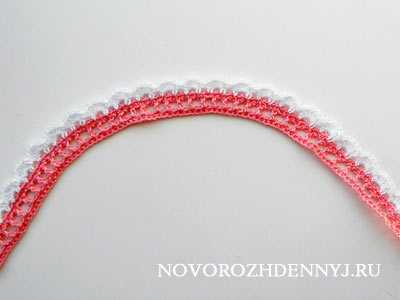
The fourth row is knitted according to the following scheme: 3 air loops, 1 half column in the second loop from the hook, again 3 air loops, 1 semi-column in the second loop from the original. And so on until the end of the series.
Fifth row: 5 double crochets in the first arch of the previous row, 1 column without crochet into the next arch of the fourth row. Similarly, we knit to the end of the row, tear off the thread and attach it to the second edge of the dressing.
We knit the second edge in the same way as the first (4-5 row). As a result, you can do it like this:
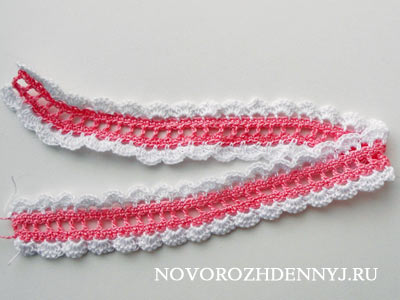
Now connect the two ends of the dressing with semi-columns or simply sew them together.
In place of the seam we have a rosette of the corresponding color.
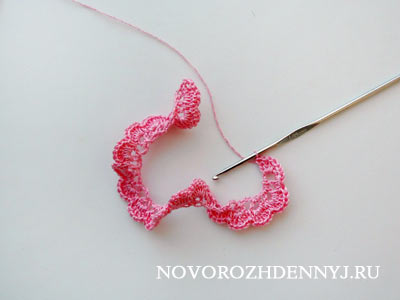
1 row: 30 air loops. We turn the chain inside out to us.
2nd row: 3 air loops for lifting, 1 double crochet in the fourth loop from the hook, 1 air loop, 1 double crochet in the same loop as the first double crochet, 1 double crochet in the third hook, 1 air loop, 1 double crochet in the same loop. As a result, you get such a chain with V-shaped patterns)
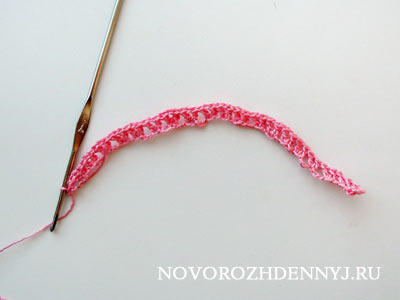
3 row: 3 air loops for lifting, 8 double crochets between the columns of the V-shaped pattern, 1 semi-column between the two V-shaped patterns. And so knit until the end of the series.
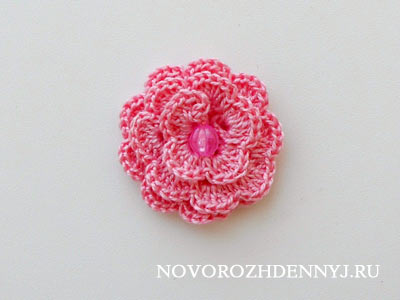
After this, we sew the rosette to the place of the seam of the bandage ends, and in the holes between the 2 and 4 rows we insert an elastic band of the appropriate color so that the bandage fits tightly on the baby's head.
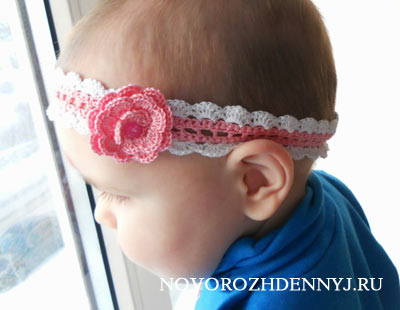
The headband for the girl is ready. This elegant bandage will look good with any dress or.
A task that almost all knitters can master without exaggeration. Many articles about knitting contain a similar statement, but here it is really justified. By and large, the bandage is a strip of knitted fabric, sewn from the side or made around and not at all seam.
As a rule, we knit a headband with knitting needles to insulate in the offseason. When they take off their hats, but the weather is still too cold to completely exclude hats from their wardrobe, they use a minimized version of the hats.
Headbands clasp the head, covering the ears and forehead, providing the necessary warmth and without crushing the hair. Material for knitting bandages should be chosen the same as for caps with a high content of wool or angora. Natural fibers in the thread must be at least 30%, otherwise the accessory will simply not perform its task.
The thickness of the yarn can be completely any. True, yarns thicker than 100 m / 100 grams give a certain roughness to knitting. If this is not a planned effect, then it is better to choose something thinner. As with many other knitted products, the optimum should be considered a yarn with a thickness of 250-300 m / 100 grams.
Modern masters have access to all knitting wisdom accumulated over the long history of the development of this craft. Now it is not necessary to leaf through the magazine for the hundredth time with the patterns studied along and across. The ornament can be chosen absolutely any, here the knitter’s experience and skills are decisive.
Both perfectly plain and knitted headbands with knitting needles decorated with intricate weaves look equally good. Schemes of several patterns are proposed below.
Most often, these accessories are knitted in short rows, located across the product, so it is more convenient to use ornaments with longitudinal rapport.
Sometimes you can find other knitting methods (for example, round knitting), but they are a bit more complicated and will not be considered by us.
To quickly bind a functional and practical bandage, you can apply elementary elastic 1: 1 or 2: 2. They are bilateral, which excludes the presence of the front and the seamy side. They also give the canvas a certain density. The disadvantage of such dressings can be called their lack of originality and the lack of "raisin".
Also often choose the pattern of "honeycomb" or "rice" in order to knit headbands with knitting needles. Patterns of these ornaments are extremely popular.
Depending on the thickness of the yarn, the needles dial 12-18 loops and work according to the chosen scheme, forming a flat cloth. When it reaches 50 cm in length, work is stopped.
The dressing is sewn from behind and tied around the edge with single crochets or “ step by step". True, the last stage can not be performed and leave the bandage as is.
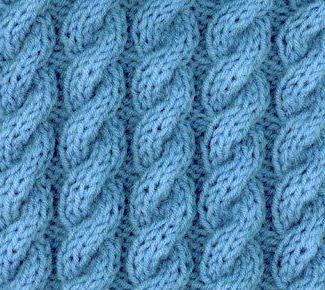
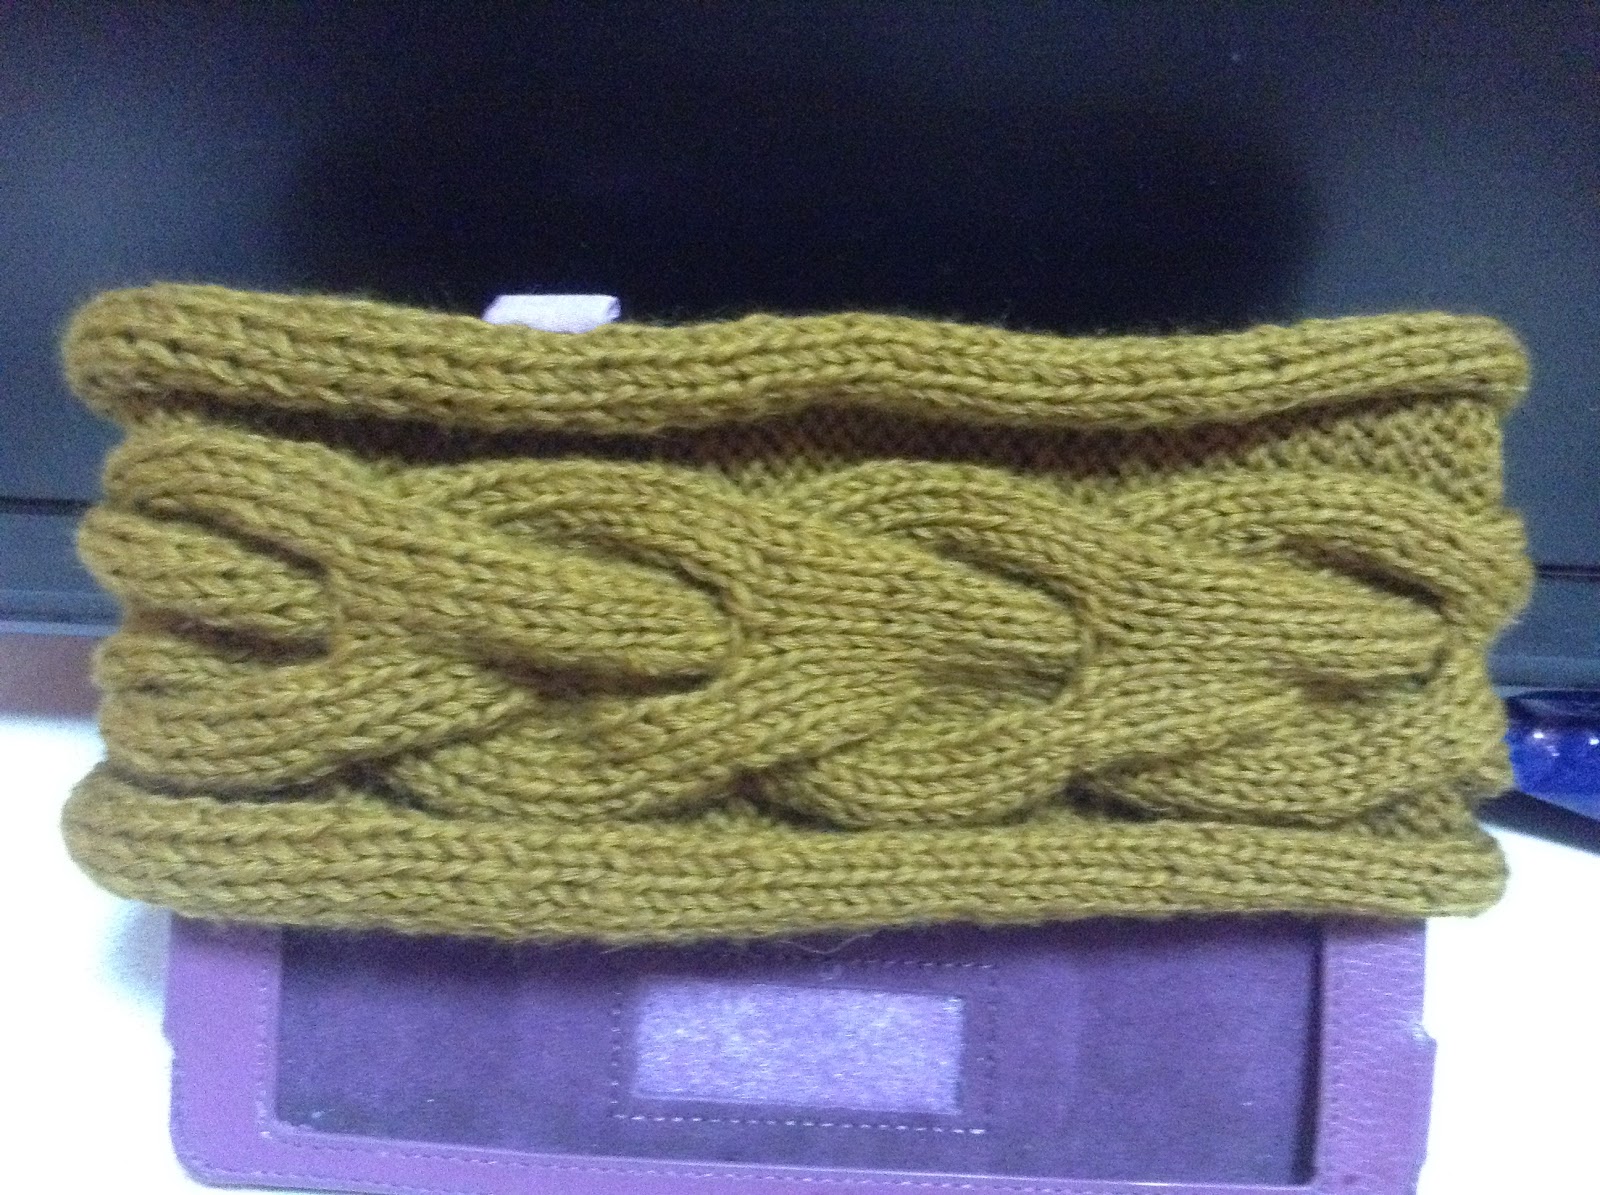
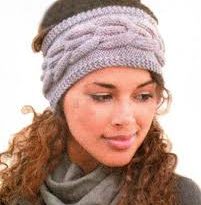
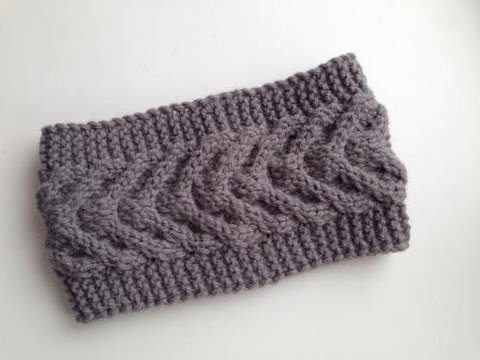
Arana, braids or harnesses are all one name for designating patterns consisting of interlacing loops. You can apply elementary or more complex braids, as well as their combination, to get really interesting headbands with knitting needles. Schemes of the most simple Arans are proposed below. It shows a braid, which is formed by interlacing six loops to the right. Interlacing interval - 10 rows. 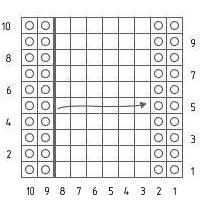
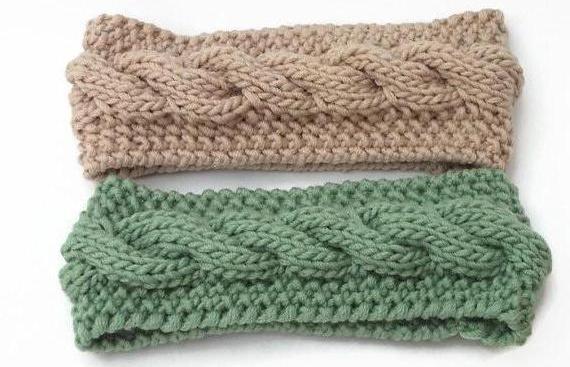
This braid can be placed on a bandage as the following photo suggests.
It uses a combination of two patterns: braids and “boucle”.
To create such an accessory, you need to type on the spokes 16 loops (including edgebands). Each first loop is removed, and the last is always the front loop.
Stages of knitting:
At this stage, all the loops need to close and sew the edges of the bandage from the seamy side. On both sides of the edge, tie it with a “stride step”.
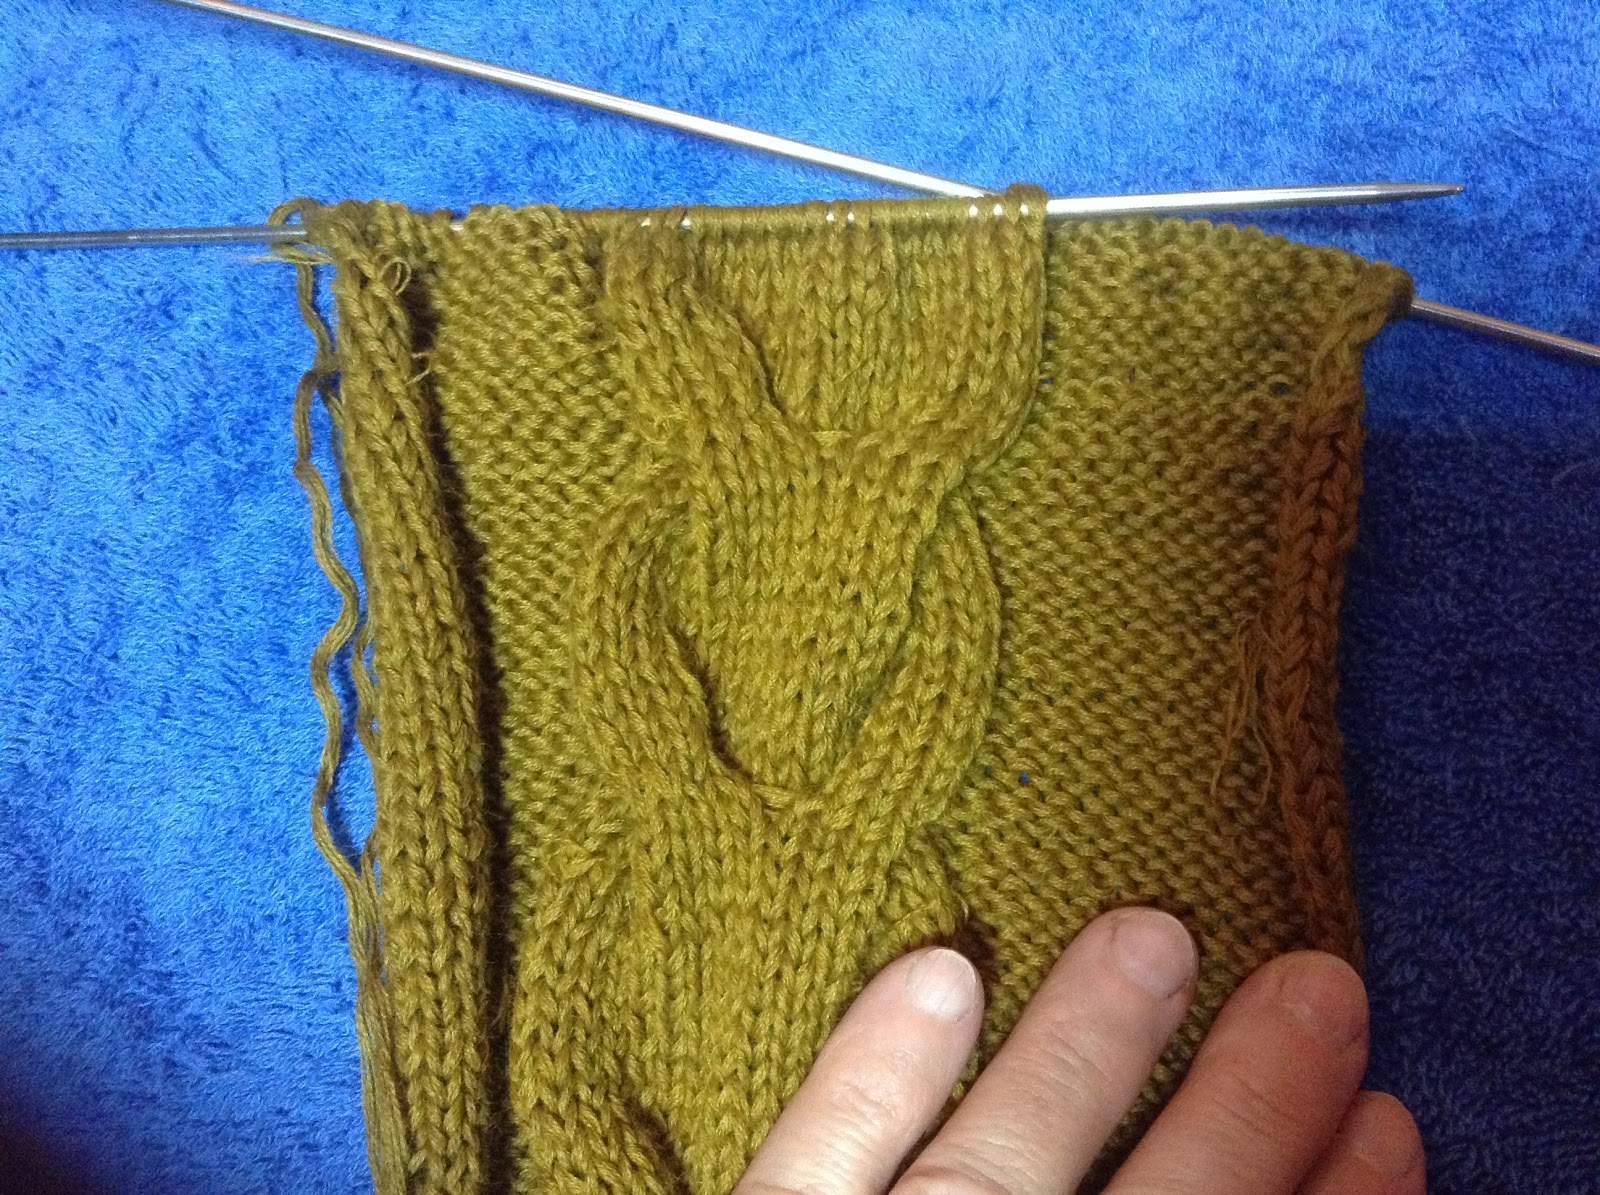
Combining different patterns or inventing your own variants of weaves, you can make extremely beautiful headbands with knitting needles. Schemes of several rather complex patterns are given further. 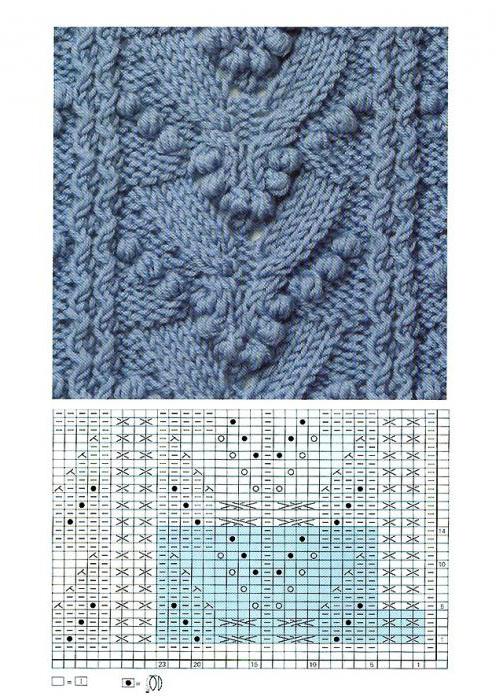
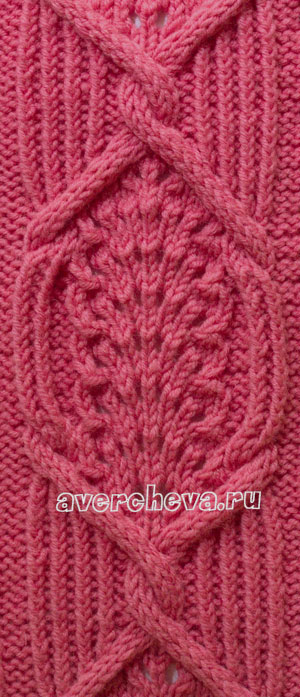
They are based on one principle: a large element is placed in the center, and along the edges are simple background patterns or narrow aranes of several loops.
Considering the pattern of the next pattern, you can see that it is very wide. 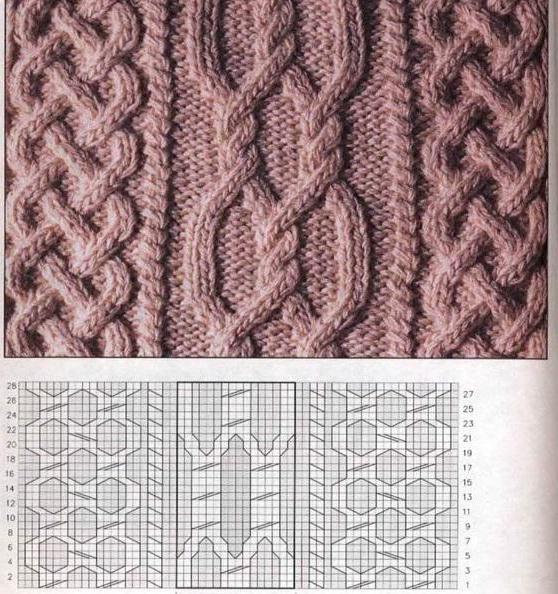
It will be convenient to divide it and to apply only one of two components to the dressing: a braid in the central part or a braid with an edge.
The headband fits pretty quickly, and after making several such accessories, the craftswoman will acquire many valuable skills.
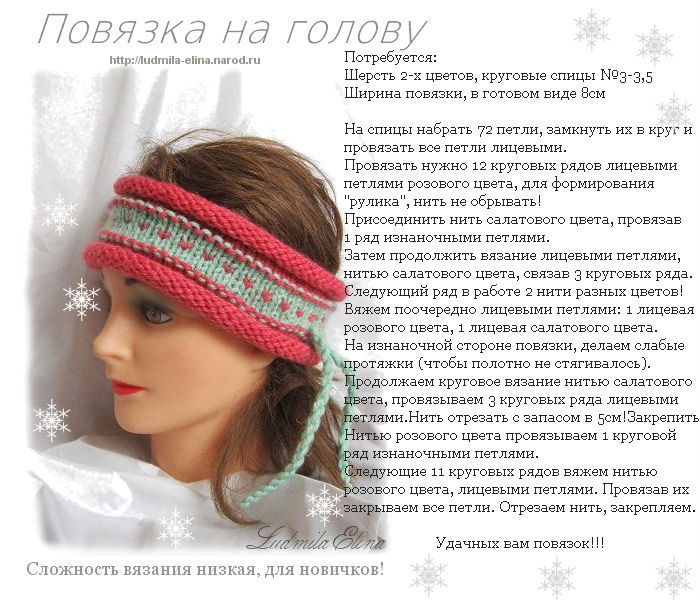
an icy strap on your head during cold weather will protect your ears from cold and cold. It is useful for everyday wear and for sports. Next, we give a lot of options for strips, and you can choose the color to your taste. If you do not know how to knit patterns, start with simple option. You can decorate the strip with buttons, beads, ribbons. You can choose for yourself any option.
The cap, as you know, is not suitable for everyone: someone is not comfortable in it, someone is hot, someone spoils the hairstyle. Striped on the needles, can be an excellent alternative to the cap. The strips are divided into winter (wide), autumn-spring (medium width), summer (narrow).
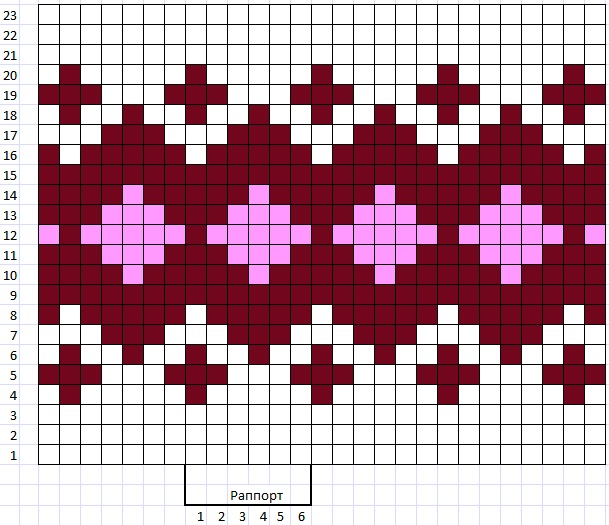
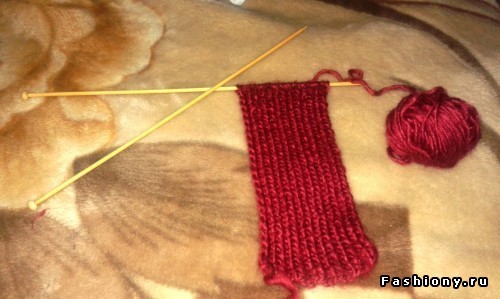
On the needles number 3, dial 42 loops of claret yarn. Knit in two threads.
1 row: 7 loops front, 7 loops purl, 7 facial, 7 purl, 7 facial, 7 purl.
2 row: 7 loops of the front, 7 loops of the purl, 7 of the front, 7 of the purl, 7 of the front, 7 of the purl.
3 row: as 1 row.
Knit 140 rows (size 56-58). Try on a strip on the head to know how many rows you need to knit. Close the loop. Next, knit the transverse bar: dial 28 loops and knit 35 rows. Close the loop. Fold the bar in half and sew it. Sew the sides and sew the bar so that the seam is not visible.
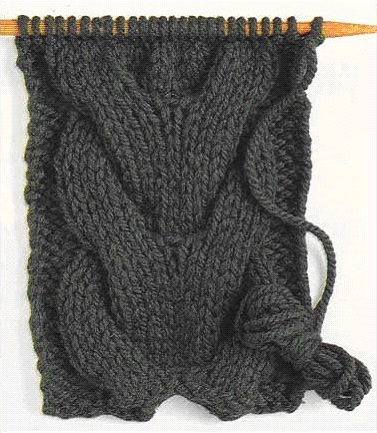
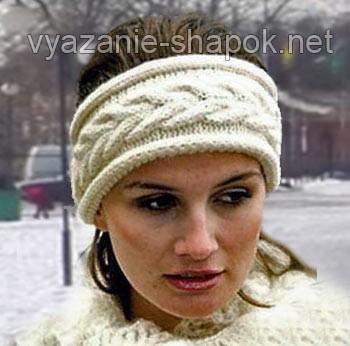
There are many options for strips with different braids. Here is one of them.
Yarn: 70% wool 30% acrylic, yarn in 2 threads. On a strip went 70 grams. On the needles number 3 dial 50 loops.
1 row: 15 loops purl, 20 loops front (braid), again 15 loops purl.
2 row: 15 loops front, 20 loops purl (spit), again 15 loops face.
We knit so 16 rows, 17 row make a pattern of braids.
Braid pattern: 5 loops removed on an additional knitting needle and leave to work. Knit 5 face and 5 face with additional knitting needles. Next, remove 5 loops on an additional knitting needle and leave before work. Knit 5 face and 5 face with additional knitting needles.
Knit 142 rows (56 head size) and close knitting. Sew the edges. In this strip, the edges are wrapped to make the volume. If you knit the edges of another viscous, make a strip a little narrower.
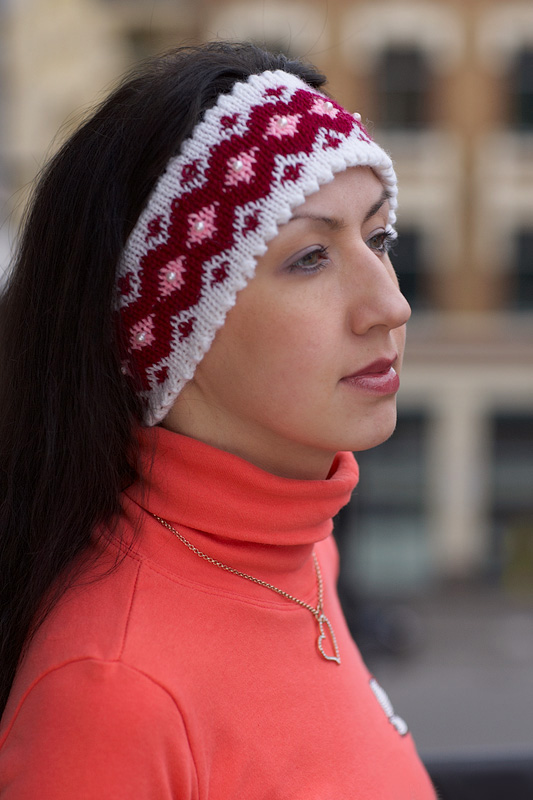
We will need:
We collect 126 loops of white yarn. We distribute the loops evenly on the knitting needles and knit 10 faces in a circle in a circle. In the next row in order to form a bend line “teeth” we knit it like this: nakid, 2 loops together front, nakid, 2 loops together facial, nakid, 2 loops together facial ..., etc. until the end of the row. The following 23 rows of knit jacquard pattern:
For the formation of the top line of the bend, knit: put on, 2 loops together, nakid, 2 loops together, nakid, 2 loops together ... etc. until the end of the row. We knit 12 rows of white thread. Sew on the front side of the bead. With purl fasten all loops. Sew inner loops. From purl it is better to use non-wool yarn so that the bandage is not barbed. Jacquard patterns can be any, based on the 16 rows.
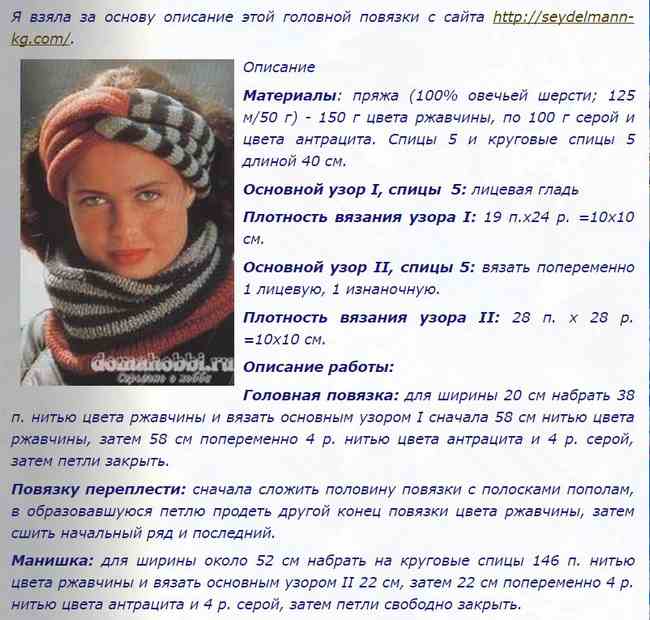
In the mid-nineties of the last century, knitting bands that were loved by many women and were put on their heads were extremely fashionable. Then there was a long period of time when almost nobody wore headbands and did not knit.
Due to the cyclical nature of fashion trends in our days, the bandages are back again, and many people like it even more than twenty years ago. That is why every interesting scheme, which is used to knit an original and spectacular headband, is very popular among needlewomen.
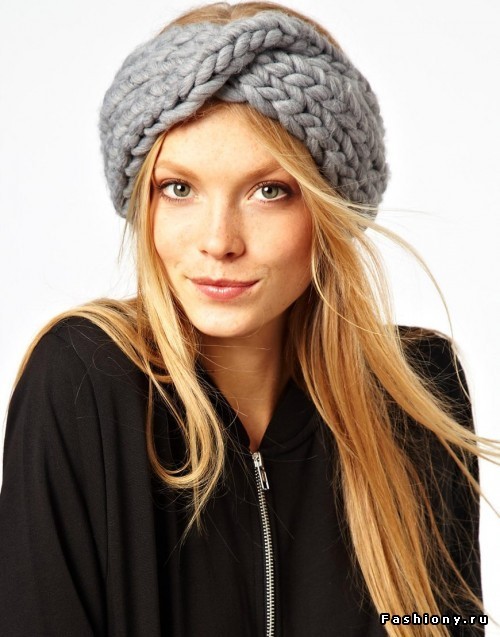
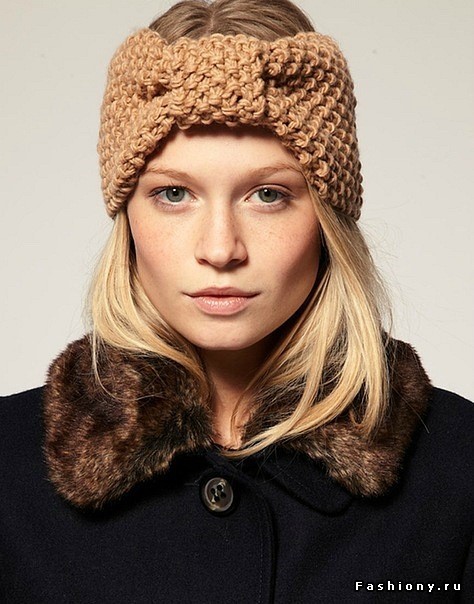
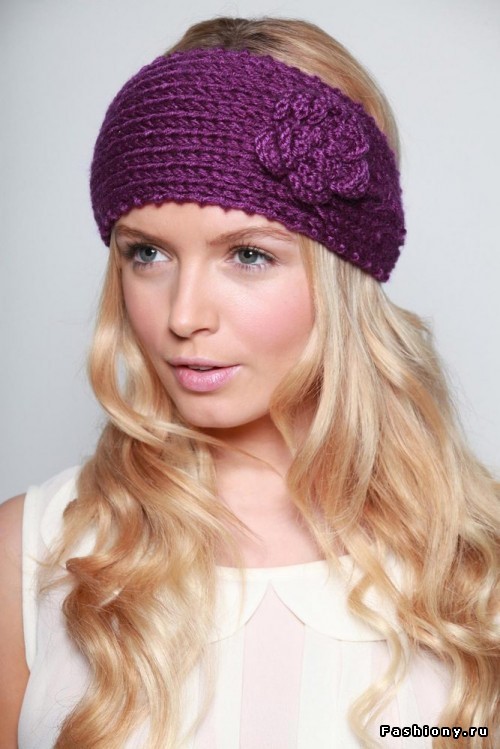
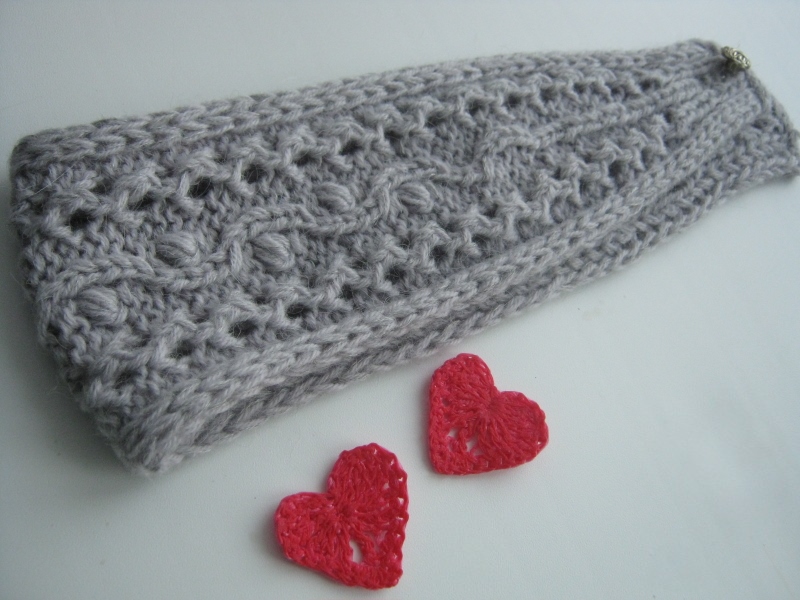
This stylish and unusual headdress is very good in the cold season, when it protects us from wind and frost. It is especially appreciated by those of us who do not go or do not like hats. These girls use a variety of options for dressings with knitting needles, which are an excellent alternative to a regular hat for them. They protect the head from cold, and hair from destruction. We offer you some options that you will see on the attached photo.
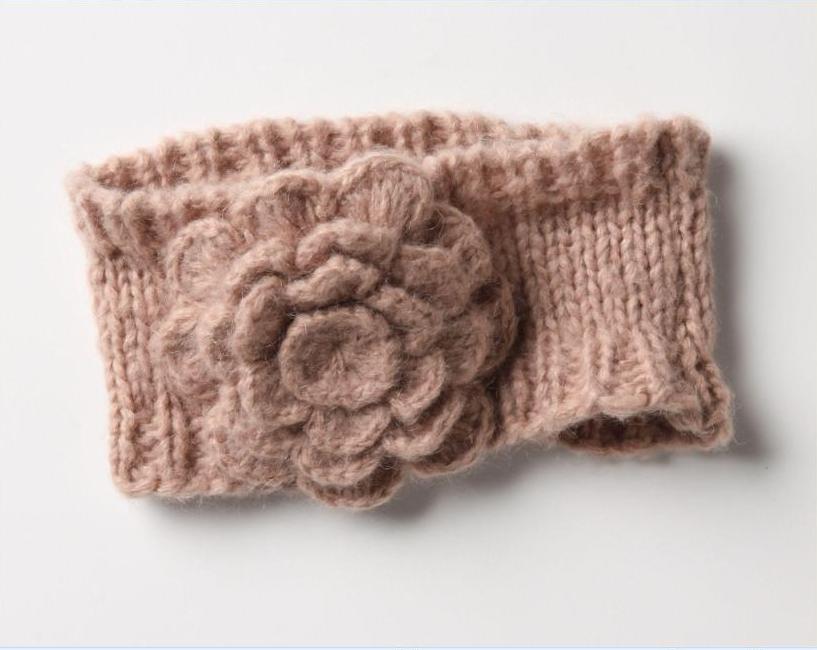
The beauty and advantage of such a headdress is that it can be knitted with almost all known patterns. If the design of the bandage or its pattern is quite complex and voluminous, then it is extremely original and stylish in itself, as in these photos. But when it is connected by the simplest relief, it is often decorated with brooches, flowers, or bows. Such decorative ornaments will make it stylish and elegant.
Knitting headbands should begin with choosing the color of the yarn, the desired style, patterns, and number of needles. If you have chosen a scheme with a light and loose knitting, then you need to purchase spokes of larger diameter. Tight and tight bandage should be made with small diameter needles.
When all these things are cooked, you can start needlework. But first it is necessary to correctly measure, measuring the head in a circle. Taking measurements, do not tighten, but do not loosen the meter too much.
Next, determine the density of knitting vertically and horizontally by connecting a small sample of 10x10 centimeters (cm) to the previously selected pattern. After the calculations, you can make a set of loops (P) on ordinary or circular knitting needles. Often such knitting is done on five knitting needles. In this version, you will get a seamless model.
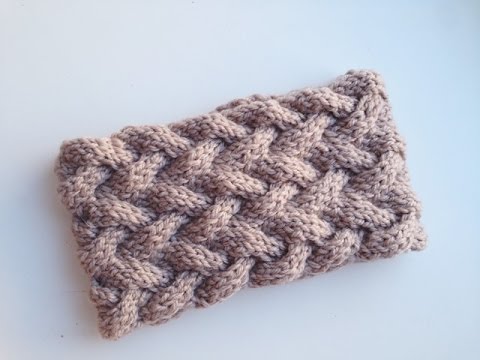
Consider knitting with such a stylish and spectacular headband associated with the overlap of two separate bands. ![]()
To knit such a beautiful and stylish headband with knitting needles, you will need one hundred grams of wool or mixed yarn, as well as knitting needles number four. 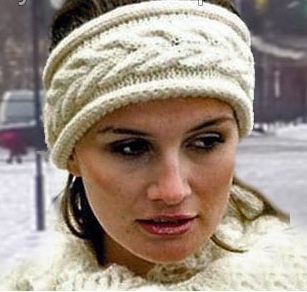
The density of knitting is nineteen P and twenty-five R when knitting with a face pattern of ten to ten cm. For the “Ear” pattern, there is a special pattern in the lesson that needs to be guided. 
| Related articles: | |
|
Long french Color French gel varnish
With all the variety of new technologies of nail art, the jacket continues ... Why is a sharp increase in blood pressure?
The most visible signs of high blood pressure are headaches, ... Weight stands still - what to do to lose weight, how to make it fall
During prolonged weight loss, almost everyone faces a problem ... | |


